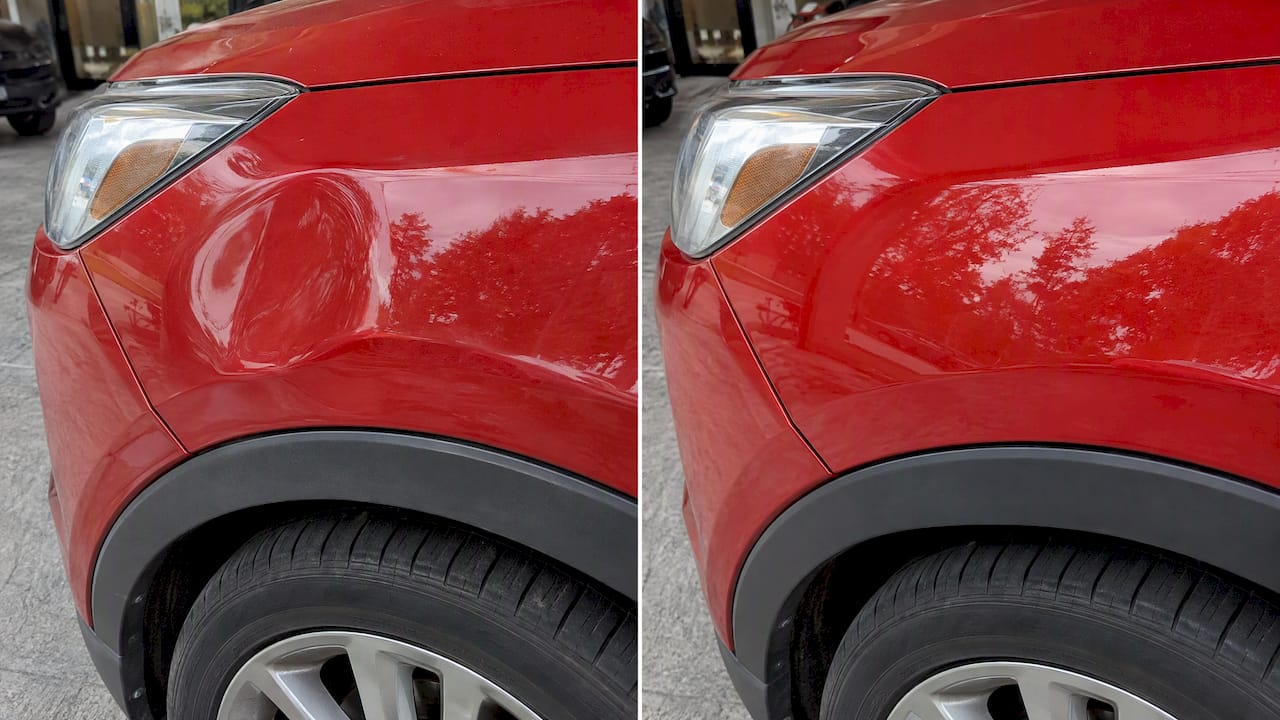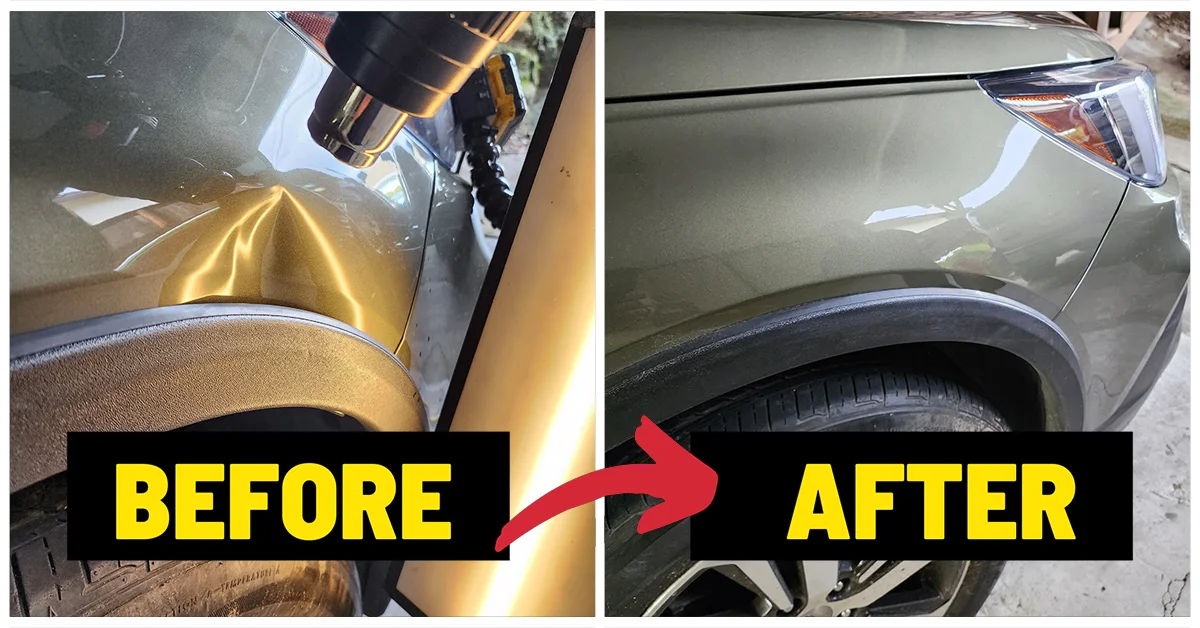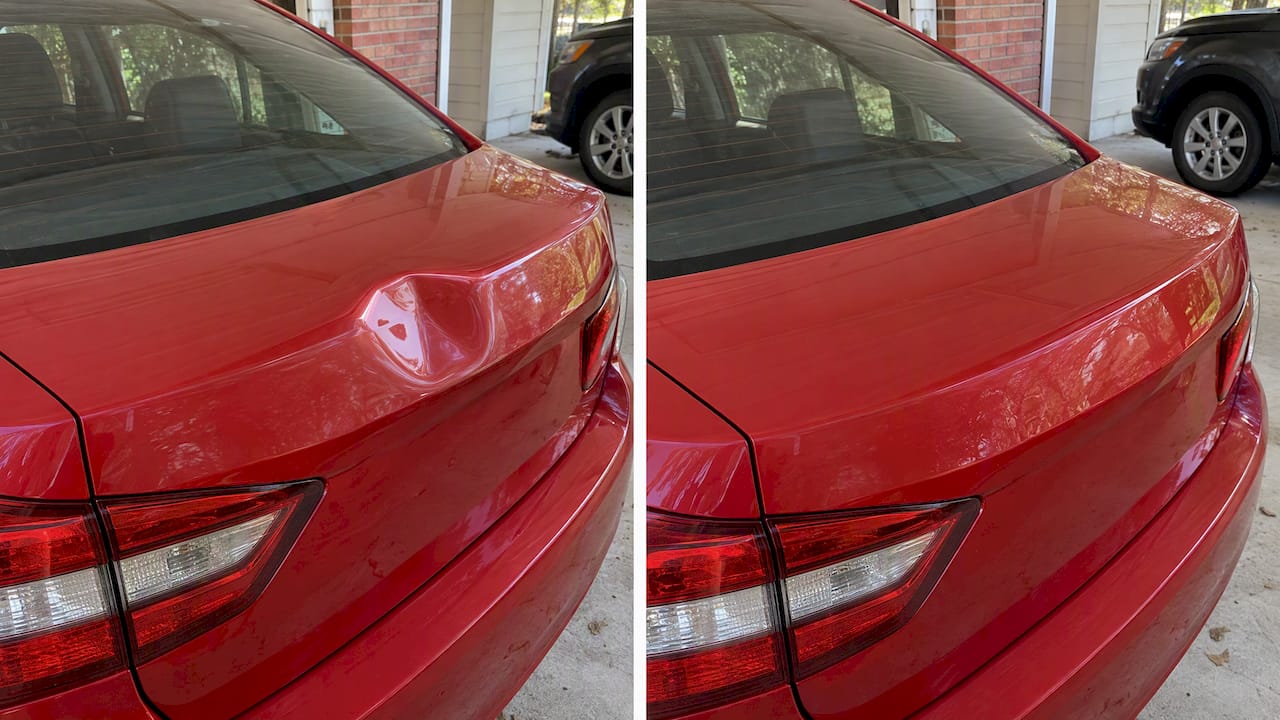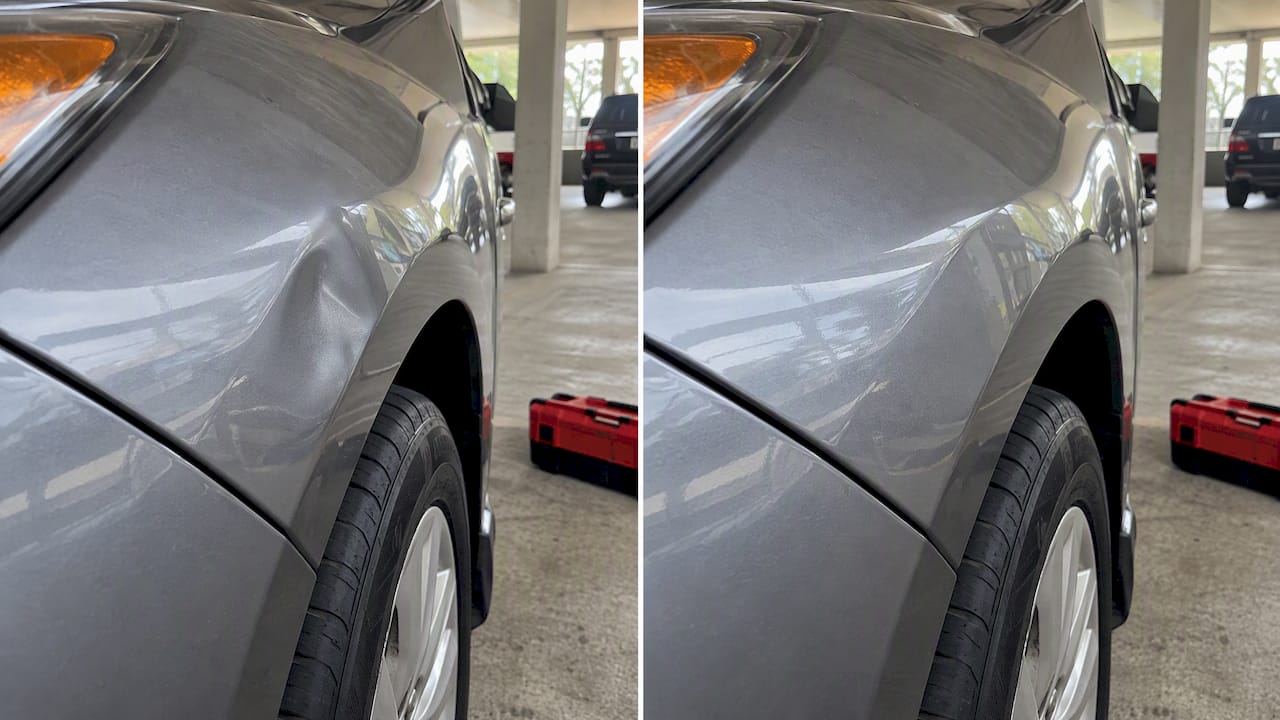
The five main body panel repair options are Paintless Dent Repair (PDR), patch panel repair, full panel replacement, weld-bonding (adhesive combined with STRSW or spot welds), and plastic bumper/trim repair. Choosing between them comes down to three quick rules:
- Paint intact, dent accessible, no crease? PDR is your fastest and most affordable path.
- Localized rust perforation or structural attachment damage? Patch welding or a welded replacement section is the right call.
- Severe corrosion, inaccessible inner structure, or dissimilar metals like aluminum or CFRP? Full panel replacement or adhesive/weld-bond per OEM procedures is the answer.
- Cracked or detached plastic bumper or trim? Plastic welding, two-part adhesives, or replacement depending on damage size.
- Not sure, or paint is already compromised? A professional or mobile tech assessment saves you from a costly mistake.
Keep those rules in your back pocket as you read through the details below.
Key Takeaways
Choosing the right body panel repair method depends on paint condition, panel material, damage severity, and whether inner structure is involved.
| Point | Details |
|---|---|
| PDR for intact paint | PDR costs $75–$800 depending on dent size and takes 1–6 hours, far less than painted repairs. |
| Rust triage matters | Surface rust gets treated; localized perforation needs a patch; severe corrosion calls for full panel replacement. |
| Weld-bonding outperforms welds alone | Weld-bonded joints are 2–3× stiffer in torsion and more fatigue-resistant than spot-welded joints alone. |
| OEM procedures are non-negotiable | Check ALLDATA or manufacturer service info and follow I-CAR-trained technique for any structural or weld-bond repair. |
| Denterasersllc for mobile PDR and bumper repair | Denterasersllc handles on-site dent and plastic bumper repairs in Contra Costa County, preserving factory finish without a shop visit. |
Table of Contents
- What are the main body panel repair options and how do materials affect the choice?
- When does Paintless Dent Repair actually work?
- How do you handle rust: patch panels, cut-and-weld, or full replacement?
- What are welding methods and weld-bonding, and which does OEM guidance prefer?
- Can you repair plastic panels and bumpers, or is replacement the better call?
- What tools and safety gear do you actually need for DIY panel repairs?
- How does a rusted rocker panel repair actually work, step by step?
- How much does body panel repair cost, and how long does it take?
- How do you decide between DIY and hiring a professional?
- Why OEM guidance and trained technique are the real quality dividers
- Mobile dent and bumper repair: when it makes sense to call Denterasersllc
- Sources
- FAQ
What are the main body panel repair options and how do materials affect the choice?
“Body panel repair” covers a wider range of car body repair methods than most people realize. At its core, it means restoring a damaged or corroded exterior panel to its original shape, strength, and finish. The method you use depends heavily on two things: the type of damage and the material the panel is made from.
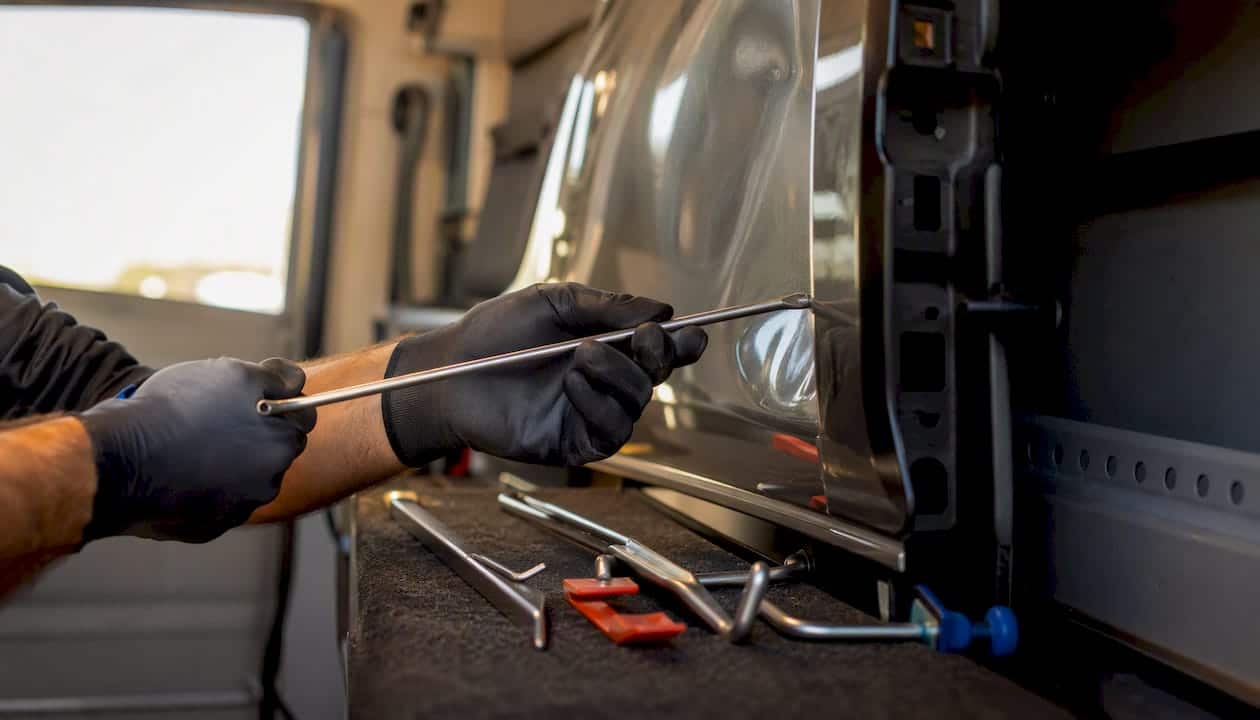
PDR (Paintless Dent Repair) uses specialized tools to massage metal back to its original shape from behind the panel, leaving factory paint untouched. Patch panel repair cuts out a rusted or damaged section and welds or bonds in a new piece of sheet metal. Full panel replacement removes the entire outer skin and installs a new OEM or aftermarket panel. Weld-bonding combines structural adhesive with squeeze-type resistance spot welding (STRSW) or plug/MIG welds, and is the OEM-preferred method on many modern vehicles. Plastic repair uses plastic welding rods, hot staples, two-part adhesives, or body filler to restore bumper covers and trim.
Material matters enormously here. Steel panels tolerate MIG welding, stitch welding, and most adhesives without special concern. Aluminum panels are heat-sensitive, prone to work-hardening, and require dedicated PDR tools, aluminum-compatible MIG wire, and adhesive or rivet-bond methods in many cases. Composite and plastic panels cannot be welded with metal techniques at all; they need plastic-specific welding or adhesive systems.
For any structural repair, checking OEM repair procedures through ALLDATA or the manufacturer’s service information is non-negotiable. I-CAR training courses translate those procedures into shop-floor technique. Skipping either step on a modern unibody vehicle is how a repair that looks fine ends up failing a safety inspection or voiding a warranty.
When does Paintless Dent Repair actually work?
PDR is the right pick when the paint is intact, the dent has no sharp creases, and a technician can reach the back of the panel. Those three conditions together are what make PDR possible. If any one of them is missing, the repair path changes.
The process itself is elegant in its simplicity. A technician uses a combination of metal rods, body picks, and a specialized lighting board or reflector to see the exact contour of the dent. Working from behind the panel, they apply gradual, controlled pressure to massage the metal back toward its original shape. The metal has “memory,” meaning it wants to return to its formed position, and a skilled tech exploits that tendency with patience and precision.
PDR works well for:
- Hail damage (multiple small dents across a panel)
- Door dings from parking lots
- Minor collision dents on doors, hoods, fenders, and trunk lids
- Dents on aluminum panels when the tech has aluminum-specific tooling
PDR does not work for:
- Dents with cracked, chipped, or flaking paint
- Sharp creases where the metal has stretched or work-hardened
- Areas with no access behind the panel (some pillars, rocker edges)
- Damage that has compromised the panel’s structural integrity
Pro Tip: Before booking PDR, run your fingernail across the dent. If you feel a sharp ridge or the paint flexes and cracks, the metal has likely stretched or the paint is already compromised. That dent needs a painted repair, not PDR.
On cost and time, PDR is hard to beat. According to industry cost data, small dents typically run $75–$150, medium dents $150–$400, and large or creased dents $300–$800. A single-panel PDR job often wraps up in 1–3 hours. A comparable painted repair at a body shop can take 3–5 days and cost substantially more.
For a deeper look at PDR cost comparisons by panel type, including quarter panels, the regional price variability is worth understanding before you get a quote.
How do you handle rust: patch panels, cut-and-weld, or full replacement?
Rust repair is one area where getting the diagnosis right upfront saves you from doing the job twice. The standard escalation path, as outlined by Classic Industries, runs from surface treatment to patch panels to full replacement, and the right choice depends on how far the corrosion has penetrated.
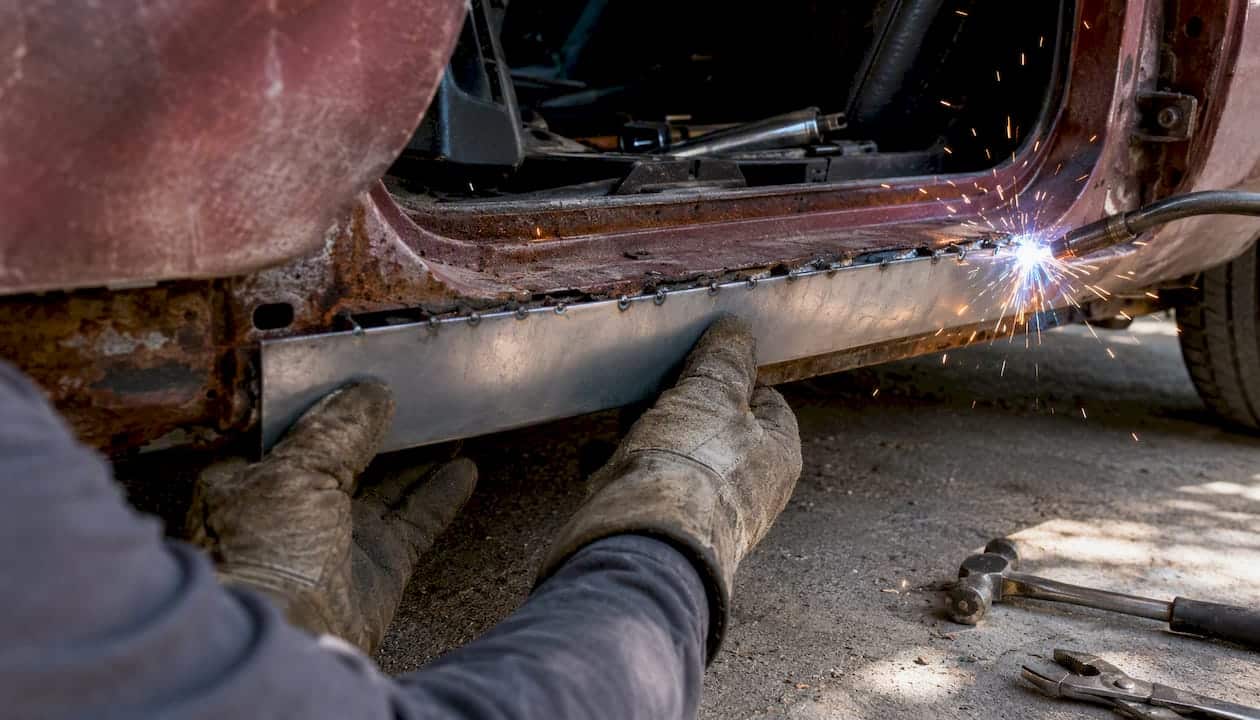
Surface rust (orange discoloration, no pitting or perforation) can usually be treated with a wire brush, rust converter, and a coat of epoxy primer. No metal removal needed. Prompt sealing of bare metal with an epoxy or direct-to-metal (DTM) primer significantly reduces the chance of flash rust after repairs, according to AutoZone’s rust prevention guidance.
Moderate rust with localized perforation calls for a patch panel. You cut out the rusted section, fabricate or source a patch from sheet metal stock, and weld or bond it in. This is the bread-and-butter repair for rocker panels, floor sections, and wheel arches where only a portion of the panel has failed.
Severe or penetrating corrosion that has spread across most of a panel, or that has reached inner structural members, usually means full panel replacement is the more sensible choice. Patching over compromised substrate metal is a short-term fix that tends to rust through again within a few years.
For the patch-panel workflow, the key consumables are sheet metal stock (18–20 gauge for most body panels), weld-through primer applied to mating surfaces before welding, plug welds or stitch welds to secure the patch, and seam sealer over every joint after welding. PPE is non-negotiable: a welding helmet rated for MIG work, leather gloves, a respirator rated for metal fumes (at minimum an N95, ideally a half-face respirator with organic vapor cartridges), and eye protection.
A patched panel, done correctly, can last as long as a replacement panel. The durability difference comes down to surface prep and corrosion protection, not the repair method itself. Where replacement saves time and money is when the rust is so extensive that cutting, fitting, and welding multiple patches would take longer than swapping the whole panel.
Cost-wise, a DIY rust patch on a rocker panel might run $50–$200 in materials. A professional shop repair for the same area typically ranges from $200–$600 depending on severity, while a full replacement panel plus labor can reach $500–$1,500 or more for complex panels.
What are welding methods and weld-bonding, and which does OEM guidance prefer?
Modern vehicles increasingly use high-strength steel (UHSS), aluminum, and mixed-material construction. That shift has made the choice of joining method a structural decision, not just a fabrication preference.
STRSW vs. plug/MIG welds
Squeeze-type resistance spot welding (STRSW) replicates the factory spot welds used in production. It applies heat and pressure through copper electrodes, creating a nugget weld without adding filler metal. The heat-affected zone (HAZ) is small and controlled, which matters on UHSS panels where excessive heat can reduce tensile strength. Plug welds (MIG welding through a pre-drilled hole) are the common shop alternative when STRSW equipment is unavailable, but they produce a larger HAZ and require more grinding to finish.
On aluminum panels, MIG welding is possible with the right wire and shielding gas, but the HAZ concern is amplified. Many OEMs specify adhesive bonding or rivet-bonding for aluminum structural joints precisely because welding introduces too much heat distortion.
Why weld-bonding is the OEM-preferred method on many modern repairs
Weld-bonding combines a structural adhesive bead with STRSW or spot welds placed through the uncured adhesive. The result is a joint that outperforms either method alone. As Body Shop Business explains, weld-bonding offers superior fatigue resistance, corrosion sealing along the entire flange, and improved torsional stiffness compared with welds-only or adhesive-only approaches.
Weld-bonded joints are reported to be 2–3× stiffer in torsion and have substantially longer fatigue life than spot-welded joints alone. The adhesive also seals the joint against moisture intrusion, which is a meaningful corrosion advantage on flanged seams that trap water. — JULI Adhesive, Structural Adhesives for Body-in-White
Adhesive classes and cure conditions
Two main adhesive types appear in collision repair. One-component (1K) BIW adhesives cure during the CED oven bake (typically 160–200°C) in factory production. In repair settings, 2K epoxy or urethane adhesives are more common because they cure at ambient temperature. The RefinishGo panel bonding guide notes that working time is typically 5–15 minutes and that fixture and full cure times vary significantly with temperature.
Surface prep is where most adhesive failures start. Sand the flange to bright bare metal, clean with the adhesive manufacturer’s recommended cleaner, and apply an adhesion promoter where the product data sheet specifies one. Apply adhesive within 30 minutes of prep to avoid surface oxidation.
Pro Tip: When using STRSW through adhesive, keep a shunt clamp on the panel to prevent current from traveling through the adhesive bead to unintended areas. For adhesive-only joints, use Clecos or clamps to maintain even pressure during fixture time. A starved joint (too little adhesive, gaps in the bead) is worse than no adhesive at all.
OEM procedures sometimes allow alternate methods where STRSW is unavailable. Always confirm acceptable alternates in ALLDATA or the OE repair manual before substituting plug welds for spot welds on a structural joint. I-CAR courses cover weld-bonding technique in detail and are the standard reference for shops doing this work correctly.
Can you repair plastic panels and bumpers, or is replacement the better call?
Small cracks, detachments, and minor gouges in plastic bumper covers can often be repaired to a paint-ready finish. Large structural tears, missing sections, or damage that has distorted the mounting tabs usually point toward replacement.
Plastic welding uses a hot-air welding gun and a compatible plastic rod (matched to the bumper’s base material, typically PP or TPO) to fuse the crack from behind. Done correctly, it produces a strong, flexible bond. The repair is invisible from the front once filled, primed, and painted.
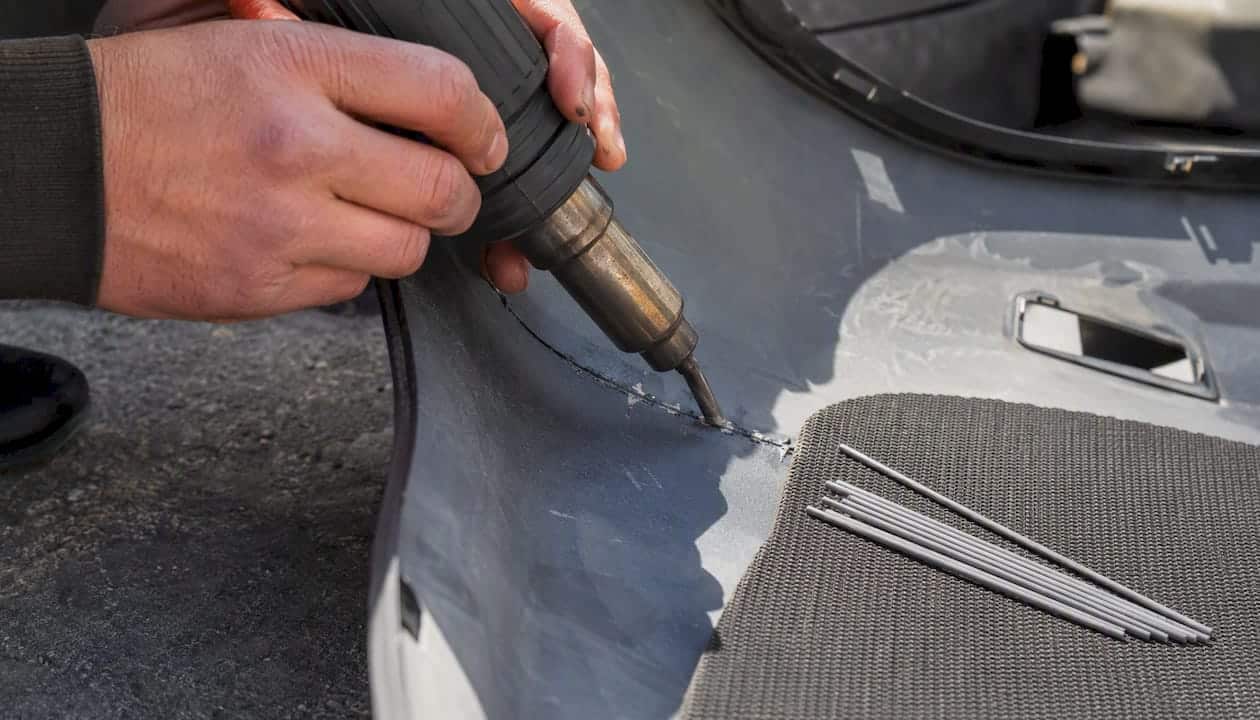
Hot staples (a staple gun that heats metal staples into the plastic) reinforce cracks from behind before welding. They add tensile strength across the repair and are particularly useful on longer cracks that would otherwise re-open under flex stress.
Two-part adhesives (urethane or epoxy formulated for flexible substrates) work well for reattaching detached sections or filling small voids. The key is using a product rated for flexible plastic; a rigid epoxy will crack when the bumper flexes.
Body filler (polyester or lightweight filler) can be used over a welded or adhesive-repaired plastic surface to smooth the finish before priming. It should not be used as the primary structural repair on plastic, only as a finishing layer over a sound substrate.
For tools and consumables, you need a hot-air plastic welder or a heat gun, plastic welding rods matched to the bumper material, a flexible two-part adhesive, 80–180 grit sandpaper for prep, and a flexible primer before topcoat. Cost for a DIY bumper crack repair typically runs $30–$80 in materials. A professional plastic bumper repair at a shop or mobile service generally runs $150–$400 depending on crack length and paint matching complexity.
Paint matching and texture are often the limiting factor for DIY plastic repairs. Getting the color right requires either a factory paint code match or blending into adjacent panels. Texture matching (the orange-peel or matte texture on many bumpers) requires a texture spray or careful technique with a texture additive in the primer. If the finish quality matters to you, this is one area where a professional result is genuinely difficult to replicate at home.
What tools and safety gear do you actually need for DIY panel repairs?
The honest answer is that the tool list varies significantly by repair type. Here is a prioritized checklist organized by category.
Safety PPE (non-negotiable for any repair involving metal work, welding, or chemicals):
- Welding helmet (auto-darkening, rated for MIG/STRSW)
- Half-face respirator with P100 particulate and organic vapor cartridges
- Safety glasses or goggles (wear under the welding helmet)
- Leather welding gloves for metal work; nitrile gloves for adhesive and chemical work
- Hearing protection for grinding
Cutting and welding tools:
- Angle grinder with cutting discs and flap discs
- Spot-weld drill bit set (for removing factory spot welds cleanly)
- MIG welder (for plug welds and stitch welding on steel)
- Clecos and Cleco pliers (for test-fitting panels before welding)
- Body hammer and dolly set
PDR tools and lighting:
- PDR rod set (basic entry-level sets cover most common access points)
- LED reflector board or PDR light (essential for reading the dent contour)
- Glue pull kit (for dents with no rear access)
Adhesive and bonding supplies:
- Dual-cartridge adhesive gun (for 2K panel bond adhesives)
- Mixing nozzles matched to the adhesive cartridge
- Surface cleaner and adhesion promoter per manufacturer spec
- 3M panel bonding adhesive and seam sealer are widely used in professional shops and are available at most auto parts retailers
Finishing supplies:
- DA (dual-action) orbital sander
- 80, 150, 220, and 400 grit sandpaper
- Epoxy primer and seam sealer for bare metal protection
- Weld-through primer for mating surfaces before welding
Shop conditions matter more than most DIYers expect. Adhesives and primers have temperature and humidity windows. Most 2K adhesives require ambient temperatures above 60°F for proper cure; below that, fixture and full cure times extend significantly and bond strength can be reduced. If you are working outdoors, pick a dry day above 65°F and keep the work out of direct sunlight to avoid flash-curing adhesives before you can position the panel.
Renting vs. buying specialized tools is a real consideration. A MIG welder, a spot-weld drill set, and a PDR light board are all available at equipment rental shops. If you are doing a one-time rust repair, renting a welder for a weekend is far more sensible than buying one. PDR rod sets are inexpensive enough to own, but a quality LED reflector board runs $100–$300 and is worth renting if you only have one or two dents to address.
How does a rusted rocker panel repair actually work, step by step?
A rocker panel is repairable when the rust is limited to the outer skin and the inner rocker structure is still solid. If the inner rocker has perforated or collapsed, replacement of the full outer skin (and possibly the inner structure) is the safer call.
Step 1: Assessment (30–60 minutes). Probe the rust with a pick or screwdriver. Soft spots that punch through easily indicate perforation. Check the inner rocker by removing the door sill trim and inspecting with a flashlight. Map the full extent of the rust before cutting anything.
Step 2: Cut out the rust (1–2 hours). Use an angle grinder with a cutting disc to remove all visibly rusted metal, cutting back to solid material. Use a spot-weld drill bit to separate the outer skin from the inner structure at factory weld points without damaging the inner panel.
Step 3: Prep mating surfaces (30–60 minutes). Clean all mating flanges to bright metal. Apply weld-through primer to surfaces that will be covered by the new patch and cannot be primed after welding.
Step 4: Fit the patch (1–2 hours). Cut the patch panel to size from sheet metal stock or a pre-formed rocker patch. Test-fit using self-tapping screws or Clecos to confirm alignment before committing to welds. This step is where patience pays off; a misaligned patch is much harder to correct after welding.
Step 5: Weld or bond (1–2 hours). Stitch-weld the patch in short 1-inch bursts, alternating positions around the patch to distribute heat and prevent warping. Never run a continuous bead along the full length of the patch in one pass. Allow the metal to cool between sequences.
Step 6: Finish and protect (1–2 hours). Grind welds flush, apply seam sealer to all joints, and coat the repair with epoxy primer immediately. Do not leave bare metal exposed overnight.
Step 7: Prime and paint. Apply a high-build primer, block sand, and topcoat to match. This step is often where DIYers hand off to a professional painter for a factory-quality finish.
Total DIY time for a moderate rocker patch runs roughly 6–10 hours across two days. A professional shop typically completes the same job in 4–6 hours of labor. If the rust has spread to the inner structure or the floor pan, call a pro. Structural rocker damage affects crash performance, and that is not a repair to guess at.
How much does body panel repair cost, and how long does it take?
The cost of body panel repair varies more than most people expect, and the variables that move the price are worth understanding before you get a quote.
Main cost drivers: paint condition (PDR vs. blending paint into adjacent panels to match color adds cost to any painted repair.
| Repair type | Typical cost range | Turnaround time |
|---|---|---|
| PDR, small dent | $75–$150 | 1–2 hours |
| PDR, medium dent | $150–$400 | 2–4 hours |
| PDR, large/creased dent | $300–$800 | 3–6 hours |
| Hail damage (full panel) | $800–$1,500+ | 1–3 days |
| Rust patch (DIY materials) | $50–$200 | 6–10 hrs DIY |
| Rust patch (shop labor) | $200–$600 | 1–2 days |
| Full door replacement | $500–$1,500+ | 1–3 days |
| Plastic bumper repair | $150–$400 | 2–4 hours |
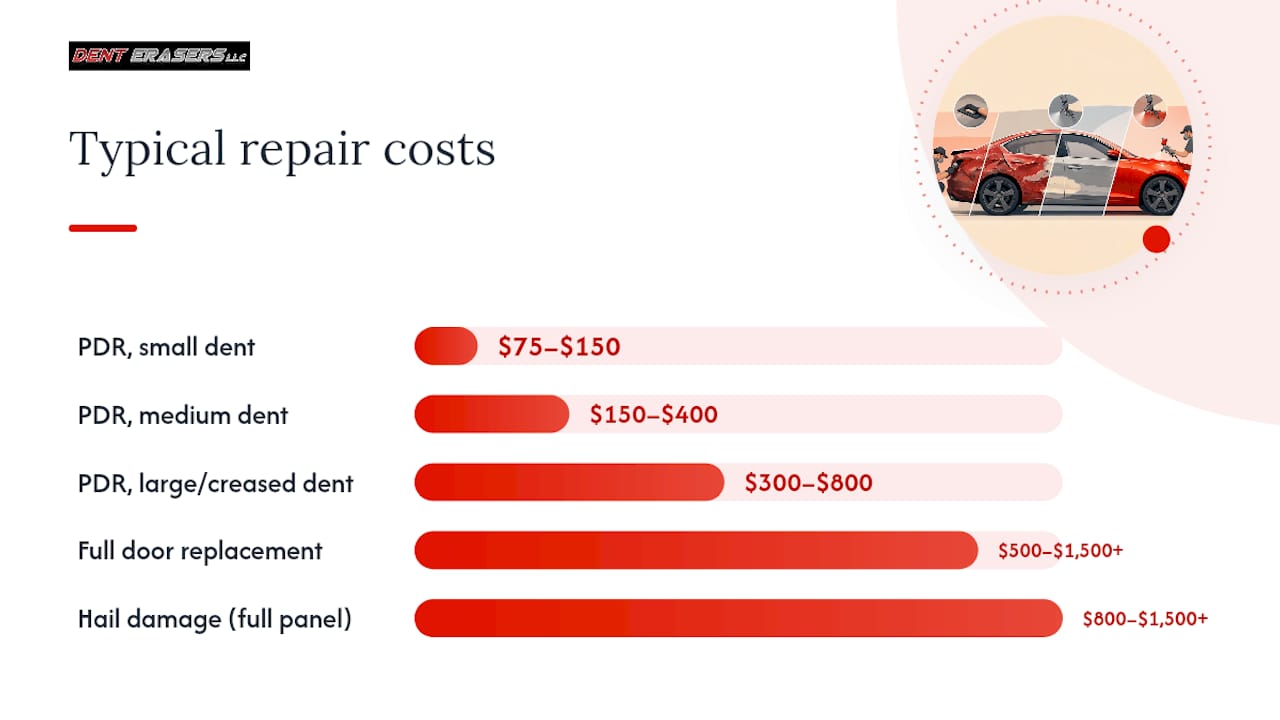
Cost data for PDR ranges is sourced from industry repair cost benchmarks.
Variables that push costs higher:
- Aluminum panels (dedicated tooling, longer labor time)
- OEM-specified procedures that require specific adhesives or welding equipment
- Blending paint into adjacent panels for color match
- Warranty practices (written warranties on repairs add value but may be reflected in price)
- Panel removal required for glass work (a door glass or windshield may need to come out before panel work begins; a partner like GWP Glassworks handles glass removal and reinstallation as part of a coordinated repair)
For hail jobs, cost scales with dent count. A car with 80 dents across three panels is a very different job from one with 15 dents on a single hood. Mobile PDR services often quote hail jobs per dent or per panel, and getting multiple quotes is sensible for large hail events.
How do you decide between DIY and hiring a professional?
Three quick gates help most vehicle owners make this call without overthinking it.
Gate 1: Is the paint intact and is the dent accessible? If yes to both, PDR is viable. A mobile PDR tech can handle this at your home or office, often same-day. If the paint is cracked or the dent has a sharp crease, move to Gate 2.
Gate 2: Is there structural damage, inner panel involvement, or dissimilar metals? If yes to any of these, consult OEM procedures via ALLDATA and strongly consider a professional shop. Structural repairs done incorrectly affect crash safety. Weld-bonding on aluminum or UHSS without the right equipment and training is a liability, not a repair.
Gate 3: Is the corrosion extensive or is the inner structure compromised? Full panel replacement is likely the right answer. This is a shop job unless you have welding experience, the right equipment, and a controlled workspace.
Questions worth asking any shop or mobile tech before booking:
- Do you follow OEM repair procedures, and can you access them through ALLDATA or the manufacturer’s service information?
- What warranty do you offer on the repair, and is it in writing?
- Are you using manufacturer-specified adhesives and primers (such as 3M panel bond products)?
- Is paint blending into adjacent panels included in the quote?
Red flags that mean you should keep looking:
- No written warranty offered
- Quote given without inspecting the vehicle in person
- No mention of OEM procedures for structural or weld-bond repairs
- Pressure to decide immediately
Mobile PDR and mobile bumper repair are a sensible middle ground for a wide range of common damage. They skip the shop drop-off, preserve your schedule, and for dents that meet the PDR criteria, deliver results that are indistinguishable from factory condition. The role of mobile auto body services has expanded significantly as technician training and portable tooling have improved. For certified dent technicians specifically, the training standards that govern their work are the same ones professional shops follow.
Why OEM guidance and trained technique are the real quality dividers
There is a version of this conversation that focuses entirely on which tool to buy or which adhesive to use, and it misses the point. The quality of a body panel repair comes down to whether the person doing the work knows what the manufacturer actually specified for that joint, and whether they have the training to execute it correctly.
I have seen repairs that looked perfect on day one and failed within two years because the tech used a generic adhesive where the OEM specified a heat-cure BIW product, or because they skipped the weld-through primer on a flanged joint. The I-CAR curriculum exists precisely to close that gap. It translates OEM repair procedures into practical shop technique, and shops that invest in that training produce repairs that hold up. Manufacturer product guidance from companies like 3M provides the technical data sheets that specify cure temperatures, surface prep requirements, and application methods. Following that guidance is not optional on structural repairs.
For DIYers, the honest advice is this: PDR, surface rust treatment, and basic plastic bumper repair are genuinely within reach with the right tools and patience. Structural weld-bonding on UHSS or aluminum is not. The consequences of getting it wrong are not cosmetic; they are structural. Know where your skill level ends, and call a trained tech for the rest.
Mobile dent and bumper repair: when it makes sense to call Denterasersllc
Skip the shop drop-off entirely. For dents that meet the PDR criteria and plastic bumper damage that does not require full replacement, mobile repair preserves your factory finish, costs less than a painted shop repair, and fits around your schedule rather than the other way around.
Denterasersllc provides mobile paintless dent repair, plastic bumper repair, and on-site estimates across Contra Costa County and surrounding areas. Services cover everything from single door dings and hail damage to bumper cracks and specialty repairs on luxury, vintage, and motorcycle vehicles, all performed at your location.
- Mobile PDR for dents with intact paint, no crease, and accessible panels
- Plastic bumper repair for cracks, detachments, and minor gouges
- On-site estimates so you know the cost before any work begins
- Factory finish preservation with no repainting required for qualifying dents
- Written warranty on completed repairs
To get started, contact Denterasersllc for an on-site estimate. Have your vehicle accessible and note the location and approximate size of each dent or crack. The tech will assess the damage in person and confirm whether PDR or plastic repair is the right approach before any work begins.
Sources
These are the most useful external references for readers who want to go deeper on specific repair methods.
- Dent Repair Cost in Houston, TX (2026) — Free Estimate | Dent Repair Cost Calculator
- An Introduction to Car Rust Repair & Auto Body Panels (Classic Industries News)
FAQ
How much does it cost to fix body panels?
PDR for small dents typically runs $75–$150; medium dents $150–$400; large or creased dents $300–$800. Painted repairs and full panel replacements cost substantially more, often $500–$1,500 or higher depending on panel complexity and labor rates.
Is it better to weld or glue body panels?
Weld-bonding (adhesive combined with spot welds) outperforms either method alone on most modern vehicles, offering 2–3× greater torsional stiffness and longer fatigue life. For aluminum and CFRP panels, adhesive-only or rivet-bond methods are often OEM-specified because welding introduces too much heat distortion.
Can you repair plastic body panels?
Yes. Small cracks and detachments in plastic bumper covers can be repaired with plastic welding, hot staples, or two-part flexible adhesives and finished to a paint-ready surface. Large structural tears or missing sections usually make replacement the more practical choice.
What is the cheapest way to fix rusted rocker panels?
A DIY patch repair using sheet metal stock, weld-through primer, and a MIG welder typically costs $50–$200 in materials for moderate rust. Surface rust caught early can be treated with a wire brush, rust converter, and epoxy primer for under $50, making prompt attention to early corrosion the most cost-effective approach overall.