Repairing Plastic Bumper Scratches: A Strategic Overview
The fastest way to fix scratches on a plastic bumper depends on how deep the damage goes:
| Scratch Type | What You See | Quick Fix |
|---|---|---|
| Clear coat scuff | Dull haze, no groove | Rubbing compound + polish |
| Paint scratch | Color missing, plastic not exposed | Sand, prime, repaint |
| Deep gouge | White/gray plastic visible | Fill, prime, paint, clear coat |
| Paint transfer | Foreign color on bumper | Clay bar or tar remover |
A shopping cart. A parking pole. A careless driver in a tight lot. That’s all it takes to turn a clean bumper into an eyesore. And the first instinct most drivers have? Call the body shop.
Here’s the thing: over 7 million bumpers are replaced in the U.S. every year — and a large share of those replacements are completely unnecessary. Many scratches can be fixed at home for $30–$80, compared to $300–$700 at a professional shop.
This guide walks you through everything — from reading the damage correctly to choosing the right method and getting a finish that actually lasts.
I’m Brian Blanc, founder of Dent Erasers LLC, and after nearly three decades of hands-on work restoring vehicles across the East Bay, I’ve seen which DIY approaches to fix scratches on a plastic bumper hold up over time — and which ones fail within months. Everything in this guide is built on that real-world experience.

Assessing the Damage: Can You Fix Scratches on Plastic Bumper Covers at Home?
Before you run to the auto parts store in Concord or San Ramon to grab a basket full of supplies, you need to know exactly what you are dealing with. Modern bumpers are highly engineered components. Unlike the rigid steel bumpers of the past, today’s bumper covers are made of flexible thermoplastics—most commonly polypropylene (PP) or polyurethane (PUR).
These materials are chosen because they are lightweight and flexible, meaning they absorb minor impacts and bounce back. However, their flexible nature also means they require specialized repair techniques. If you treat a flexible plastic bumper like a rigid steel fender, your repair will crack and peel off the very first time you bump a driveway curb.
To choose the right repair path, you must understand the layers of your bumper’s finish:
- The Plastic Substrate: The raw black, gray, or white thermoplastic structure of the bumper.
- Adhesion Promoter: A clear chemical layer that helps paint stick to bare plastic.
- Primer: A high-build layer that levels out minor imperfections.
- Base Coat (Paint): The color layer matched to your vehicle’s factory paint code.
- Clear Coat: The hard, glossy, protective top layer that shields the paint from UV rays and light scuffs.

Clear Coat Scuffs vs. Deep Plastic Gouges
To determine if your bumper is a candidate for a quick DIY fix or if it requires a multi-stage filling and painting process, you must categorize the damage.
- Clear Coat Scuffs: These are shallow scratches that only penetrate the clear topcoat. When wet, these scratches seem to disappear temporarily. They do not expose bare plastic or color-matched paint layers. You can easily polish these out at home.
- Paint Scratches: The scratch has cut through the clear coat and exposed the base color coat, but has not gouged into the underlying plastic. These require sanding, priming, and color-matched touch-up paint.
- Deep Plastic Gouges: The scratch has sliced through all paint layers and dug directly into the raw polypropylene or polyurethane. You will see rough, hairy plastic edges, and the color will usually be a stark white, gray, or black. To repair these, you must use a flexible filler or plastic welding to level the surface before painting. For a comprehensive look at how these layers interact during repair, you can consult this Scratched Bumper Repair Guide.
The Fingernail Test for Bumper Scratches
How do you tell the difference between a paint scratch and a deep plastic gouge? Use the 90-degree fingernail test.
Run your clean fingernail gently across the scratch at a 90-degree angle.
- If your nail glides smoothly over the scratch without catching, the damage is purely in the clear coat.
- If your nail catches slightly but doesn’t sink into a deep groove, you are looking at a standard paint scratch.
- If your nail drops into a distinct, deep canyon and you can feel rough, fibrous edges, the scratch has reached the raw plastic.
A Quick Note on Paint Transfer: Sometimes, what looks like a horrific scratch is actually just “paint transfer” from a yellow parking pole, a white concrete pillar, or another car’s bumper. Before you sand anything, rub the area with a clay bar, tar remover, or a microfiber cloth dabbed with a tiny bit of mineral spirits. If the foreign color wipes away to reveal perfect factory paint underneath, you just saved yourself hours of work! If the damage is deeper, understanding the distinction between simple cosmetic issues and structural damage is key to deciding whether to attempt a home repair, as we discuss in our guide on plastic bumper repair.
Essential Tools and Materials for DIY Bumper Repair
If your fingernail test reveals that you need to sand, fill, or paint, you need to gather the correct materials. Using the wrong products—like standard, rigid household fillers—is one of the 5 common mistakes to avoid when seeking collision repairs or attempting DIY fixes.

Here is your shopping list for a professional-grade DIY repair:
- Sanding Supplies: Wet/dry sandpaper in a variety of grits: 180-grit (for shaping rough plastic), 320-grit (for feathering paint edges), 600-grit (for sanding primer), and 1000- to 2000-grit (for wet sanding paint and clear coat).
- Wax and Grease Remover: Crucial for decontaminating the plastic before applying any fillers or paint.
- Flexible Plastic Filler: Do not use standard Bondo! You need a specialized two-part flexible epoxy or urethane filler, such as the EGC60 Technical Datasheet compliant filler, which is designed to flex with the bumper without cracking.
- Plastic Adhesion Promoter: Bare plastic is naturally slick and repels paint. Adhesion promoter acts as a chemical primer that forces paint to bond to the plastic substrate.
- High-Build Primer: Formulated for flexible plastic parts (often labeled with “flex additive”).
- Factory-Matched Paint: Look up your car’s paint code (usually found on a sticker inside the driver’s door jamb) and order a high-quality spray can matched to that exact code.
- 2K Clear Coat: A two-part aerosol clear coat that uses an integrated activator button on the bottom of the can. This provides a hard, fuel-resistant, UV-stable finish that matches the gloss of your original paint.
- Safety Gear: Nitrile gloves, a dual-cartridge respirator mask (vital when spraying 2K clear coat), and safety glasses.
Step-by-Step Guide: How to Fix Scratches on Plastic Bumper Surfaces
Now that your garage is staged and your safety gear is ready, let’s look at the exact steps to fix scratches on a plastic bumper. We will break this down into two methods: one for light scuffs and one for deep gouges.
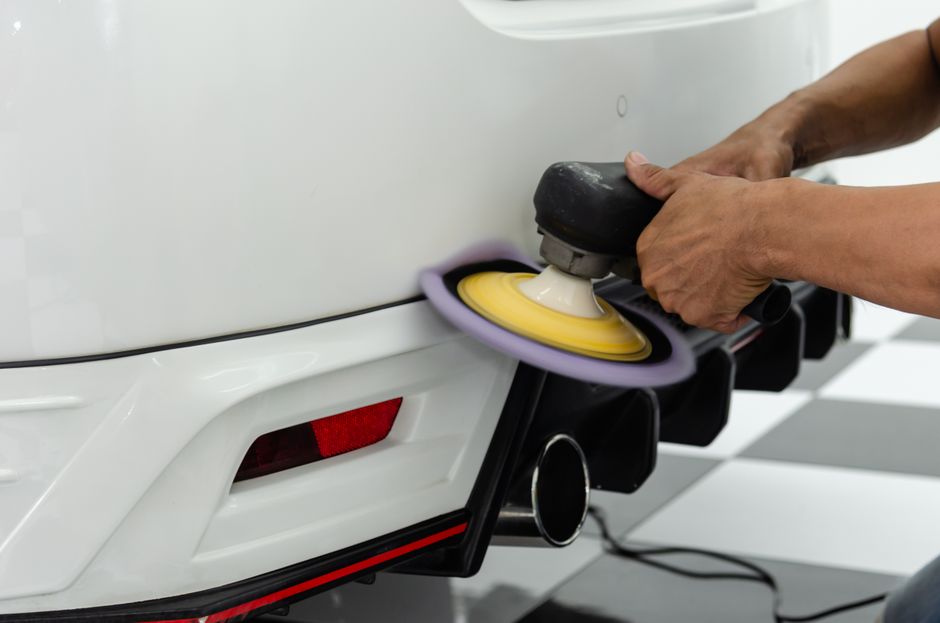
Method 1: How to Fix Scratches on Plastic Bumper Clear Coats (Light Scuffs)
If your scratch passed the fingernail test and is only in the clear coat, you do not need paint, primer, or filler. You can restore the gloss using hand polishing or a dual-action polisher.
Step 1: Clean the Area
Wash the bumper thoroughly with car soap and water, then dry it completely. Wipe the scratch and the surrounding 6 inches with a wax and grease remover to ensure there is no road grime or wax left in the scratch groove.
Step 2: Apply Rubbing Compound
Place a nickel-sized drop of high-quality automotive rubbing compound onto a clean microfiber towel or a foam polishing pad.
Step 3: Polish with Firm, Circular Pressure
Work the compound into the scratch using firm, overlapping circular motions. If you are using a dual-action polishing wheel, keep it moving constantly to avoid building up heat, which can melt the plastic bumper underneath. Polish for 1–2 minutes, then wipe the residue clean with a fresh microfiber towel to inspect your progress.
Step 4: Refine with Finishing Polish
Once the scratch is gone, the area might look slightly dull from the abrasive compound. Apply a fine finishing polish to a clean pad and buff the area again to restore a deep, mirror-like gloss.
Step 5: Protect with Wax
Wipe away all polish residue and apply a coat of high-quality car wax or ceramic sealant to protect the freshly restored clear coat.
Method 2: How to Fix Scratches on Plastic Bumper Deep Gouges (Filling and Painting)
If your bumper has deep gouges, scrapes, or road rash, you need to rebuild the surface. Follow these steps carefully to ensure a seamless, long-lasting repair.
Step 1: Prep and Mask
Wash the bumper and wipe it down with wax and grease remover. Use high-quality automotive masking tape and masking paper to cover everything you don’t want to paint—including nearby body panels, headlights, and grilles.
Pro Tip: Mask off a larger area than you think you need. Spray paint mist travels surprisingly far in a garage!
Step 2: Sand the Gouge and “Feather” the Paint
Using 180-grit wet/dry sandpaper, sand down any rough, “hairy” plastic fibers protruding from the gouge. Once the plastic is level, switch to 320-grit sandpaper to sand the surrounding paint. You want to “feather” the edges of the scratch—creating a smooth, gradual slope from the deep gouge up to the undamaged paint. This prevents a visible “step” or line from showing through your new paint.
Step 3: Clean and Apply Adhesion Promoter
Clean the sanded area again with wax and grease remover. If you have exposed any bare plastic during sanding, spray two light coats of plastic adhesion promoter over the bare plastic, waiting 5 minutes between coats. This step is non-negotiable; skipping it is a primary cause of paint peeling later on.
Step 4: Mix and Apply Flexible Filler
Mix your two-part flexible plastic filler on a clean mixing board according to the manufacturer’s instructions. Using a plastic spreader, apply the filler to the gouge with firm pressure to force it deep into the scratch and eliminate air pockets. Smooth it out, leaving the filler slightly higher than the surrounding bumper surface (it will shrink slightly as it cures). Allow it to dry for 30 to 45 minutes.
Step 5: Sand the Filler Smooth
Once the filler is completely cured, wrap 320-grit sandpaper around a sanding block. Sand the filler using long, straight, diagonal strokes. Do not use your bare hand to hold the sandpaper, as your fingers will create low spots. Sand until the filler is perfectly flush with the surrounding bumper. Run your open hand over the repair with your eyes closed—if you can feel a bump or a dip, keep sanding or apply a thin second skim coat of filler. Finish by sanding the entire repair area with 600-grit sandpaper to prep it for primer.
Step 6: Prime the Repair
Wipe the area clean. Spray 3 light, even coats of high-build primer over the repair, overlapping each pass by 50%. Allow the primer to dry for 15 minutes between coats. Let the final coat dry for at least 3 hours (or overnight). Once dry, gently wet-sand the primer with 1000-grit sandpaper and water until it is silky smooth. Wipe away the sanding slurry and let it dry completely.
Step 7: Apply Color-Matched Paint (Base Coat)
Shake your color-matched paint can for a full 2 minutes. Hold the can 10 to 12 inches away from the bumper. Spray in smooth, sweeping passes, starting and stopping your spray off the edge of the repair area. Apply 2 to 3 light coats, waiting 10 to 15 minutes between each. Do not try to achieve full coverage on the first coat; light coats prevent runs and sags. Let the paint dry for 30 minutes.
Step 8: Apply Clear Coat
Activate your 2K clear coat spray can. Spray 2 wet, overlapping coats over the painted area, extending slightly past the edges of your new paint to blend it into the original clear coat. Wait 10 minutes between coats. The clear coat should look wet and glossy as it goes on, but be careful not to spray so heavily that it runs.
Step 9: Cure and Polish
Let the clear coat cure for at least 24 to 48 hours. If you notice any tiny dust nibs or a slight “orange peel” texture, you can gently wet-sand the area with 2000-grit sandpaper, then buff it back to a high gloss using rubbing compound and polish.
When to Skip DIY and Choose Professional Repair
While fixing minor scuffs and moderate scratches at home is a fantastic way to save money, not all bumper damage is a good candidate for a weekend DIY project. Modern vehicles are packed with advanced technology, and making a mistake can lead to safety risks and high repair bills.
You should skip the DIY route and call in professional help if:
- Your Bumper Houses ADAS Sensors: Modern cars manufactured in recent years feature Advanced Driver Assistance Systems (ADAS). This includes blind-spot monitoring radar, parking sensors, and automated braking cameras mounted directly behind or within the plastic bumper cover. Applying thick layers of plastic filler or heavy paint over these areas can disrupt sensor signals, causing your safety systems to fail.
- There are Deep Structural Cracks or Tears: If the plastic bumper cover is split in half or has a large structural crack, standard filler will not hold. While you can attempt plastic welding, structural integrity is compromised.
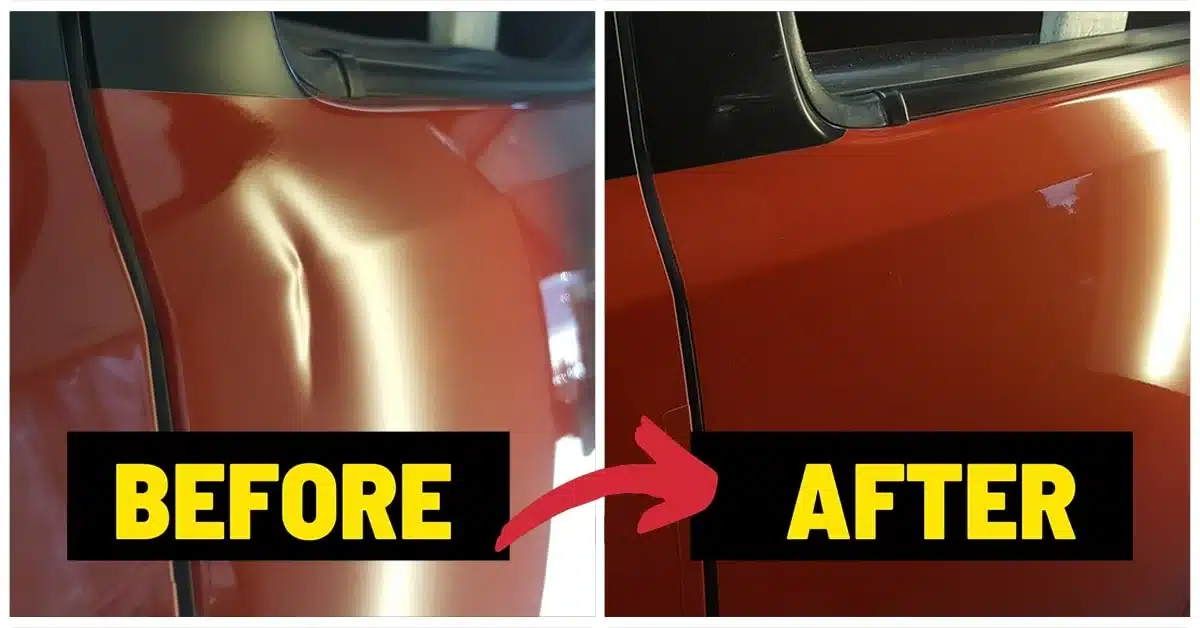
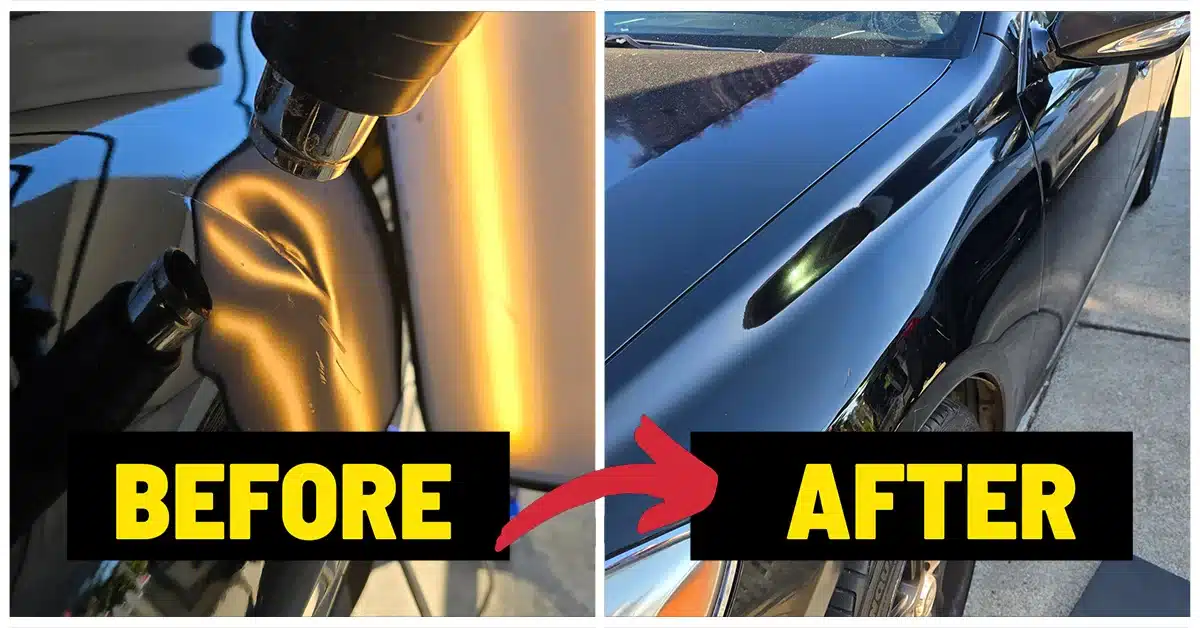
- The Bumper is Dented and Out of Shape: Large, deep dents require specialized heating and reshaping techniques to release the plastic’s “memory” without warping the panel. To understand the complexity of structural plastic repair, read about How to Remove Dents from Plastic Bumpers.
- You Want to Preserve Your Original Factory Paint: If the damage is a dent without paint loss, DIY methods often ruin the finish. Professional Paintless Dent Repair (PDR) can massage the dent out from behind, preserving your factory paint and saving you hundreds. Learn more about typical professional costs in our guide on common auto body repair costs.
If you live in Concord, Walnut Creek, Antioch, or anywhere else in Contra Costa County, our team at Dent Erasers LLC specializes in on-site, mobile paintless dent removal and bumper restoration. We bring the body shop directly to your driveway, saving you time and preserving your car’s original paint.
Frequently Asked Questions About Bumper Scratch Repair
Can you use a heat gun to remove plastic bumper scratches?
A heat gun can be used to reduce the visibility of very light scratches on unpainted, textured black plastic trim (like the rugged cladding on SUVs). Gently heating the plastic causes the surface to slightly melt and re-flow, which can smooth out light scuffs. However, you must never use a heat gun on painted plastic bumpers to fix scratches. Doing so will instantly blister, discolor, and ruin your paint and clear coat, turning a minor scratch into an expensive repainting job.
How much does it cost to fix a scratched plastic bumper?
A DIY repair kit with sandpaper, primer, color-matched paint, and clear coat typically costs between $30 and $80 and takes 3 to 6 hours of work. If you take your car to a traditional auto body shop in the East Bay, a professional scuffed bumper repair will run between $300 and $700. If the bumper is severely cracked or has sensor damage, a full replacement can cost anywhere from $500 to $1,500+ depending on your vehicle’s make and model.
Can you use standard body filler (Bondo) on a flexible plastic bumper?
No! Standard body filler (like classic pink Bondo) is designed for rigid metal panels. It does not contain flexible agents. Because plastic bumpers constantly expand, contract, and flex during normal driving and temperature changes, standard rigid filler will quickly lose adhesion, crack, and pop out of the repair area. Always use a dedicated two-part flexible epoxy or urethane filler designed specifically for automotive plastics.
Conclusion: Restoring Your Bumper the Smart Way
Learning how to fix scratches on a plastic bumper is an incredibly satisfying DIY project that can save you hundreds of dollars. By taking your time, using the correct flexible fillers, and applying high-quality color-matched paint, you can achieve a finish that looks fantastic and stands up to the elements.
However, if you are dealing with deep dents, structural cracks, or complex ADAS sensor arrays, DIY repairs can quickly become overwhelming—and potentially compromise your vehicle’s safety features.
If you are located in the East Bay—from Richmond and El Sobrante to Concord, Brentwood, and San Ramon—you don’t have to tackle this alone. At Dent Erasers LLC, we provide expert, mobile paintless dent repair and bumper restoration services that preserve your car’s original paint and factory finish. We come directly to your home or office, offering quick turnaround times and affordable pricing ranging from $150 to $500.
Skip the hassle of a traditional body shop and keep your car looking pristine. Contact us today or visit our Dent Erasers LLC Plastic Bumper Repair service page to get a quick quote and restore your vehicle’s appeal!