Why Most Drivers Pay Too Much to Fix a Plastic Bumper
Fix plastic bumper damage at home — and you can save hundreds of dollars over a body shop visit.
Here’s a quick breakdown of your options:
| Repair Option | Typical Cost | Time Required |
|---|---|---|
| DIY repair | $30–$80 | 3–6 hours |
| Professional repair | $150–$400 | 1–2 days |
| Full replacement | $500–$1,500+ | 2–4 hours labor |
For most minor damage — scuffs, shallow scratches, small cracks, and soft dents — a DIY fix is completely doable with basic tools and a little patience.
That said, not every bumper repair belongs in your driveway. Damage involving parking sensors, cameras, or structural supports is a job for a professional.
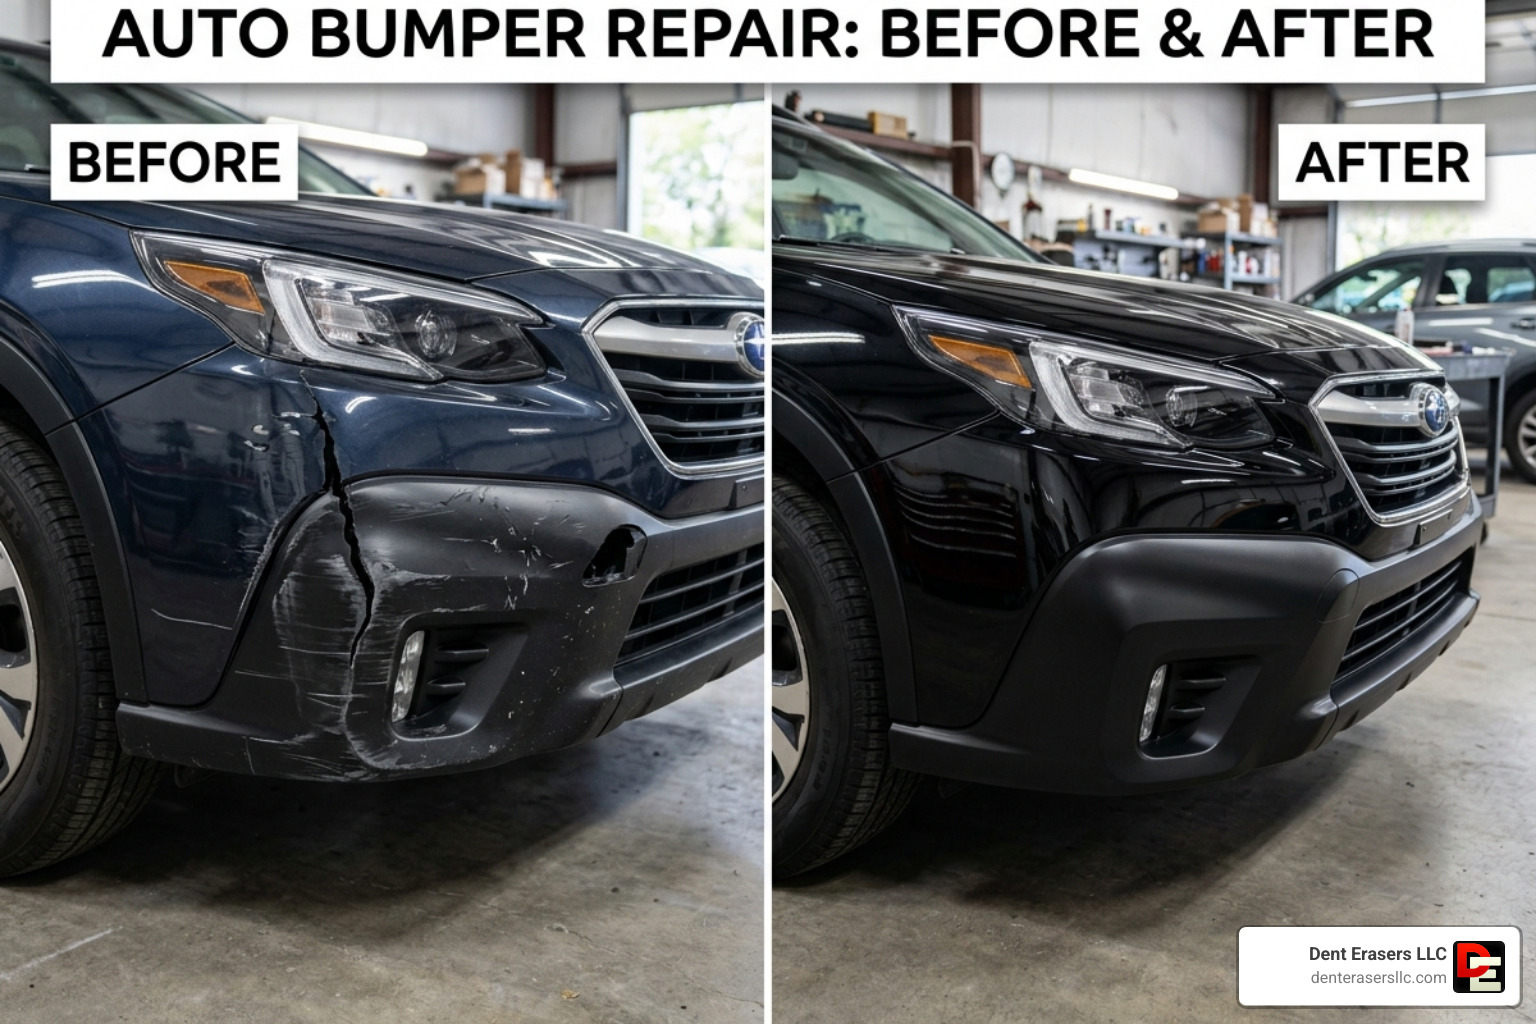
That sinking feeling when you walk back to your car and spot a nasty scuff or crack on the bumper? Most drivers assume it means an expensive body shop bill. But in most cases, it doesn’t.
Over 7 million bumpers are replaced in the U.S. every year — many of them unnecessarily. With the right materials and approach, repairs that look factory-fresh are well within reach for any motivated vehicle owner.
I’m Brian Blanc, and with 28 years of mobile dent and bumper repair experience across the East Bay Area, I’ve seen how the right technique to fix a plastic bumper can save a vehicle owner $300 or more compared to shop replacement. In this guide, I’ll walk you through exactly what works.

Assessing Damage: When to DIY vs. Professional Help
Before we start grabbing the sandpaper, we need to take a cold, hard look at the damage. Not all bumper wounds are created equal. As we move through April 2026, modern vehicle technology has made this assessment more critical than ever.
Surface Scratches and Scuffs
If you have “spiderweb” cracks in the paint or superficial scuffs that haven’t gouged deep into the plastic, you are a prime candidate for a DIY fix. A simple rule of thumb: if your fingernail doesn’t catch on the scratch, it might even buff out with a polishing compound. If it does catch, you’ll need to sand and fill.
Dents and Depressions
Modern plastic bumper covers have a “memory.” This means that large, soft dents—the kind you get from nudging a pole in a parking lot—can often be popped back into place using heat. If the plastic isn’t stretched or torn, this is a very satisfying home repair.
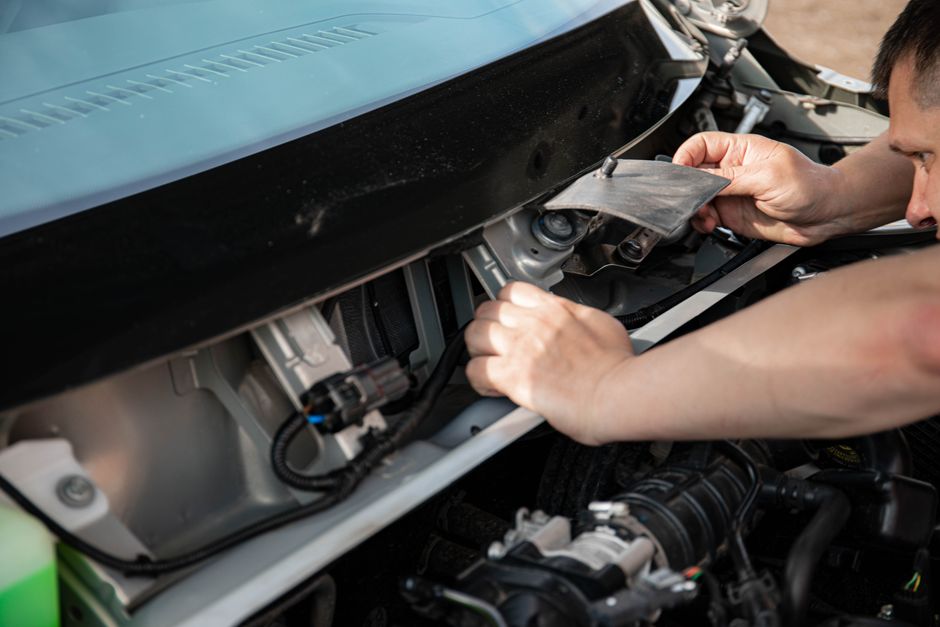
Structural Damage and ADAS Sensors
This is where we have to be careful. In 2026, bumpers are no longer just plastic covers; they are “smart” components. If your bumper houses:
- Parking Sensors: Small circular sensors flush with the bumper.
- ADAS Cameras: Often used for 360-degree views.
- Blind Spot Radar: Usually hidden behind the corners of the rear bumper.
If the damage is directly over or near these sensors, or if the internal mounting brackets are snapped, you should seek professional help. Misaligning a sensor by even a few millimeters can compromise your vehicle’s safety systems.
| Damage Type | DIY Feasibility | Estimated Cost |
|---|---|---|
| Light Scratches | High | $10–$25 |
| Moderate Gouges | High | $30–$80 |
| Deep Cracks | Medium | $50–$150 |
| Sensor Damage | Low | $500–$1,500+ |
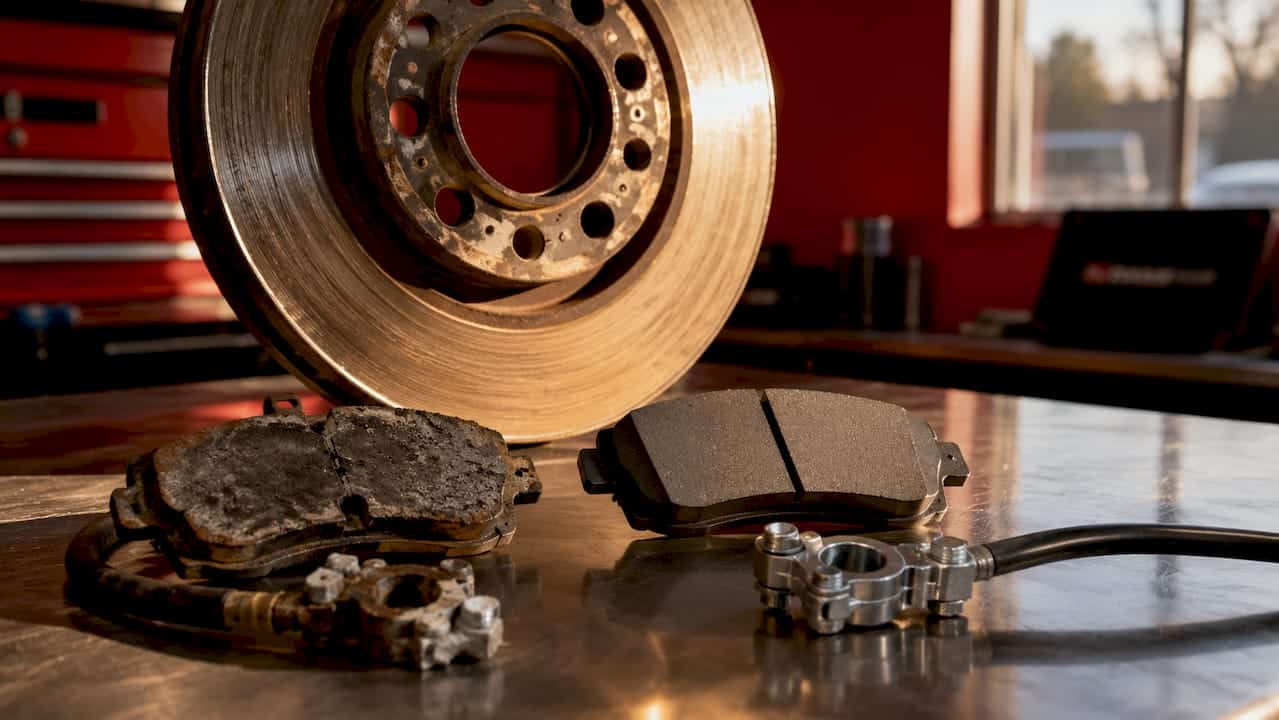
Essential Tools and Materials to fix plastic bumper
To get professional results, you can’t just use whatever is in the kitchen junk drawer. You need a dedicated Plastic Bumper Repair Tips – Fix Cracks & Dents at Home kit or a collection of specific supplies.
Here is what we recommend keeping in your “save my bumper” kit:
- Heat Gun or High-Powered Hair Dryer: Essential for softening plastic to push out dents.
- Flexible Plastic Filler: Do not use standard “Bondo” meant for metal; it will crack the first time the bumper flexes. Look for two-part urethane or epoxy fillers.
- Sanding Blocks and Sandpaper: You’ll need a range of grits, typically 80-grit for rough shaping, 180-grit for smoothing filler, and 320 to 600-grit for final finishing.
- Adhesion Promoter: This is the “secret sauce.” Paint and filler do not like to stick to raw plastic. This chemical creates a bond that prevents peeling.
- Reinforcement Mesh: For cracks, a fiberglass or metal mesh provides the structural backbone for the repair.
- Wax and Grease Remover: To ensure the surface is chemically clean before you start.
Identifying Your Bumper Material and Surface Preparation
Not all plastics are the same. If you try to use a repair material designed for one type of plastic on another, the repair will literally fall off in a few months.
Most modern bumpers are made from TPO (Thermoplastic Olefin), PP (Polypropylene), or ABS (Acrylonitrile Butadiene Styrene).
How to Identify Your Plastic
Look on the back of the bumper cover. Manufacturers usually stamp a recycling code or material shorthand into the mold.
- PP/TPO: Most common; very flexible. Requires an adhesion promoter.
- ABS: Harder, more rigid. Often found on older vehicles or trim pieces.
- Fiberglass: Rare on modern daily drivers, but common on aftermarket body kits.

The Cleaning Ritual
Preparation is 90% of the work. We start by washing the entire bumper with soap and water. Once dry, use a dedicated VOC-compliant surface cleaner or isopropyl alcohol. Pro tip: Always wipe the cleaner onto a microfiber cloth first, then wipe the bumper. Never spray cleaners directly onto the plastic, as they can soak into the pores and cause “fisheyes” in your paint later.
Comprehensive Repair Procedures for Every Damage Type
Environmental factors play a huge role in your success. Ideally, you want to work in a garage where the temperature is between 60°F and 80°F. High humidity can prevent paint from drying clearly, leading to a cloudy finish.
Always wear proper PPE, including a respirator for fumes and impermeable gloves to keep skin oils off the repair surface.
Step-by-Step Guide to fix plastic bumper Scratches and Dents
For scratches and dents, we follow a process of “heat, sand, and fill.”
- Heat the Dent: If you’re dealing with a dent, use your heat gun to warm the area until it’s uncomfortable to touch but not melting. You may need to remove the fender liner or a few clips to get behind the bumper. Gently push the dent outward from the back. Once it’s back in shape, hold it there with a damp cloth to “set” the plastic’s memory.
- Feather Sanding: For scratches, sand the edges of the damage with 180-grit paper. You want to “feather” the edges, meaning you create a smooth slope from the bottom of the scratch to the surrounding paint. This prevents a visible “ring” around the repair.
- Apply Adhesion Promoter: Spray a light coat of adhesion promoter on any bare plastic and let it dry for 5-10 minutes.
- Filling: Mix your two-part flexible filler and apply it in thin layers. It’s better to apply three thin coats than one thick, gloopy one. Overfill the area slightly to account for minor shrinkage.
- Final Sanding: Once cured (usually 15-20 minutes), sand the filler smooth with 320-grit, then 600-grit sandpaper.
If you find this process daunting or the damage is located in a tricky spot, we offer expert Plastic Bumper Repair services that come directly to your home or office in Concord and surrounding areas.
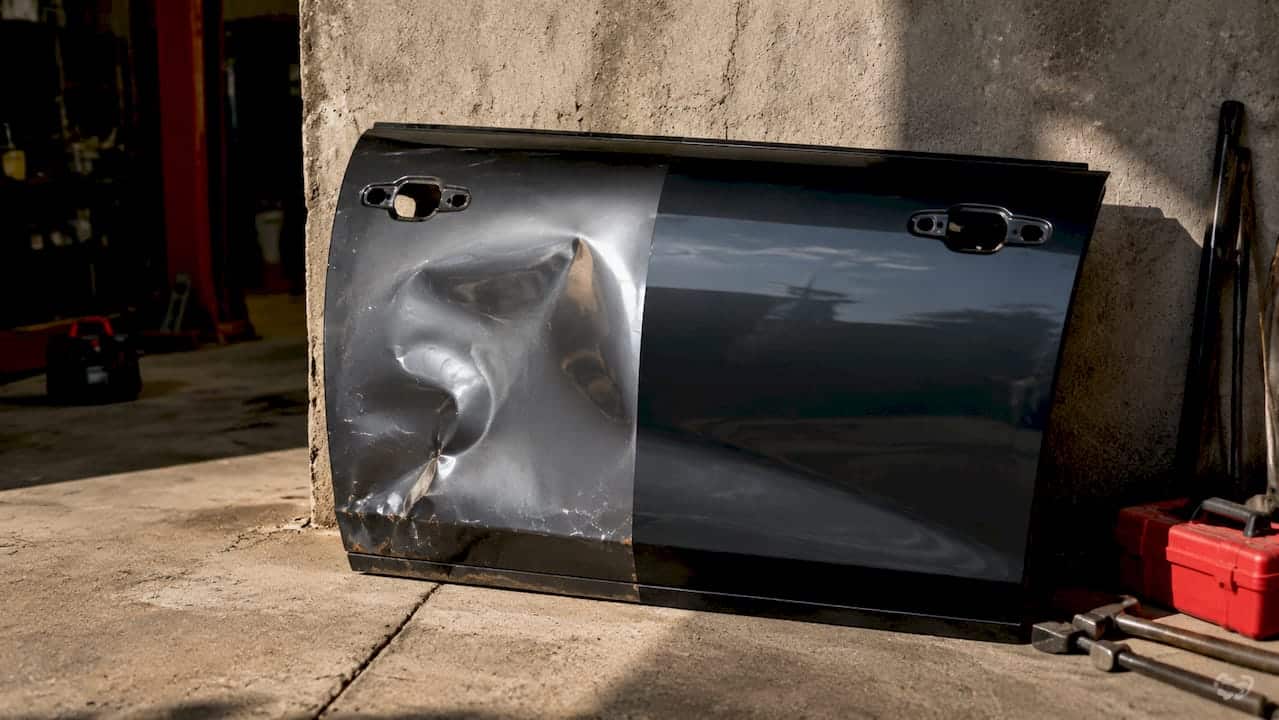
Advanced Techniques: How to fix plastic bumper Cracks
A crack is a structural failure, so we have to treat it like one.
- Stop-Drilling: Use a small drill bit to drill a tiny hole at each end of the crack. This stops the crack from spreading further.
- The V-Groove: Use a Dremel tool or a sanding block to create a “V” shape along the crack line. This increases the surface area for the epoxy to grab onto.
- Backside Reinforcement: This is the most important step. If possible, remove the bumper and apply a layer of reinforcement mesh and heavy-duty epoxy to the back of the crack. This provides the strength.
- Front Side Filling: Fill the front “V” with your flexible filler, sand smooth, and prepare for paint.

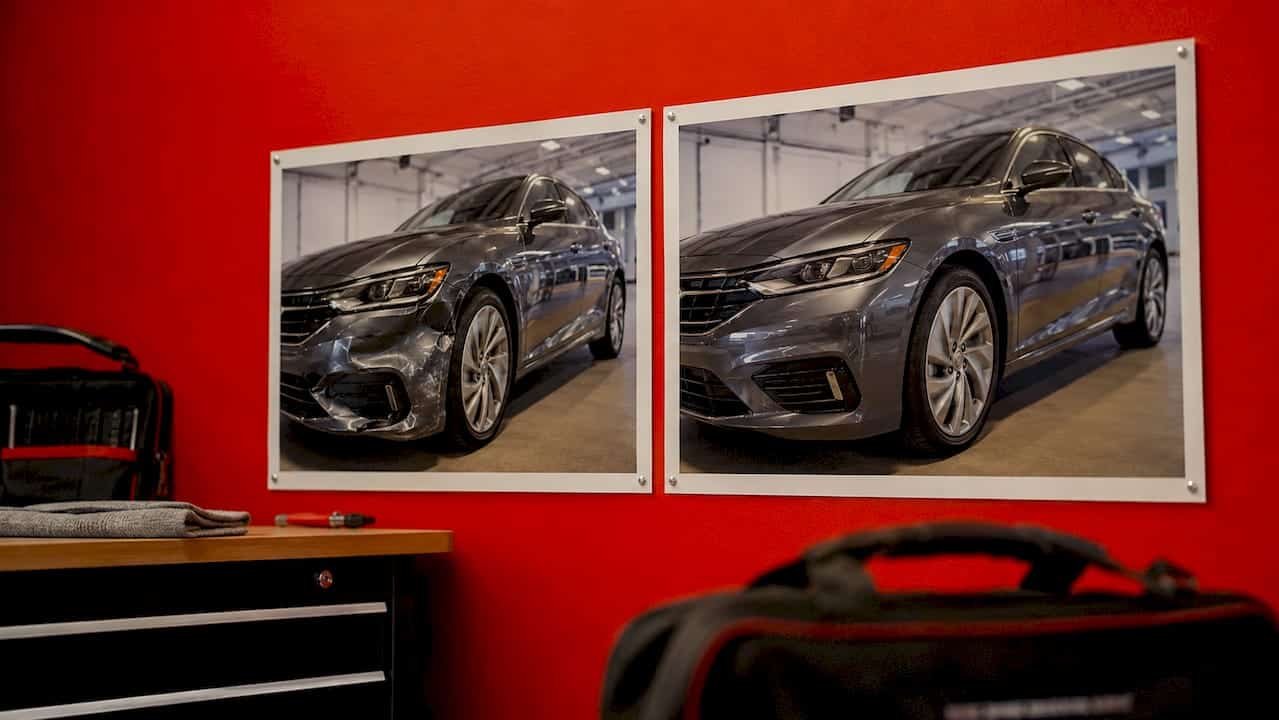
Painting and Finishing for a Seamless Result
Now for the part that makes or breaks the “invisible” look: the paint.
Finding Your Color Code
Don’t guess the color based on the cap of a spray can at the store. Look on your driver’s side doorjamb for a sticker that lists the “Paint” or “EXT PNT” code. Use this code to order a factory-matched aerosol kit.
The Painting Process
- Masking: Tape off surrounding areas to prevent overspray. Use a “soft edge” technique by folding the edge of the tape back on itself—this prevents a hard line between the old and new paint.
- Primer: Apply 2-3 coats of primer. Sand the final coat lightly with 600-grit paper once dry.
- Base Coat: Apply the color in thin, overlapping passes. If you’re using a metallic paint (like silver), use vertical passes to prevent “tiger stripes.”
- Clear Coat: This provides the shine and UV protection. Apply two wet coats, overlapping by 50%. Let it dry for at least 24 hours before you even think about touching it.
- Buffing: After the clear coat has fully cured, you can use a fine polishing compound to blend the new finish with the old.
Frequently Asked Questions about Bumper Repair
Can I use super glue or Gorilla Glue on a plastic bumper?
Absolutely not. These glues are designed to be rigid and brittle. A car bumper is designed to vibrate and flex. Super glue will crack and fail within days of driving. Always use specialized flexible adhesives or epoxies designed for automotive plastics.
How long does a DIY bumper repair last in 2026?
If you used an adhesion promoter and the correct flexible fillers, a DIY repair can easily last 3 to 5 years or more. The main factor in longevity is how well you protected the repair with a high-quality UV-resistant clear coat.
Do I need to remove the bumper from the car for a professional finish?
For small scuffs and scratches, no. You can easily fix plastic bumper damage while it’s still on the car. However, for cracks that require backside reinforcement or large dents that need access from behind, removing the bumper will make the job much easier and the result much stronger.
Conclusion
Repairing your own bumper is a fantastic way to save money and keep your car looking sharp. By following these steps—assessing the damage, using the right materials, and taking your time with the finish—you can achieve results that would make a pro proud.
However, we know that life is busy. If you’re in Concord, Walnut Creek, Antioch, or anywhere in Contra Costa County, and you’d rather have an expert handle it, Dent Erasers LLC is here to help. We provide mobile paintless dent repair and plastic bumper restoration that comes to you. Our services are designed to preserve your vehicle’s original paint whenever possible, offering a quick turnaround and affordable pricing that typically ranges from $150 to $500—far less than a traditional body shop.
Ready to restore your car’s face? Whether you do it yourself or give us a call, your bumper will thank you. For more information on our professional options, visit our Plastic Bumper Repair page today!