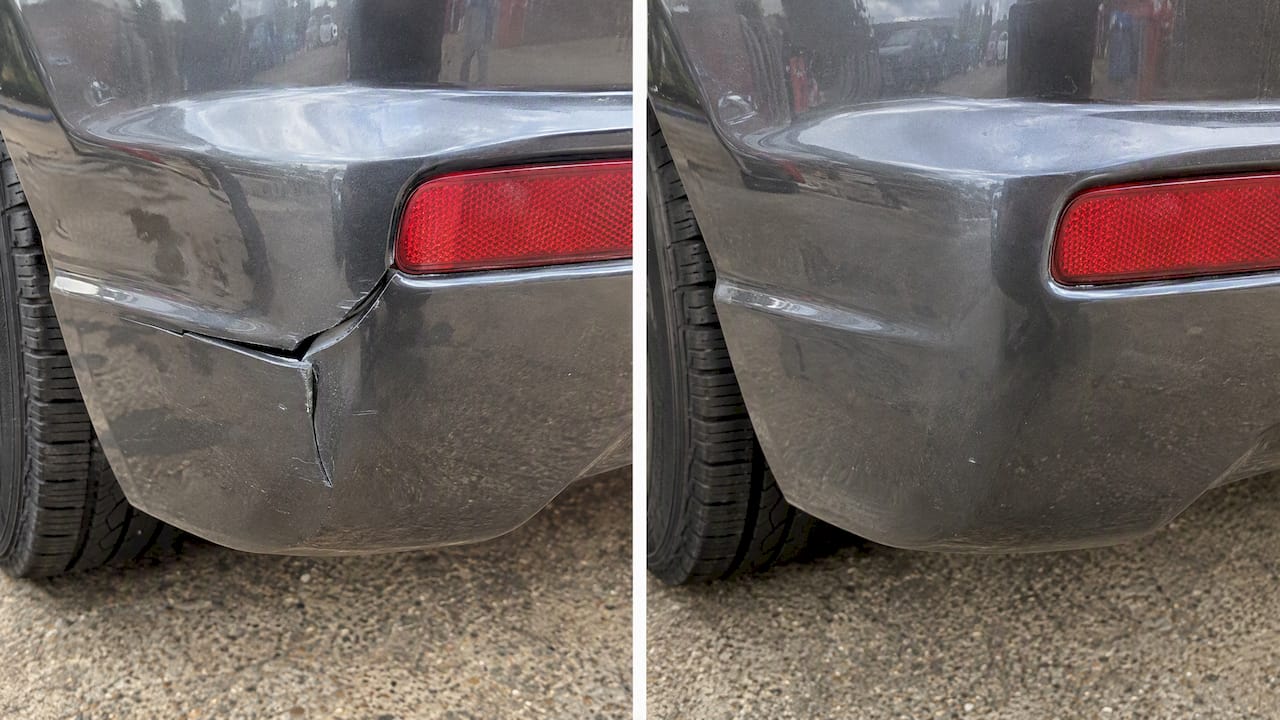
If the broken part is a weldable thermoplastic and the repair needs structural strength, plastic welding usually wins. If you are dealing with a low-surface-energy plastic like polypropylene, an uneven gap, or a part that needs to keep flexing after the fix, a matched structural adhesive or epoxy is the smarter call. The right choice always starts with identifying the plastic and how much the part moves, which we break down below.
TL;DR:
- Check the part’s backside for a resin code; polypropylene, polyethylene, and TPO resist standard epoxy, so use a rated structural acrylic or weld them.
- PlasticWeld syringe epoxy has a 3,900 PSI rating and fully cures in 1 hour, while the 700 PSI putty reaches functional cure in 2 to 3 hours.
- DIY welding can restore strength, but lab results of 63.8% to 94.5% came from controlled equipment, not handheld tools; match the filler rod to the plastic.
- Wear gloves approved for epoxy resin and work with ventilation; hire a professional for structural bumper cracks, broken tabs, safety related parts, or repairs needing paint.
Table of Contents
- Strength, cure time, cost, and ease of use compared
- How to identify the plastic before you choose a method
- Doing it yourself: the plastic welding workflow
- Doing it yourself: the epoxy and structural adhesive workflow
- When to hire a pro: a repair shop’s view
- Denterasers LLC: mobile plastic bumper and crack repair
- FAQ
- Sources
Strength, cure time, cost, and ease of use compared
Strength numbers tell most of the story. J-B Weld’s PlasticWeld putty is rated at 700 PSI tensile strength, while the PlasticWeld syringe jumps to 3,900 PSI because it is a true two-part structural formula rather than a hand-mixed filler. Welding tells a different story depending on who is doing it. A thermoplastic composite joint study from LSU found that controlled welding methods restored between roughly 63.8% and 94.5% of original joint strength in lab testing, but that work used ultrasonic and resistance-heating equipment, not a handheld iron on a workbench. A DIY weld with a hot-air tool can get close to those numbers on a clean, well-aligned joint, but the process control that produced the LSU figures simply is not available at the kitchen-table level.
Cure time separates the two methods just as sharply:
- PlasticWeld putty has a 20 to 25 minute work life and reaches functional cure in 2 to 3 hours, according to the manufacturer’s product page.
- The PlasticWeld syringe sets in 5 minutes and fully cures in 1 hour under normal shop temperatures, per the same product line.
- Plastic welding cools to handling strength in minutes once the bead is laid, though full stress-ready strength depends on bead thickness and how the part was clamped while cooling.
Pro Tip: If you only have one evening to finish the repair and drive the car the next morning, a fast syringe epoxy is more forgiving on timing than learning to weld on the fly.
Cost favors epoxy for occasional repairs. A tube of structural syringe epoxy runs under $10, while a basic plastic welding kit with rod and a heat tool is a one-time equipment purchase that pays off only if you repair plastic often. Ease of use tilts the same direction: epoxy forgives small mixing errors, while welding rewards practice and punishes overheating with warped, discolored plastic.
A majority of tested thermoplastic joints recovered meaningful tensile strength after controlled welding repair, which is the baseline worth remembering before assuming any weld, DIY or lab-grade, will match the original part.
On safety, the NIOSH evaluation of epoxy exposure found that uncured epoxy systems caused skin contact and respiratory sensitization in a meaningful share of monitored workers, even with gloves on, because the wrong glove material lets resin through. Welding carries its own hazards: fumes need ventilation, and the iron or heat gun runs hot enough to burn skin on contact.
How to identify the plastic before you choose a method
Every plastic repair starts with the same question: what is this part actually made of? Most bumpers, trim pieces, and housings carry a small recycling code, usually a triangle with a number and letters like PP, PE, ABS, or TPO, molded into an inconspicuous spot on the backside.
- Check the back or underside of the part for a resin identification code or material abbreviation.
- If no code is visible, scratch a hidden area with a fingernail: a slightly waxy, flexible feel suggests polyolefins like PP or PE, while a harder, glossier scratch points to ABS or nylon.
- Do a small adhesion test with your chosen product on an inconspicuous spot and let it cure fully before trusting it on the visible repair.
Polyolefins like polypropylene, polyethylene, and TPO resist ordinary epoxies because their surface energy is too low for most adhesives to grip. 3M’s technical data for structural acrylics shows that specialized products such as DP8010 can bond many grades of PP, PE, and TPO without special surface treatment, which is why automotive bumpers increasingly rely on these acrylics instead of general-purpose epoxy. The J-B Weld FAQ page confirms the same limitation on the consumer side: standard PlasticWeld formulas are not recommended for polypropylene or polyethylene.
Pro Tip: Never trust a product label’s generic “bonds plastic” claim. Test a dab on a hidden spot and walk away for the full cure time before committing to the visible repair.
Doing it yourself: the plastic welding workflow
Consumer-level plastic welding generally means one of two tools: a plastic welding rod paired with a hot-air gun, or a soldering-iron-style tool that melts rod directly into the crack. True ultrasonic or resistance welding, the kind used in the LSU lab study, belongs to professional manufacturing and collision shops, not home garages.
- Assess the crack and dry-fit the pieces to confirm alignment before applying heat.
- Clean the area with isopropyl alcohol and lightly roughen the surface so the filler rod has something to grip.
- Tack the crack at a few points first, then bridge the full length with the iron or hot-air tool.
- Build the bead using a filler rod that matches the base plastic, since mismatched polymers will not fuse.
- Add a reinforcing mesh or backing strip on the underside for any part that flexes or bears load.
- Let the weld cool fully before sanding the bead flush and prepping for paint.
The most common mistake is overheating the plastic until it distorts, which leaves a lumpy, uneven surface that no amount of sanding fixes. A second mistake is building a rigid bead on a part that is meant to flex, which cracks again at the edge of the repair within a season. Larger structural cracks, or anything on a safety-related part, usually call for backing support or professional equipment rather than a freehand weld.
Doing it yourself: the epoxy and structural adhesive workflow
Picking the right epoxy starts with matching the product to the plastic and how much the part moves. Hand-mix putty works well for rigid, non-flexing repairs; a fast syringe epoxy suits small structural fixes; and 3M structural acrylics are built for flexible automotive plastics that need to survive years of vibration.
- Clean the area thoroughly, removing dirt, grease, and old paint, since the PlasticWeld syringe instructions specifically call out surface contamination as the top cause of bond failure.
- Apply an adhesion promoter on low-surface-energy plastics before bonding, especially on PP, PE, or TPO parts.
- Mix the epoxy at the exact ratio specified, whether that is the 1:1 of a consumer syringe or the 10:1 ratio 3M’s structural acrylics require with dispensing equipment.
- Clamp or brace the joint for the full cure window rather than just the initial set time.
- Sand and prime once cured, then time paint and reinstallation around the manufacturer’s cure notes rather than guessing.
3,900 PSI is the tensile strength J-B Weld lists for its PlasticWeld syringe, more than five times the 700 PSI rating of the hand-mix putty, which is why structural syringe formulas suit load-bearing cracks better than cosmetic fillers.
Safety is not optional here. Follow the SDS sheet for your specific product, wear gloves rated for epoxy resin rather than generic latex, and work in a ventilated space, since the NIOSH findings on epoxy exposure tie most sensitization cases to prolonged skin contact during mixing and application.
When to hire a pro: a repair shop’s view
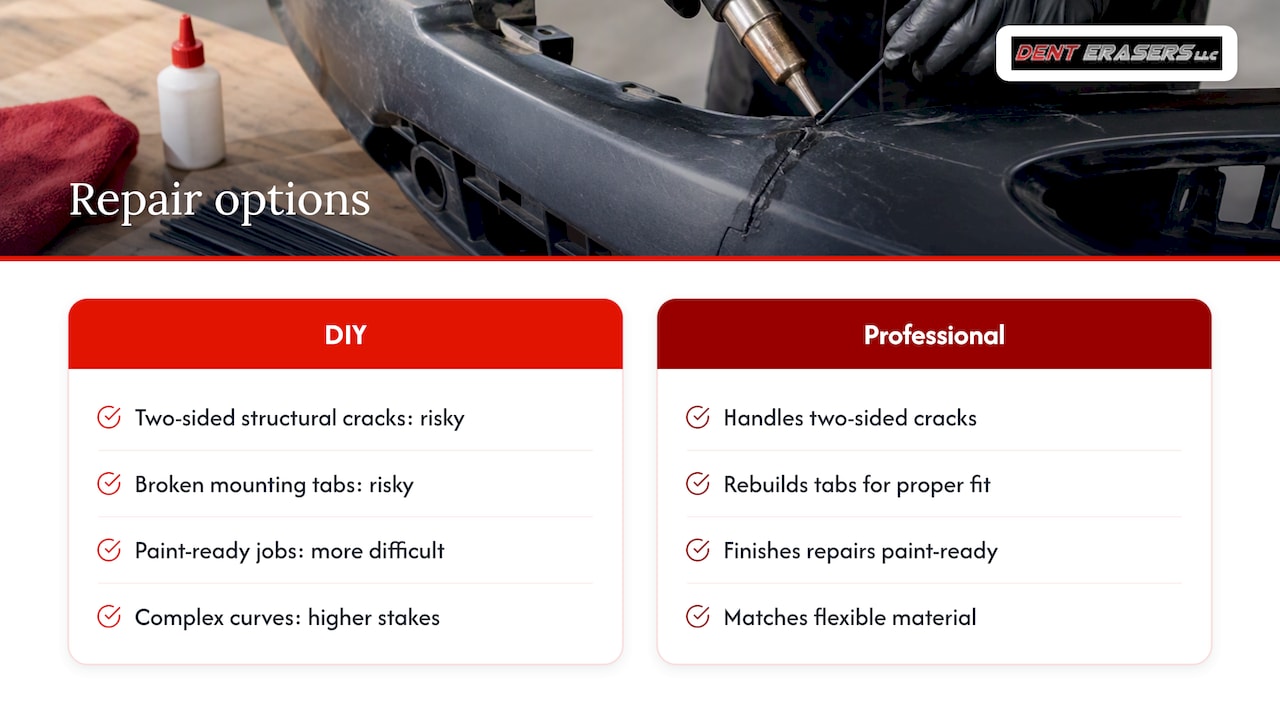
Some repairs are worth doing yourself, and some are not. Two-sided cracks that run through both the cosmetic and structural layer of a bumper, broken mounting tabs that need rebuilding, and any part that has to come back paint-ready all tend to go better in professional hands. Complex curves and safety-critical brackets also raise the stakes on a DIY attempt gone wrong.
For mobile plastic bumper repair, we bring the ability to match the correct flexible material to the part, rebuild tabs so the bumper sits and fits properly, and finish the repair so it is ready for paint without an extra trip to a shop. A quick way to get an accurate quote is to send photos of the crack or break along with the vehicle’s year, make, and model, so we can give you an upfront idea of what the repair involves.
Denterasers LLC: mobile plastic bumper and crack repair
When a crack, tab break, or deep gouge is on a part you still need to look factory-finished, we come to you and handle the plastic bumper repair onsite, matching the right flexible material to the plastic and finishing it paint-ready without a shop visit taking up your time.
- Request your free mobile dent and repair quote and we will tell you exactly what your repair involves.
- See the full scope of our plastic bumper repair service before you book.
- For readers considering a body-kit-level upgrade instead of a repair, e6carbon’s AMG bumper conversion guide walks through what a full carbon-fiber swap involves.
If the crack is more than cosmetic or the part needs to come back off the car and go on looking showroom-correct, get a quote and we will schedule a time that works around your day.
FAQ
How do I use J-B Weld PlasticWeld correctly?
Clean the surface fully, mix the putty or syringe at the ratio the product calls for, and apply within the stated work life before it starts to set. The putty has a 20 to 25 minute work life and reaches functional cure in 2 to 3 hours, while the syringe sets in 5 minutes and cures in 1 hour, according to the manufacturer’s product pages. Always test adhesion first, since neither formula is recommended for polyethylene or polypropylene.
Is epoxy a good choice for bonding metal to plastic?
Epoxy can bond metal to plastic, but the plastic side needs to be a type the formula is rated for, since low-surface-energy plastics like polypropylene resist most standard epoxies. Structural acrylics designed for mixed-material automotive bonding, such as those 3M documents for plastic parts, are generally a better match for metal-to-plastic joints that need to hold under vibration.
Is J-B Weld stronger than standard epoxy resin?
J-B Weld’s PlasticWeld syringe is rated at 3,900 PSI tensile strength, well above the 700 PSI rating of its hand-mix putty, so the two are not interchangeable despite sharing a brand name. Strength always depends on the specific formula and whether it is rated for your plastic type, not on the brand alone, according to the manufacturer’s own specifications.
Does J-B Weld PlasticWeld pose a fire risk once cured?
Cured epoxy is not considered a fire hazard in normal automotive use, though uncured resin and hardener should be kept away from open flame during mixing and application as a standard precaution. For specific flammability data, check the product’s safety data sheet rather than relying on general assumptions.
Sources
- PlasticWeld Epoxy Putty | J-B Weld
- 3M™ Scotch-Weld™ Structural Plastic Adhesive DP8010 | 3M United States
- Thermoplastic composite-joint repair study | LSU repository
- NIOSH evaluation of epoxy exposure and health risks