That Dent on Your Hood Is More Fixable Than You Think
Car hood dent removal is something many drivers can tackle at home — if the damage is the right type and size.
Here’s a quick answer to help you decide what to do:
| Dent Type | Size | Paint Condition | Best Fix |
|---|---|---|---|
| Round, shallow | Under 3 inches | Intact | DIY thermal or glue pull |
| Round, shallow | Under 3 inches | Scratched/cracked | Body shop repaint |
| Large, bowl-shaped | 3–5 inches | Intact | Professional PDR |
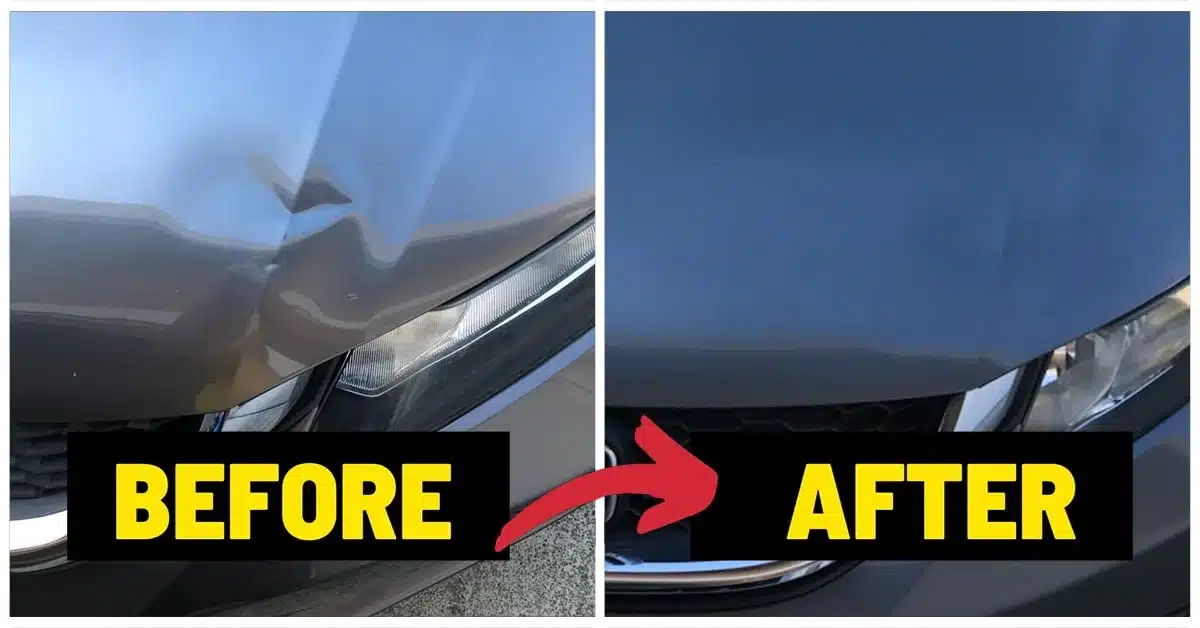
| Creased or on a body line | Any | Any | Professional PDR |
| Aluminum hood, any dent | Any | Any | Professional PDR |
| Hail damage (multiple dings) | Small | Intact | Professional PDR |
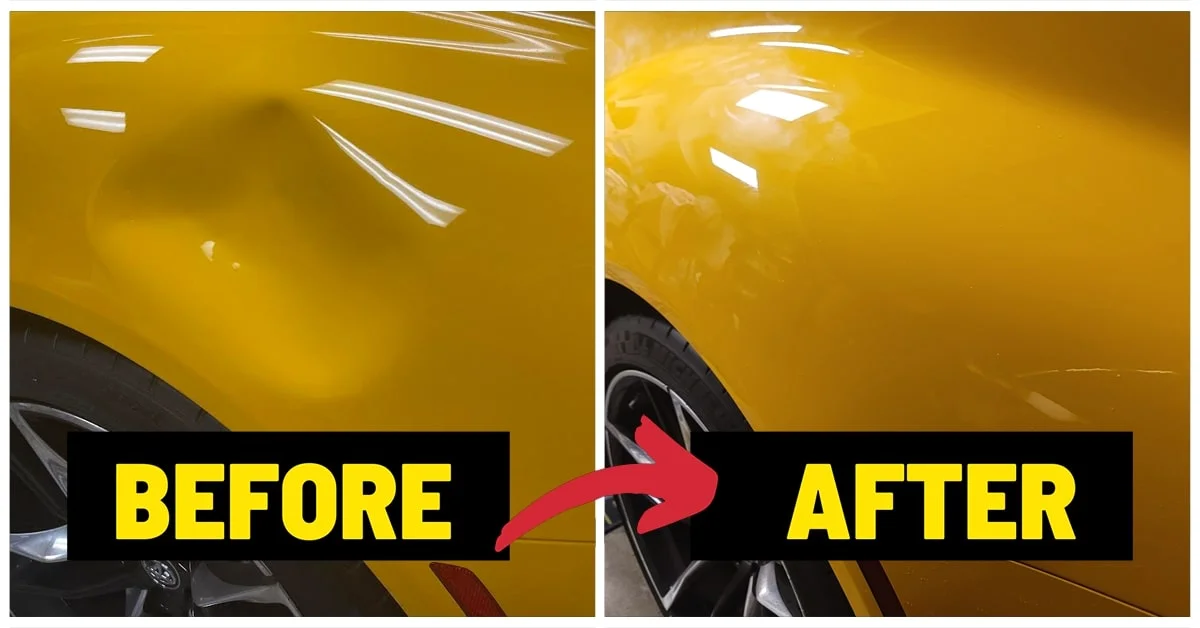
We’ve all been there. You walk back to your car in a parking lot and spot it — a fresh dent right in the middle of your hood. It’s frustrating, and the thought of a body shop bill makes it worse. The good news: steel hoods have something called metal memory, meaning the metal naturally wants to return to its original shape. With the right technique, you can often coax it back — no repainting required.
That said, not every dent is a DIY job. Rushing into the wrong method can stretch the metal further, crack the paint, or turn a $150 fix into a $1,500 problem.
I’m Brian Blanc, and I’ve spent nearly three decades performing expert car hood dent removal as the founder of Dent Erasers LLC, a mobile PDR service built on protecting factory finishes and preserving resale value. In this guide, I’ll walk you through exactly how to read your damage, choose the right method, and know when to call in a pro.

Assessing Your Damage: Is DIY Car Hood Dent Removal Right for You?
Before you grab a hair dryer or a suction cup, we need to talk about the “personality” of your dent. Not all metal is created equal, and in April 2026, many modern vehicles use specialized materials that change the rules of the game.
The Magnet Test: Steel vs. Aluminum
The most critical step in car hood dent removal is identifying what your hood is made of. Grab a simple kitchen magnet. If it sticks, your hood is steel. Steel has excellent “metal memory,” making it more forgiving for DIY attempts. If the magnet doesn’t stick, you likely have an aluminum hood.
Aluminum is a different beast. It is more rigid, lacks metal memory, and is prone to cracking or tearing if you apply the wrong pressure. From our experience, we highly recommend not attempting DIY repair on an aluminum hood; these require specialized professional tools and heat control to move the metal without breaking it.
Paint Integrity and Location
Is the paint cracked or chipped? If you can feel a “catch” with your fingernail, the paint is compromised. DIY pulling methods like glue tabs will likely pull the remaining paint right off the metal. In these cases, How to Get a Dent Out of a Car Hood often involves traditional bodywork rather than simple PDR.
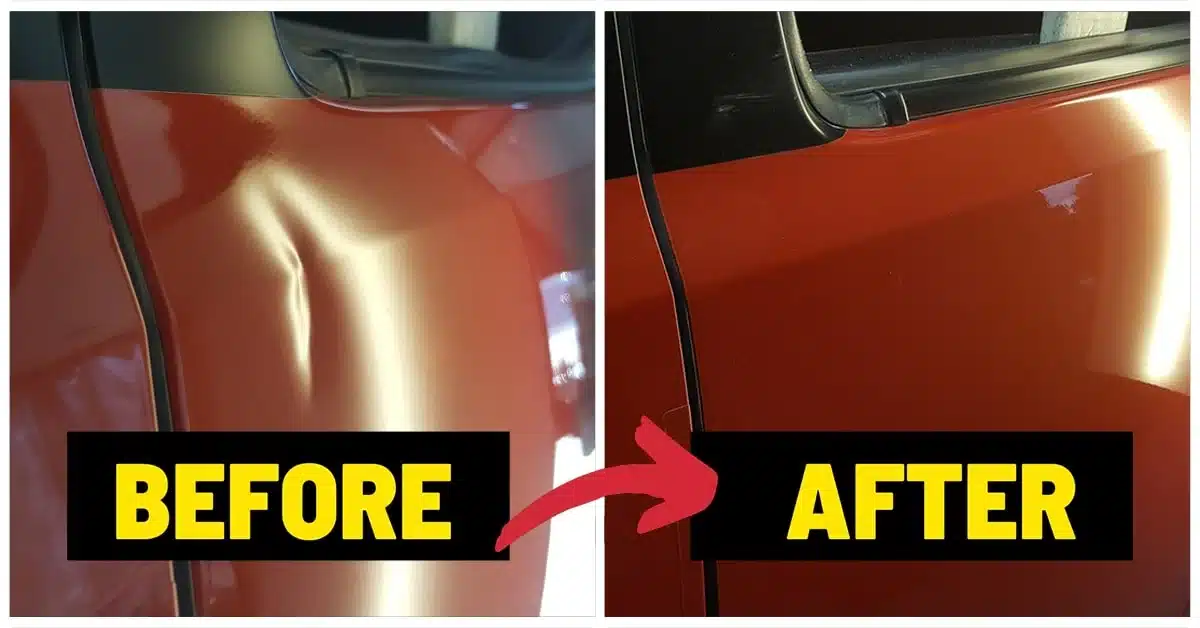
Furthermore, check the location. Is the dent on a flat surface, or does it cross a body line (a crease)? Dents on creases are under much higher tension. If you try to pop these out yourself, you often end up with a “high spot” or a ripple that looks worse than the original ding. Understanding Paintless Dent Repair explains why these complex shapes require a technician’s finesse.
ADAS Sensors: The 2026 Warning
Modern cars are smarter than ever. Many hoods now house or sit near Advanced Driver Assistance Systems (ADAS) like cameras or radar. If your dent is near the front edge of the hood where sensors are located, a DIY attempt could knock them out of calibration, leading to safety issues.
Essential Tools and Preparation for Hood Restoration
If you’ve determined your dent is a “Green Light” for DIY (small, round, steel, intact paint), you need the right kit. Don’t just raid the kitchen junk drawer!

The Pro-Style Toolkit
To get results that don’t look like a science experiment gone wrong, gather these items:
- Isopropyl Alcohol (90% or higher): This is non-negotiable. You must remove all wax and road grime so glue or suction can actually grip the metal.
- Microfiber Towels: To prevent scratching the clear coat while you work.
- LED Line Boards: You don’t need a professional light, but a board with straight black and yellow lines helps you see the “true” shape of the dent by watching how the lines distort in the reflection.
- Heat Gun or Hair Dryer: Metal moves better when it’s warm (but not melting-hot).
- Compressed Air (Canned): For the thermal shock method.
Preparation is 90% of the Job
Start by washing the entire hood. Any dirt trapped under a suction cup or glue tab will act like sandpaper. Once dry, degrease the specific area with alcohol. Following The Complete Paintless Dent Removal Checklist: What You Should Know ensures you don’t skip the small steps that lead to big failures.
Proven Methods for DIY Hood Restoration
The Thermal Shock Method for Car Hood Dent Removal
This is the “magic trick” of the PDR world. It relies on the physics of expansion and contraction.
- Heat the Area: Use a hair dryer or heat gun to warm the dent for about 60-90 seconds. Keep the heat source moving to avoid burning the paint. You want it hot to the touch, but not so hot you can’t leave your hand on it.
- Apply the Cold: Immediately spray the dent with a can of compressed air held upside down. This releases liquid CO2, which is incredibly cold.
- The Pop: The rapid temperature change causes the metal to contract sharply. If the metal memory is strong enough, you’ll hear a distinct “pop” as the dent returns to its original shape.
According to How to Fix Car Hood Dents: Step by Step DIY Guide for All Sizes – CarXplorer , this works best on shallow, round dents that haven’t stretched the metal too far.
Using Glue Puller Kits for Car Hood Dent Removal
For more stubborn dings, a glue puller kit is your best friend. These kits use hot glue tabs and a bridge puller to “lift” the metal from the outside.

- Step 1: Apply a generous amount of specialized hot glue to a tab that fits the size of the dent.
- Step 2: Press the tab into the center of the dent and let it cure for 3–5 minutes.
- Step 3: Attach the bridge puller and slowly turn the knob to apply incremental tension. Don’t try to yank it! You want a slow, steady lift.
- Step 4: Once the tab pops off, use alcohol to clean the residue. If a “high spot” (a small bump) appears, use a plastic knockdown tool to gently tap it back down.
For residents in Concord or Walnut Creek, Mobile Dent Repair is always an option if the glue pulling feels a bit too technical.
Accessing the Underside: The Push Method
If you can get behind the dent, you can “massage” it out. On a hood, this usually means removing the insulation liner (those black plastic clips can be stubborn!).
However, hoods are built with structural braces. Often, the dent is located directly under a brace, making it impossible to reach with a hammer. If you do have access, use a plastic-tipped hammer or a hardwood dowel. Start at the outer edges of the dent and work your way inward in a spiral. Never hit the center first—that’s a recipe for a permanent crease.
Risks, Aftercare, and Prevention Strategies
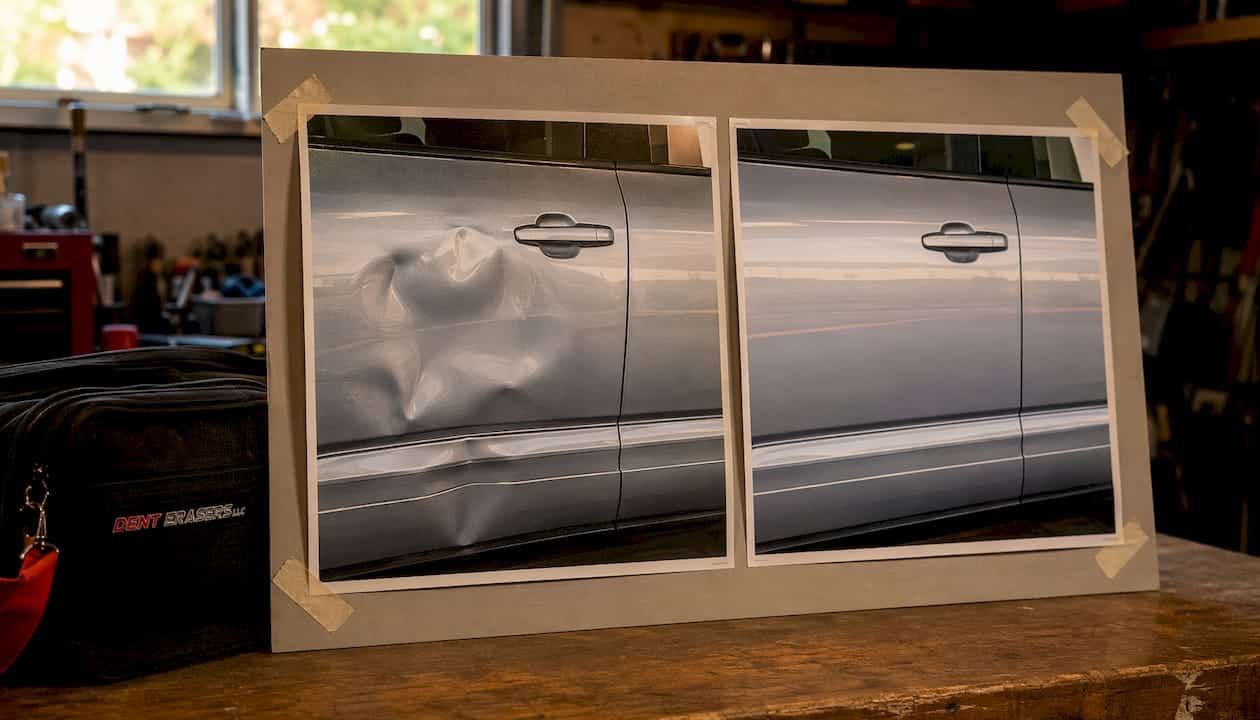
DIY car hood dent removal isn’t without risks. The biggest danger is “stretched metal.” Once metal is stretched beyond its elastic limit, it won’t just pop back; it becomes “oil-canned,” meaning it will flop back and forth like the lid of a tin can.
There is also the risk of paint cracking. Even if the paint looks fine now, the stress of pulling can cause microscopic fractures that lead to rust later. This is one of the 5 Reasons to Choose Paintless Dent Repair Over Traditional Methods—professionals know exactly how much stress the paint can take.
Prevention and Value Loss
A car with visible hail damage or hood dings can lose 10% to 20% of its resale value. To prevent future issues:
- Smart Parking: Avoid parking under oak trees (acorns are hood-dent magnets!) or near shopping cart returns.
- Paint Protection Film (PPF): While it won’t stop a major dent, it can prevent the minor dings and scratches that often accompany them.
Frequently Asked Questions about Hood Dents
How much does professional car hood dent removal cost in 2026?
In April 2026, the cost of professional PDR generally ranges from $150 to $500 for a standard hood dent. If you go to a traditional body shop that requires sanding and repainting, you could easily see estimates between $1,000 and $1,500. For severe damage or older vehicles, a full hood replacement might cost $800 to $2,500 depending on the paint match. If you have dings elsewhere, check our guide on Vehicle Roof Dent Repairs Near You for more pricing context.
Can I use a household plunger on my car hood?
We strongly advise against this. Toilet plungers are designed for drains, not thin automotive sheet metal. They lack the focused suction needed for small dents and the large surface area often causes “rippling” in the surrounding metal. Always use a dedicated automotive suction cup or glue puller.
When should you replace the hood instead of repairing it?
If the dent is located on a structural “crumple zone” or if the metal is sharply kinked, the integrity of the hood is compromised. In a collision, a repaired crease might not fold as the manufacturer intended. If the cost of PDR or bodywork exceeds the cost of a new, painted hood, replacement is the smarter move. However, as seen in our gallery, Timely Hood Dent Repair Saves Last-Minute Car Sale, a quick professional fix is often the best way to save a deal.
When to Seek Professional Paintless Dent Repair Services
At Dent Erasers LLC, we believe in the power of Paintless Dent Repair to keep your car looking showroom-ready without the hassle of a body shop. Whether you’re in Antioch, San Ramon, or right here in Concord, our mobile service comes to you.
We specialize in preserving your car’s original factory paint, which is the single most important factor in maintaining its value. DIY methods are a great way to learn about your vehicle, but when the metal gets stubborn or the dent gets deep, don’t risk a permanent mistake. Give us a call, and let us bring our decades of “metal morphing” expertise to your driveway.