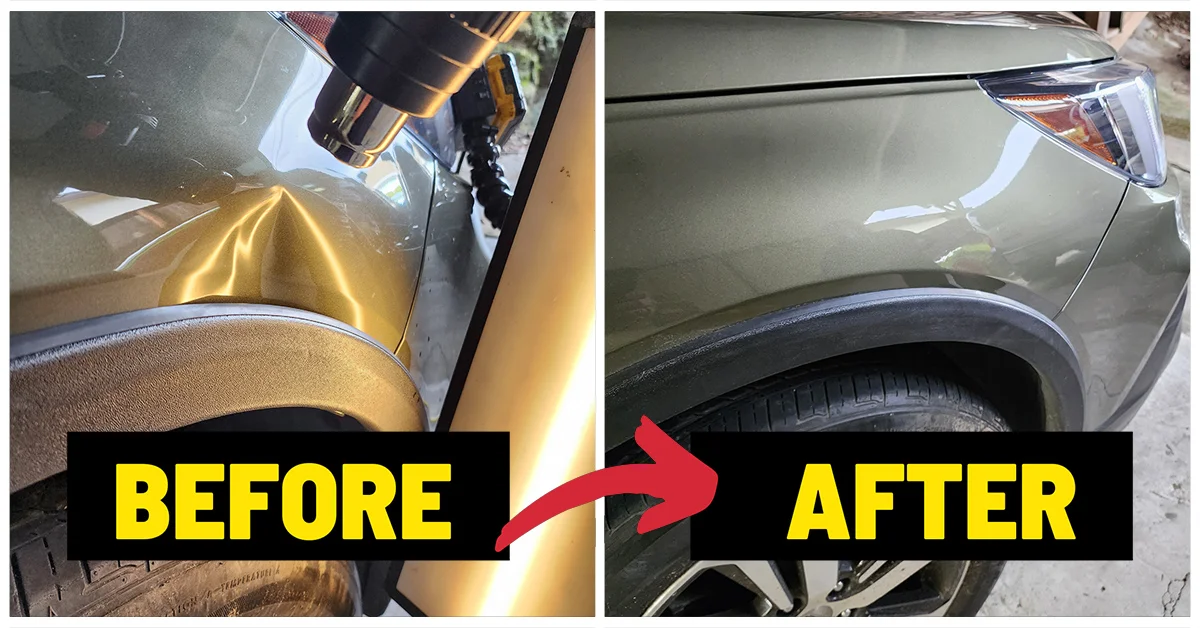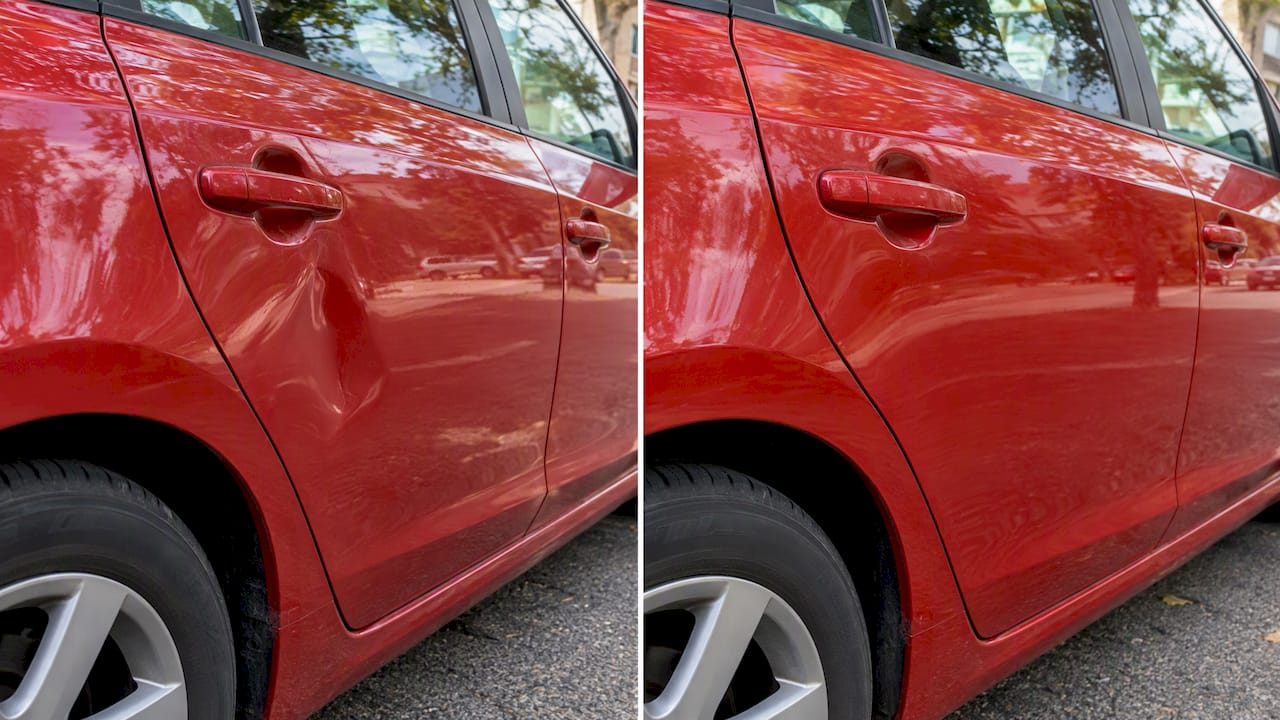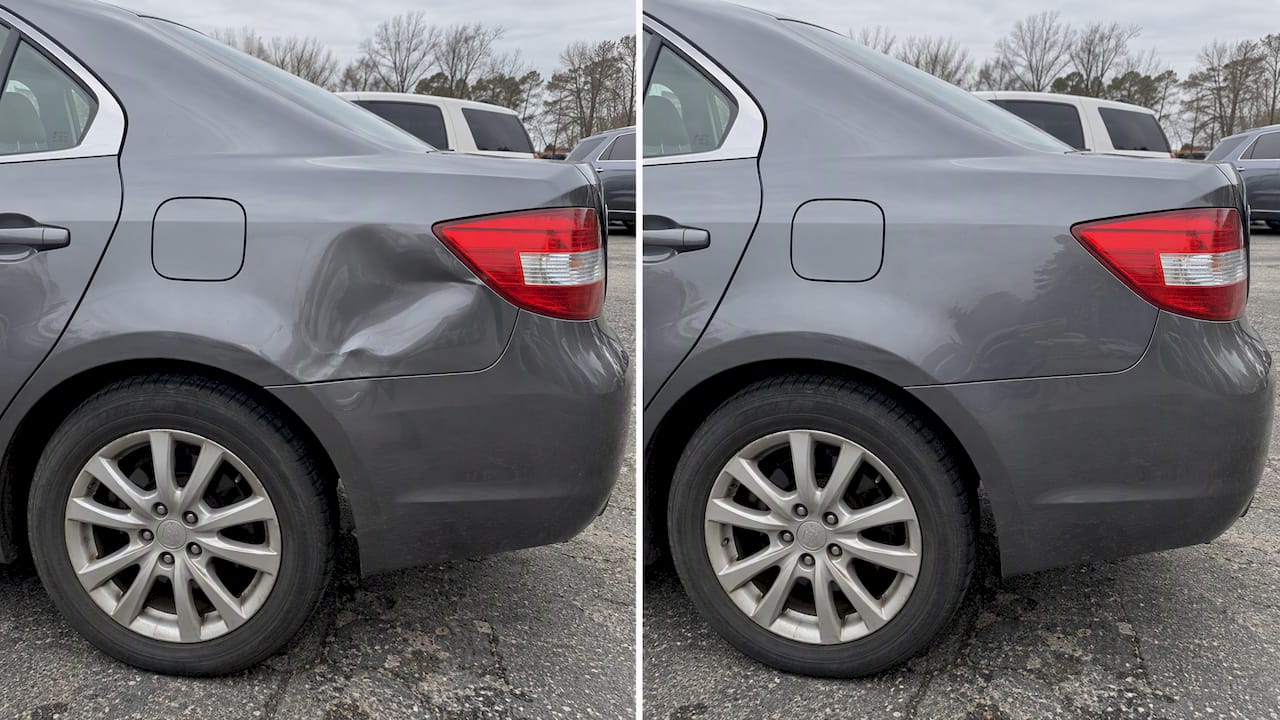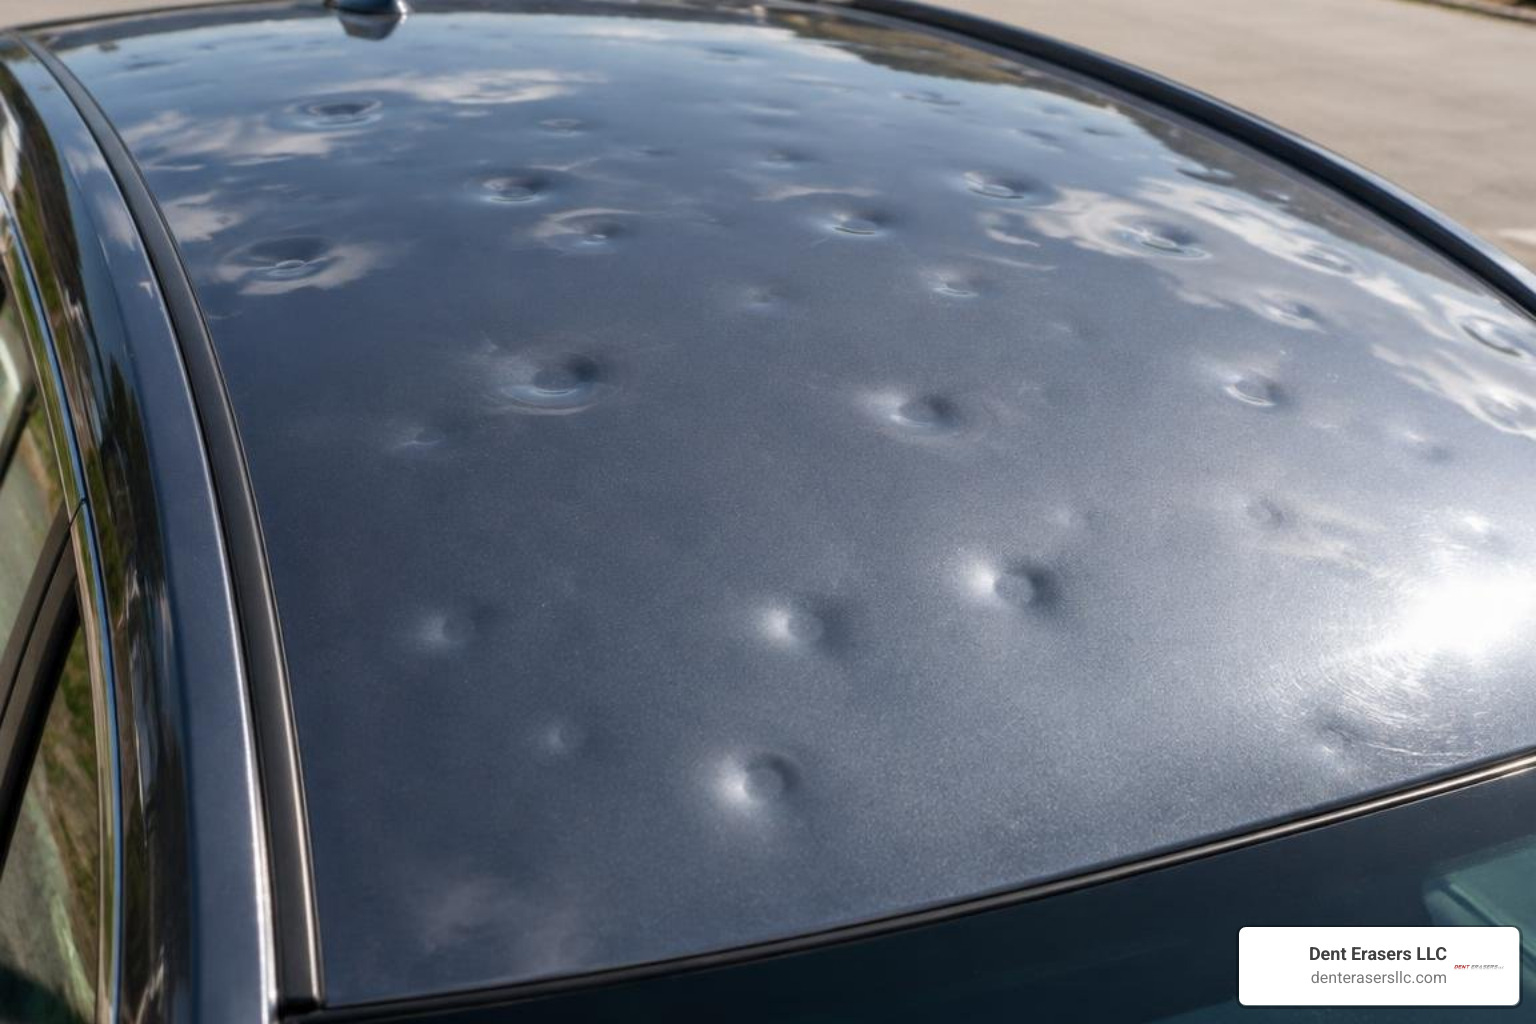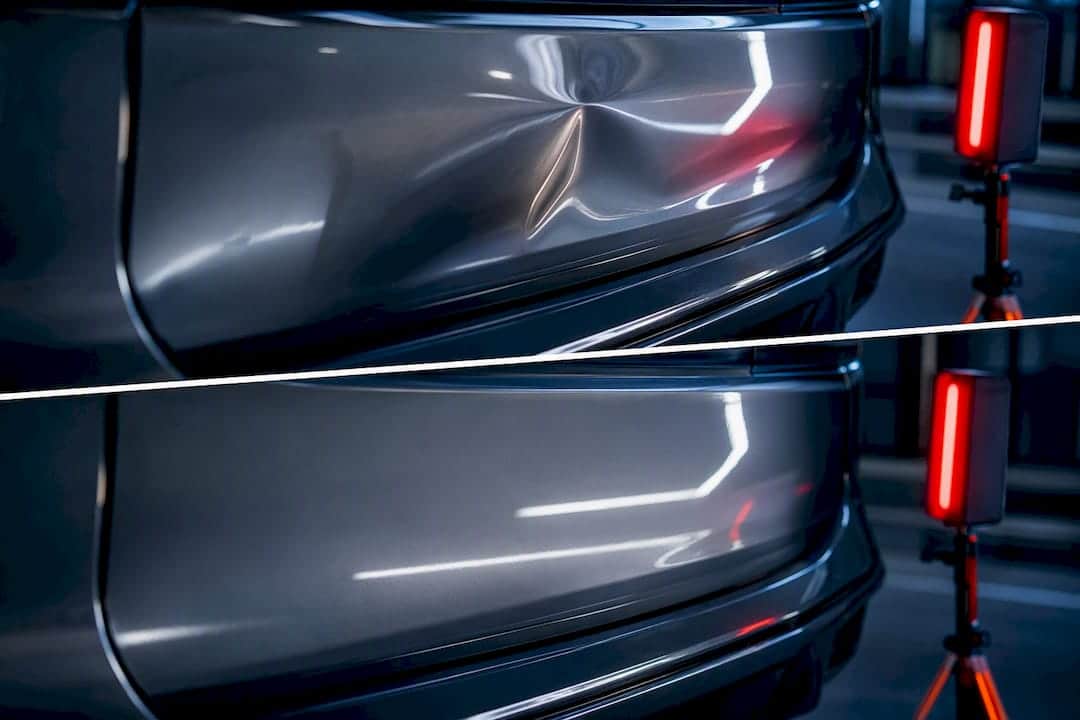
Most shallow SUV tailgate dents with intact paint respond well to paintless dent repair, so a careful DIY attempt is worth your time before you spend a dime. If the paint shows any cracking, the dent sits near the hem flange, or the metal has a sharp crease instead of a smooth low spot, stop and call a mobile PDR technician like Denterasers LLC before you make it worse.
TL;DR:
- Most shallow SUV tailgate dents with intact paint and no cracks are repairable with paintless dent repair, but structural restrictions near the hem flange prevent DIY success.
- Proper access, shape, and material (especially aluminum) are critical; dents near edges, creases, or within restricted zones likely require professional intervention.
- Testing heat and suction first is low-risk; if unsuccessful, glue-tab pulling or internal pushing can work, but stop if paint cracks or the panel responds poorly.
- DIY tools should include a heat gun, suction cup, glue tabs, alcohol, and protective gear, while professional tools and techniques are generally more advanced and reliable.
- If the dent is near structural elements, cracked paint, or within restricted zones, hiring a professional is more cost-effective to avoid worsening damage.
Table of Contents
- How Do You Know If SUV Tailgate Dent Repair Will Work With PDR?
- Step-by-Step DIY Methods for Accessible Tailgate Dents
- What Tools and Materials Do You Actually Need?
- When Should You Stop DIY and Call a Professional?
- What Does Tailgate Dent Repair Cost and How Long Does It Take?
- How Do You Protect a Repaired Tailgate From Future Dents?
- How Denterasers LLC Approaches a Tailgate Dent
- Why Finish Preservation Matters More Than a Quick Fix
- Ready for Professional Mobile Tailgate Repair?
- Sources
- FAQ
How Do You Know If SUV Tailgate Dent Repair Will Work With PDR?
Paintless dent repair works by massaging the metal back to its original shape from behind or around the panel, without touching the paint. That only works when the paint film itself is still whole. Before you touch a heat gun or a suction cup, run through a short checklist. Skip a step here and you risk turning a $200 fix into a $900 one.
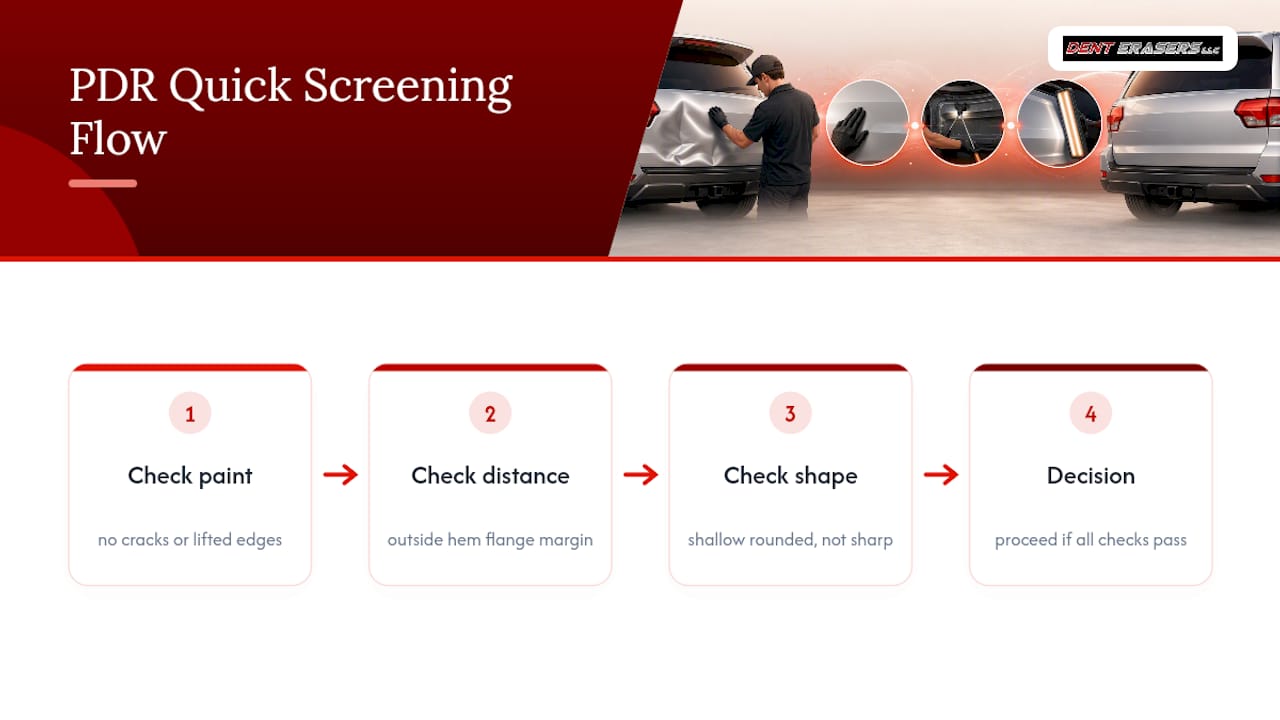
Check the paint first. Take the vehicle into full sun or shine a bright work light across the dent at a low angle. You’re hunting for hairline cracks, a dull haze, or paint that looks slightly lifted at the edges. Any of that means the coating has already failed at a microscopic level, and PDR is off the table.
Check the location next. Measure a small margin in from any edge, seam, or body line. A technical breakdown of PDR limitations confirms that the hem flange, where metal is folded and crimped three layers thick, is a hard no-go zone. Tools can’t get purchase there, and forcing it can pop the factory bond that holds the panel skin to its frame.
Check the shape. A shallow, rounded low spot with soft edges is a good sign. A sharp crease, especially one with a visible ridge or fold, means the metal has likely work-hardened past the point where it wants to spring back. That’s a job for a dolly and filler, not a suction cup.
Check your access. Can you realistically remove the inner access panel, or find a controlled path for a glue-pull bridge? A repairability matrix from SuperPDR lays out five conditions that all have to line up at once: paint condition, metal geometry, panel construction, distance from restricted edges, and a safe route to reach the damage. Miss one and the whole plan falls apart.
Check the material. Aluminum tailgates, common on several late-model SUVs, behave differently than steel. Aluminum has less “memory,” so it needs more patience with heat and sometimes has to be pushed slightly past flush to settle correctly.
Statistic Callout: Industry guidance puts the hem flange no-go zone at a small margin from the panel edge. Dents that fall inside that margin are considered structurally restricted for PDR, regardless of how minor they look on the surface.
Step-by-Step DIY Methods for Accessible Tailgate Dents
If your dent clears every check above, you’ve got a real shot at fixing it yourself. Work through these steps in order, and don’t skip the verification stage. Rushing the last step is how a decent repair turns into a visible high spot.
-
Document and prep. Photograph the dent from three angles in natural light. Park on level ground, out of direct sun, and lay painter’s tape or a microfiber towel around the area to protect the surrounding finish from scratches.
-
Try heat and suction first. Warm the dent with a variable heat gun to roughly 140°F, keeping the gun moving in slow circles so you never scorch one spot. A concentrated blast will blister clear coat fast. Once warm, apply a heavy-duty suction cup or a small suction bridge and pull with steady, even pressure. This step alone rarely reshapes a modern double-walled tailgate, since the internal bracing resists a straight pull, but it’s low-risk and worth trying before you commit to anything more aggressive.
-
Move to glue-tab pulling if suction fails. Match the glue tab size to the dent, roughen the tab surface slightly, and use a hot glue gun to bond it to the lowest point of the dent. Attach a bridge puller or slide hammer and pull in small, controlled increments, checking your progress after every pull rather than yanking repeatedly. When you’re done, release the tab with 91% isopropyl alcohol rather than prying it off, which can gouge the paint.
-
Go internal if the dent still won’t budge. Locate the tailgate’s inner access panel and remove it with the correct Torx driver, usually a T20 or T25 depending on the SUV. Watch for latch cables and wiring harnesses tucked behind the panel. Use a PDR rod or a padded wooden dowel to push gently from the inside, working the edges of the dent inward rather than pushing straight in the center.
-
Handle crowns and creases carefully. If pushing creates a slightly raised high spot (a “crown”), knock it down gently with a nylon punch before doing anything else. Then work the surrounding metal from the outside toward the center in small, patient passes.
-
Verify under real light. Step back and check the reflection of a straight line, a fluorescent shop light, a door frame, anything with a clean edge, across the repaired area. Under a dedicated PDR light or strong sunlight, any remaining low spot or high spot will show up as a distortion in that reflected line.
Pro Tip: Work from the outside edges of the dent inward, never straight down on the deepest point. Pushing the center first almost always creates a new crown you’ll spend twice as long fixing.
Know when to stop. If you see paint lifting anywhere during the process, if the panel starts making a hollow “oil-canning” sound that gets worse instead of better, or if you can’t safely reach the reinforcement behind the dent, put the tools down. A DIY tailgate repair guide notes that suction and boiling-water tricks have real limits on double-walled metal panels, and forcing the issue past that point tends to cost more than it saves.
What Tools and Materials Do You Actually Need?
You don’t need a professional PDR rod set to attempt a simple tailgate dent, but you do need the right basics, and you need to know where the line is between DIY gear and shop-only equipment.
For DIY attempts, keep this kit on hand:
- A variable-temperature heat gun (not a hair dryer, which won’t reach a usable range)
- A heavy-duty suction cup or compact bridge puller
- Quality glue tabs in a few sizes, plus a hot glue gun rated for auto body work
- 91% isopropyl alcohol for clean tab removal
- Nylon knockdown tools for tapping down crowns without marring paint
- Microfiber pads to protect the surrounding finish
Some gear belongs to the professionals for good reason. Full PDR rod sets, the long, curved steel tools technicians use to reach and massage metal from awkward angles, take real practice to use without punching through a panel. Purpose-built PDR lights, precision dolly sets, and the tool-isolation protocols aluminum repair requires (keeping steel tools away from aluminum panels to prevent galvanic corrosion) are worth leaving to someone who works with them daily.
Skip the internet shortcuts. A claw hammer, a plumber’s plunger, or a cheap suction cup meant for a shower door will not move a double-walled steel tailgate, and they’re a fast way to add new dents or scratches. Round out your safety gear with eye protection, heat-resistant gloves, and painter’s tape to keep the repair contained to the area that actually needs it.
When Should You Stop DIY and Call a Professional?
Certain signs mean the smartest move is to put your tools away and pick up the phone. Trying to push past these red flags is how a $200 problem becomes a $900 one.
- Paint that’s cracked, hazy, or lifting at the edges of the dent
- Damage within about an inch of the hem flange or any body seam
- A sharp crease rather than a smooth, shallow low spot
- Metal that feels stretched or has an oil-canning “give” when pressed
- No safe way to reach the backside of the panel
- Dents near backup cameras, sensors, or tailgate-mounted electronics
A qualified technician checks things a home garage usually can’t. They know the panel’s construction (single-wall versus double-wall, steel versus aluminum), whether the manufacturer restricts drilling into the panel for access, and whether the safest plan is pure paintless dent repair or a mixed approach that blends dent work with a small amount of refinishing.
Statistic Callout: According to PDR limitation guidance, a dent only qualifies for paintless repair when paint is intact, the metal hasn’t reached a fracture point, safe backside access exists, and the damage sits outside the hem flange or other restricted structural areas. All four conditions have to hold true at once.
Forcing PDR on a dent that fails one of these checks usually ends one of two ways: the paint cracks further and now needs refinishing anyway, or a glue bond fails mid-pull and stretches the metal beyond what a technician can correct without filler. Either outcome adds cost you were trying to avoid in the first place. If you’re shopping around for the right technician rather than attempting the repair yourself, a guide to choosing a PDR service walks through what separates a solid shop from a rushed one.
What Does Tailgate Dent Repair Cost and How Long Does It Take?
Price and time both come down to one thing: how much of the panel is involved and whether paint is part of the job. For a broader look at how PDR fits into the wider category of dent work, Denterasers LLC’s PDR overview covers the range of panels the technique handles well.
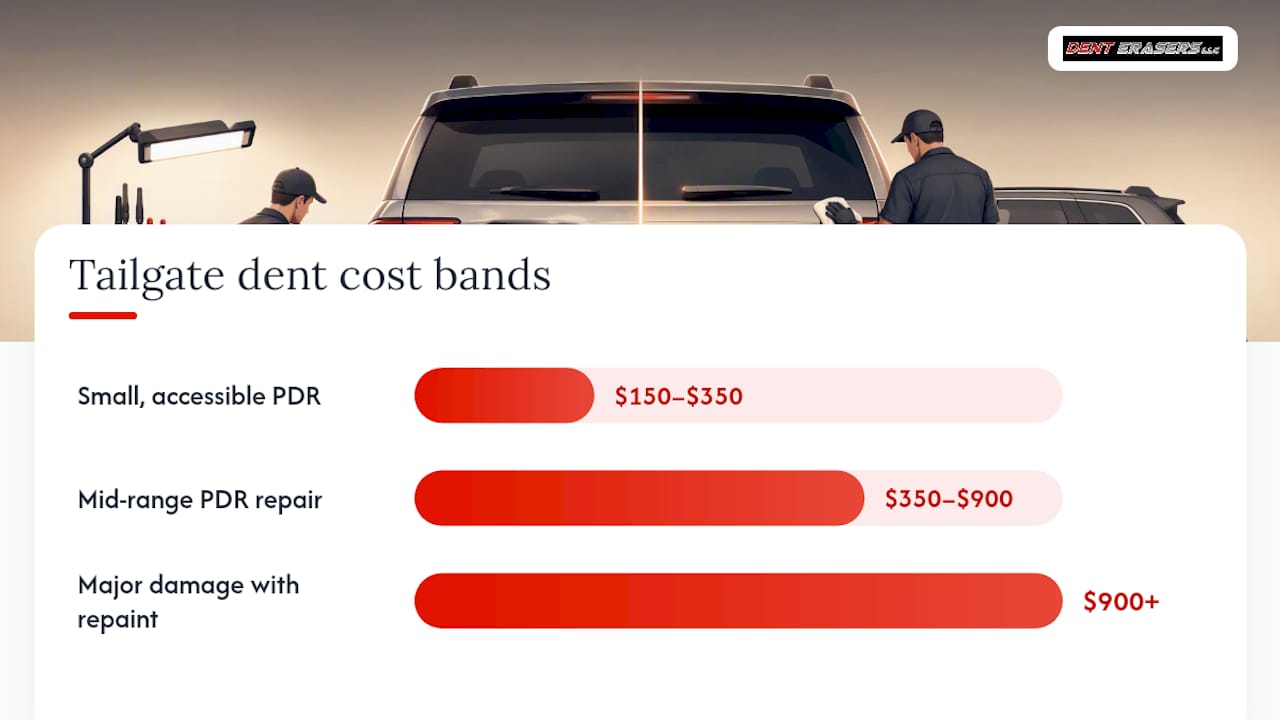
| Repair scope | Typical cost | Typical time |
|---|---|---|
| Small, accessible PDR dent | $150–$350 | 1–2 hours |
| Mid-range PDR repair | $350–$900 | 2–4 hours |
| Major damage with repaint | $900+ | 4 hours or longer |
These bands come from a detailed tailgate dent repair cost guide, which notes that full projects requiring blended paintwork can be significantly more expensive depending on finish and labor.
A DIY attempt itself might cost you nothing but an afternoon and the price of a suction cup and glue tabs, roughly $30 to $60 in materials if you’re starting from scratch. Mobile paintless dent repair appointments generally take a few hours for straightforward dents. Conventional shop repairs that involve pulling and repainting can take several hours and may require additional curing time over multiple days.
Watch for hidden costs that don’t show up in a quick online estimate: mobile service call fees, sensor recalibration if a backup camera or parking sensor sits near the dent, paint blending into adjacent panels to avoid a visible color mismatch, and, in the worst cases, full panel replacement if the metal is too stretched to save.
How Do You Protect a Repaired Tailgate From Future Dents?
Once your tailgate is back in shape, whether you did it yourself or a technician handled it, a little aftercare protects that work.
- Inspect the finish closely a few days after any repair, checking for micro-cracks that weren’t visible right after the work
- Ask a professional repair for a written warranty on the work if one is offered
- Avoid stacking or dragging cargo directly against the tailgate; use a soft liner or corner protectors for anything heavy
- Back into parking spots when you can, rather than pulling forward into tight spaces where the tailgate takes the risk
- Use a bumper or tailgate protector pad when loading gear regularly, especially bikes, coolers, or lumber
- Run a quick diagnostic check if backup cameras or sensors were disturbed during repair, to confirm they’re reading correctly
Small habits like these are the difference between a tailgate that stays smooth for years and one that’s back in the shop by next summer.
How Denterasers LLC Approaches a Tailgate Dent
A mobile technician’s process usually follows a predictable arc, and understanding it helps you know what to expect if you decide DIY isn’t the right call. It typically starts with photo triage, where a customer sends a few clear pictures so the technician can get a rough read on the damage before ever arriving. That’s followed by an in-person inspection at the vehicle’s location, where the eligibility checks covered earlier in this article get applied directly to the panel: paint condition, dent shape, proximity to the hem flange, and access.
From there, the technician either proceeds with straight PDR or recommends a mixed plan that pairs dent work with limited refinishing if paint has already been compromised. The job wraps with a finish check under proper lighting to confirm the contour reads clean from every angle.
A tailgate that looks flawless from three feet away can still hide a faint ripple under the right light. That final check under angled lighting is what separates a repair that holds up from one that gets noticed six months later.
Denterasers LLC documents completed jobs through before-and-after galleries and customer feedback, giving prospective clients a sense of the finish quality to expect before booking.
Why Finish Preservation Matters More Than a Quick Fix
The biggest mistake I see vehicle owners make isn’t a bad pull or an overheated panel. It’s rushing past the eligibility checks because the dent “doesn’t look that bad.” Paint doesn’t crack gradually; it fails at a threshold, and once it does, you’ve converted a paintless job into a paint job. Document the damage before you touch it, respect the hem flange boundary, and if you’re unsure whether what you’re looking at is a shallow low spot or a work-hardened crease, that uncertainty is itself the answer: bring in a mobile technician before you commit. The dent will still be there in an hour. A cracked clear coat won’t wait for you to change your mind.
— Brian Blanc
Ready for Professional Mobile Tailgate Repair?
If your tailgate dent failed even one of the eligibility checks above, a mobile paintless dent repair technician can bring the fix to your driveway instead of asking you to book time off work for a shop visit. A mobile appointment includes an onsite inspection, a straight answer on whether PDR is realistic for your specific dent, the repair itself, and a finish check before the technician leaves.

To get an accurate quote, send clear photos of the dent from a couple of angles, your SUV’s year, make, and model, and your general location. That’s usually enough for an initial estimate before anyone even arrives. Whether the damage is a shallow dent from a shopping cart or a deeper crease that needs a mixed repair plan, you get an honest read on what’s realistic without a trip to a body shop. Visit Denterasers LLC to request a quote or schedule a mobile appointment for your tailgate.
Sources
- What dents can be repaired with PDR? A repairability matrix | SuperPDR
- Tailgate dent repair cost guide – Cost Insider
FAQ
How much does it cost to fix a dent in the tailgate?
Small, accessible PDR repairs typically run $150 to $350, mid-range repairs fall between $350 and $900, and major damage requiring repaint often exceeds $900, according to a detailed cost breakdown.
Can a dented tailgate be fixed?
Yes, most shallow dents with intact paint and safe backside access can be fixed with paintless dent repair, but creases, cracked paint, or damage near the hem flange usually require conventional repair instead.
What dents cannot be fixed with PDR?
Dents with cracked or lifted paint, sharp creases in stretched metal, and damage within about an inch of the hem flange or structural reinforcements are generally not good candidates for paintless repair.
How do you fix a dent in the top of a tailgate?
Start with heat and suction to test for easy movement, then try glue-tab pulling if that fails, and only remove the inner access panel for internal pushing if you have safe, confirmed access to the backside of the panel.
Is it cheaper to DIY a tailgate dent than hire Denterasers LLC?
DIY materials cost roughly $30 to $60, but a failed attempt on a dent that needed professional access can turn a $200 job into a $900 one, so Denterasers LLC’s onsite eligibility check is often the more cost-effective first step for anything borderline.