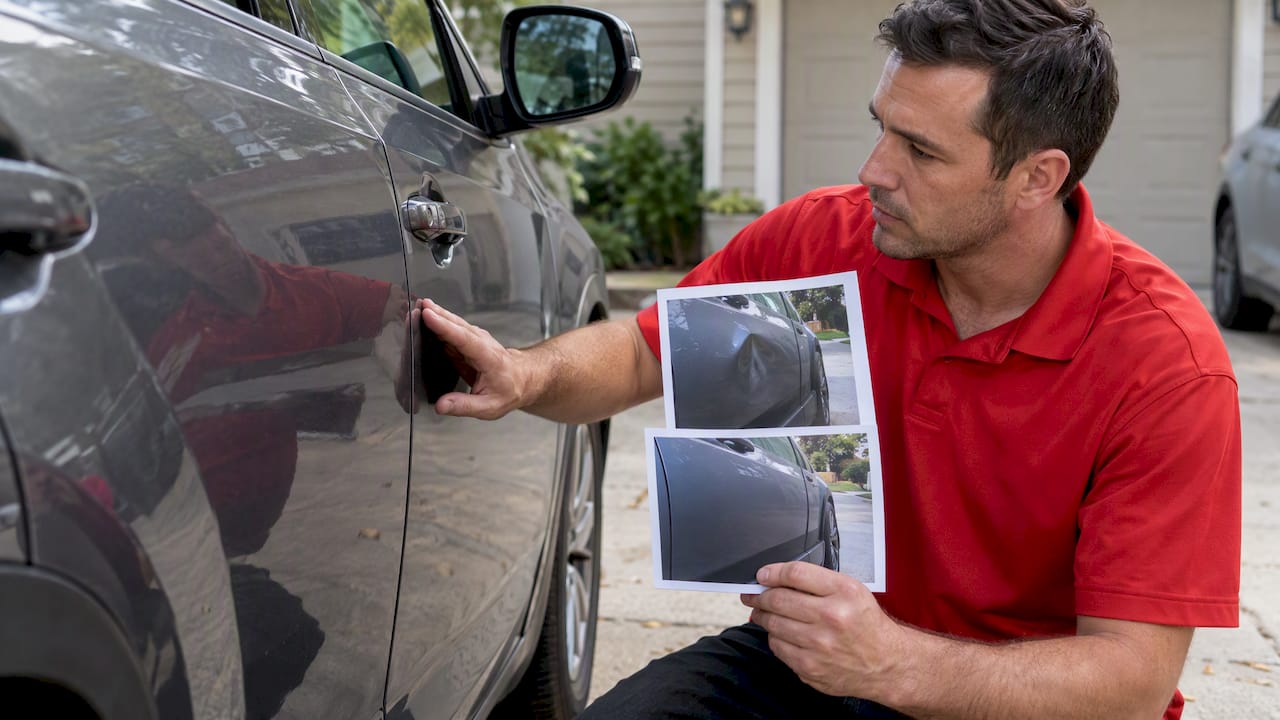
Skip any of those steps and the “quick fix” can turn into a paint, sensor, or rust problem down the road.
TL;DR:
- GM limits repairs in ADAS bumper zones to topcoat refinishing and 13 mils of paint; Rivian permits panel PDR but prohibits drilling for access.
- Require documented 30X magnifier inspections before and after repair, plus restoration of the panel’s backside corrosion coating if tools may have disturbed it.
- Technicians should never drill or cut for access, follow vehicle service procedures for trim removal, and isolate the battery near wiring or sensors.
- Choose level ground away from traffic, use shade, and require eye protection and gloves, adding respiratory protection when solvents or refinishing are involved.
- Request matching before and after photos, a signed inspection checklist, and VIN and OEM notes confirming that the repair avoids restricted sensor zones.
Table of Contents
- 1. On-site safety checklist for mobile PDR
- 2. Vehicle-specific risks: ADAS, radar zones, and OEM repair limits
- 3. Paint integrity, micro-cracking, and corrosion protection after PDR
- 4. Tools, PPE, ergonomics, and workspace controls for safe on-site PDR
- 5. Operational controls: access, electricals, and panel removal rules
- 6. Training, inspection workflow, and documentation
- A field technician’s take on what gets overlooked
- How we build safety into every mobile PDR visit
- FAQ
- Sources
1. On-site safety checklist for mobile PDR
A mobile repair happens in a driveway, a parking lot, or a fleet yard, not a controlled shop bay, so the setup matters as much as the technique. We walk through the same sequence every time, and it’s the same sequence you should expect from anyone working on your vehicle at your curb.
Before the first tool touches the panel, the site itself needs to check out:
- Level, stable ground with the vehicle parked out of active traffic lanes, with cones or a safety vehicle for roadside work.
- Shade, a canopy, or a weather window; direct sun and wind both distort how a dent reads and how paint responds to inspection.
- A clear path around the vehicle, free of cords, tool cases, and curbside hazards.
Once the site is set, the pre-repair inspection takes over:
- Pull the VIN and check OEM service notes for ADAS sensors, cameras, or radar near the damage.
- Run a 30X magnifier across the paint surface before starting, documenting any existing micro-cracking.
- Confirm the dent is reachable through existing access points, with no drilling, cutting, or trim removal needed to get a tool behind the panel.
PPE is non-negotiable even for a job that looks simple: eye protection and gloves at minimum, a respirator and ventilation plan if any solvent or refinishing step is involved, and hi-vis plus hearing protection for anything done near moving traffic.
Tool checks come next: soft, non-marring tips on every rod and tap-down tool, glue-pulling kits used instead of drilling whenever panel access is limited, and clean, direct lighting so the technician can actually see what the metal is doing.
The job isn’t finished when the dent is gone.
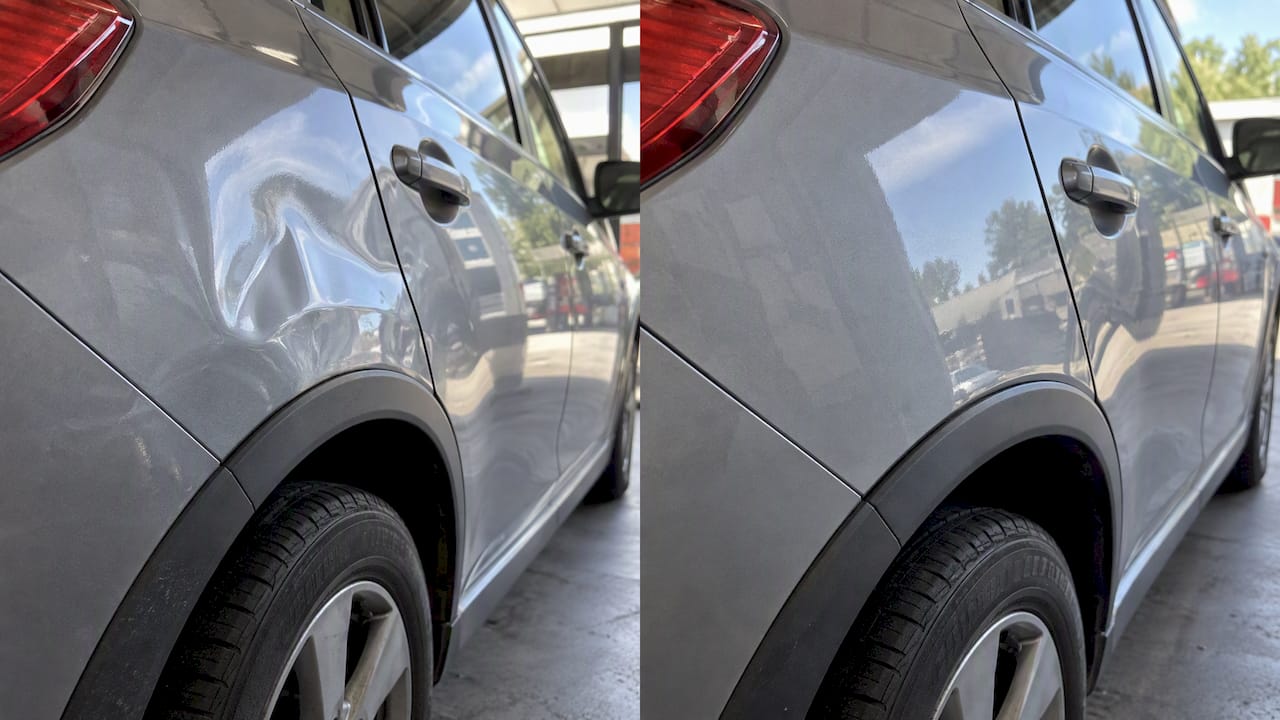
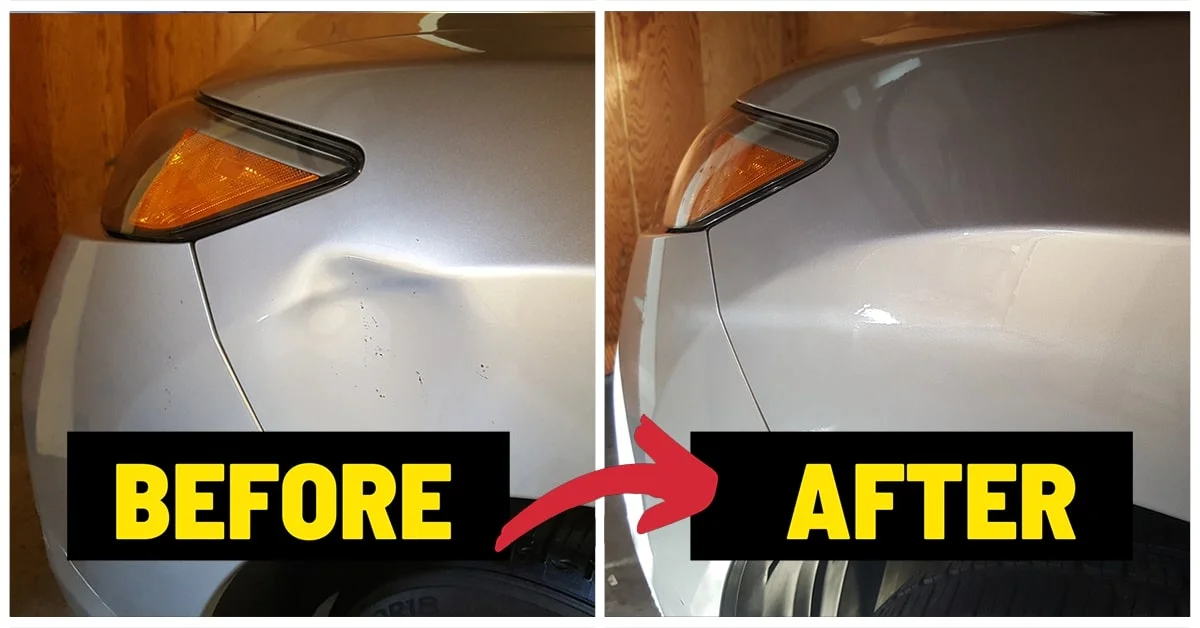
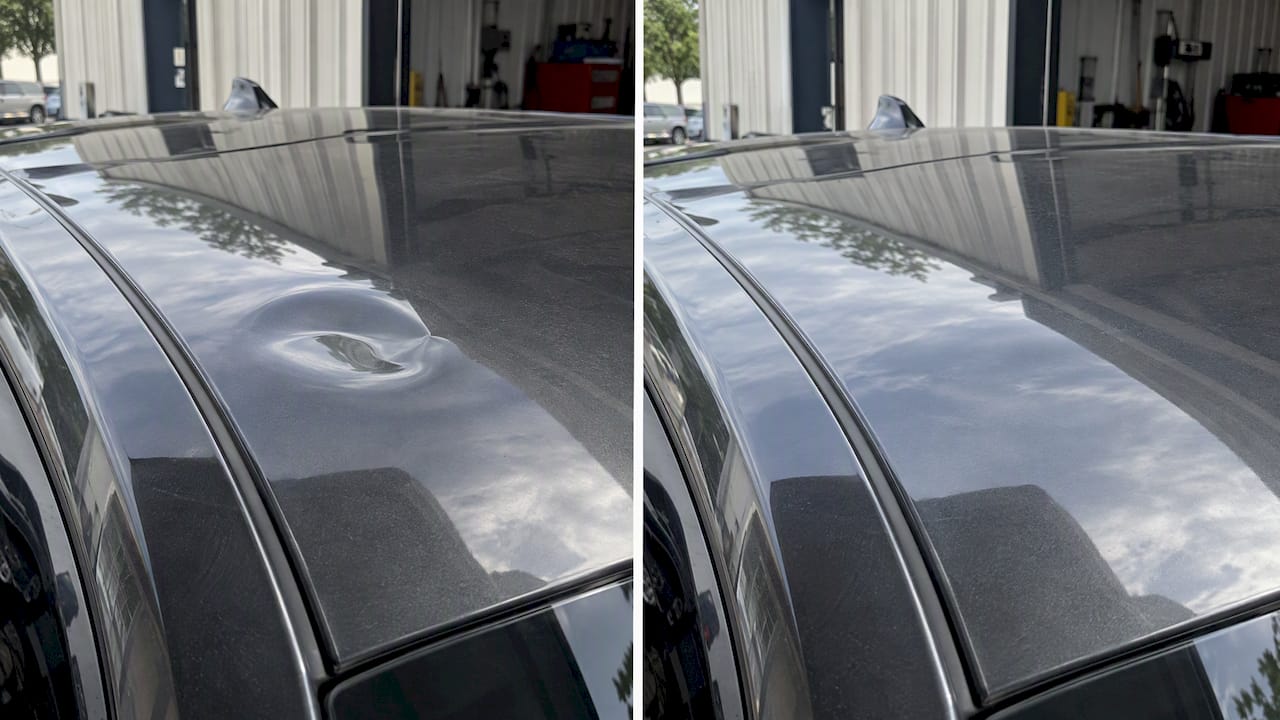
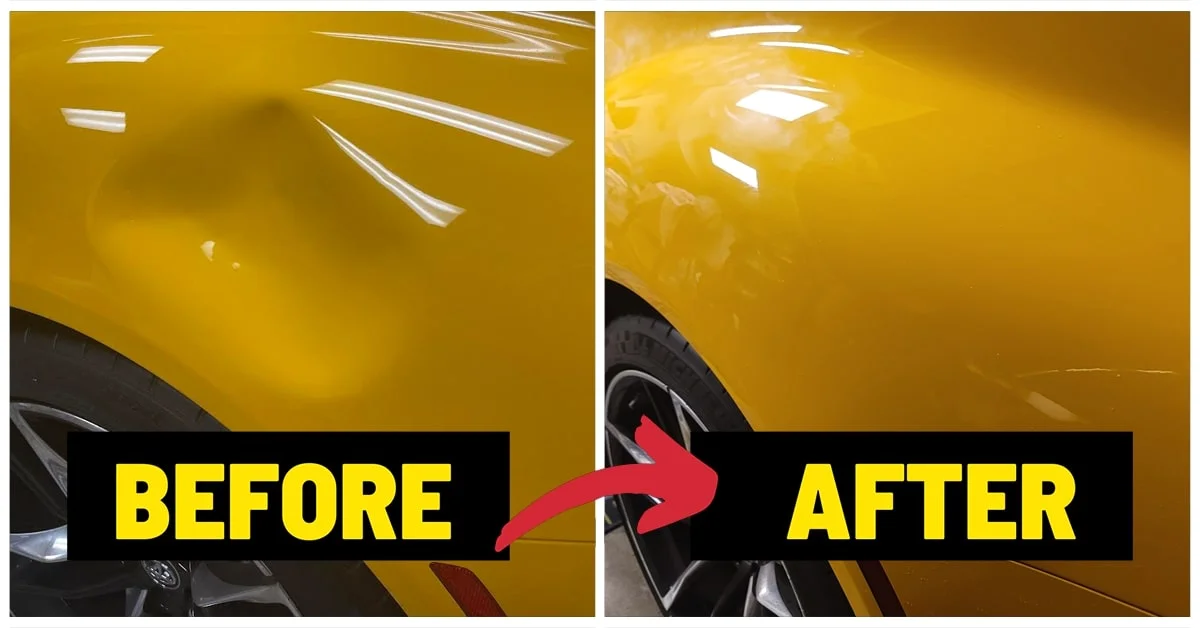
Pro Tip: Ask for before-and-after photos taken under the same lighting. It’s the simplest way to confirm the paint surface wasn’t disturbed.
2. Vehicle-specific risks: ADAS, radar zones, and OEM repair limits
Modern bumpers and quarter panels often hide radar units, cameras, or parking sensors directly behind the sheet metal, and that changes what’s safe to do with a dent tool. GM’s position statement on ADAS-equipped bumper and fascia systems restricts repairs in those zones to topcoat refinishing only, and caps paint thickness at 13 mils so the added material doesn’t interfere with radar transmission.
Other OEMs set similar boundaries, and Rivian’s PDR position statement permits PDR on steel and aluminum panels but forbids drilling or modifying a panel to gain access. Typical constraints you should expect a technician to respect:
- No filler, body solder, or welding anywhere inside a mapped radar or camera zone.
- A maximum paint film thickness in sensor areas, since extra material can distort radar signal return.
- A refinish or panel replacement, rather than PDR, when the damage sits directly over a sensor housing.
Before any mobile visit, ask the technician to confirm the OEM service manual guidance for your specific make and model, or to defer to a shop equipped to follow those procedures when the damage falls inside a restricted zone.
3. Paint integrity, micro-cracking, and corrosion protection after PDR
Paintless dent repair works by massaging the metal back toward its original shape from underneath, and that flexing puts real stress on the paint film sitting on top of it. Technicians check for that stress with a 30X magnifier, run both before the repair starts and again once it’s finished, because Rivian’s guidance requires exactly that check to catch micro-cracking invisible to the naked eye.
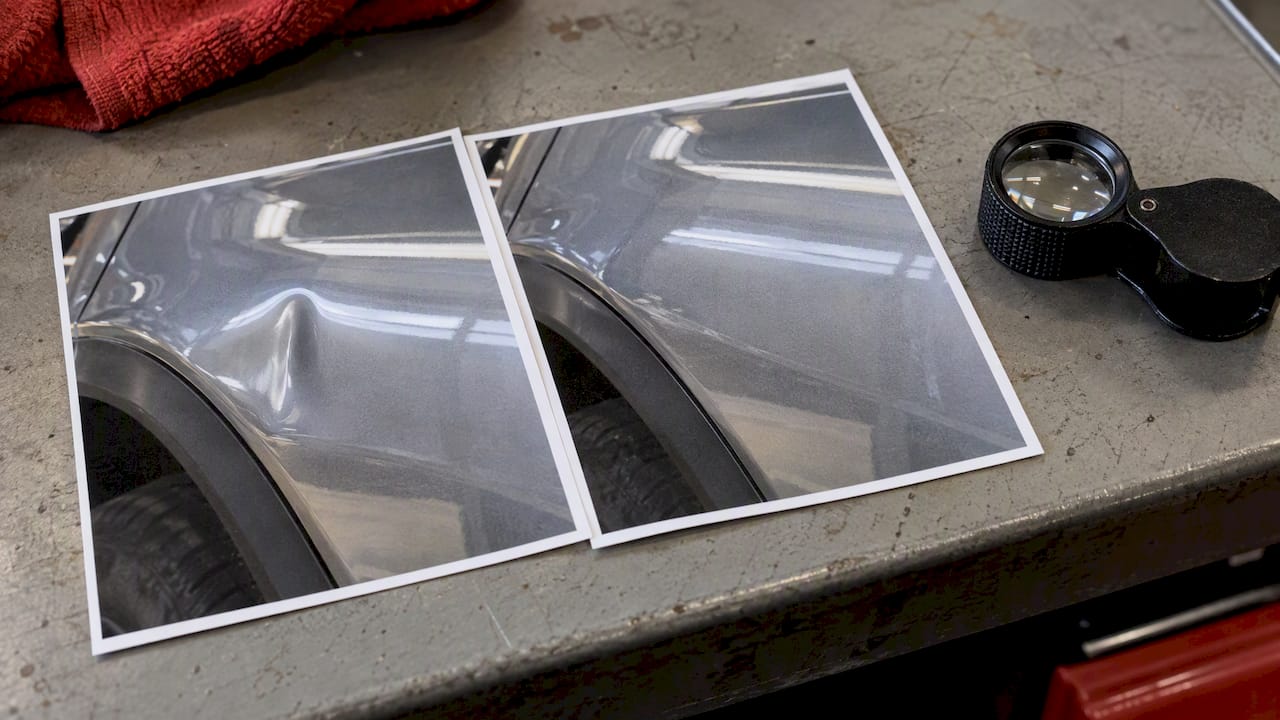
Micro-cracking means the paint’s bond to the substrate has failed in tiny fractures across the surface.
There’s a second, less visible risk: the backside of the panel. I-CAR’s guidance on corrosion protection after PDR notes that the E-coat or wax-based coating protecting the inside of the panel can be scraped or worn away by tool contact during the repair. Treating that backside layer as compromised and restoring it is standard professional practice, not an optional add-on.
- Pre-repair: magnifier check, documented.
- Post-repair: magnifier check again, plus backside corrosion-protection restoration.
Pro Tip: If a technician skips the backside check entirely, ask why. Rust that starts from the inside of a panel is far harder to catch early.
4. Tools, PPE, ergonomics, and workspace controls for safe on-site PDR
The tools that make PDR work without paint damage are mostly about control, not force. Glue-pulling kits, tap-down tools with soft protected tips, and knockdown pens let a technician work the metal gradually, which is why they’re preferred over more aggressive options like push rods in tight or sensitive areas.
PPE needs scale with the job:
- Eye protection and nitrile or latex gloves for every repair, no exceptions.
- A respirator and a documented respiratory protection program, aligned with OSHA’s standards for auto repair and refinishing, whenever solvents or refinishing are part of the job.
- Hi-vis clothing for roadside or lot work where vehicle traffic is present.
Ergonomics matter on mobile jobs because technicians often work at odd angles for extended periods. Rotating positions, using adjustable tool supports, and taking short breaks on longer repairs reduce strain on the hands and shoulders that do the bulk of the work.
Environmental controls round out the setup. Portable dust barriers and electrostatic film keep particulate out of the work area, and NIOSH’s guidance on controlling paint overspray recommends ventilation measures like HVLP spray guns whenever refinishing is required, even in a mobile setting. Products like dust-free protective films are built specifically for this kind of on-site containment.
Pro Tip: A clean, contained work zone isn’t just tidier. It directly protects the paint you’re trying to preserve.
5. Operational controls: access, electricals, and panel removal rules
Some shortcuts that save a technician time create real risk, and a handful of “do not” rules separate careful PDR from careless PDR. Drilling or cutting into a panel to gain tool access defeats the entire purpose of paintless repair and voids the corrosion protection built into that panel at the factory. Push rods, used carelessly in tight cavities, can gouge the backside coating or stress wiring routed behind the panel.
- Never drill or cut a panel solely to create access for a dent tool.
- Use vehicle-specific service manual procedures whenever interior trim, liners, or modules must be removed to reach the dent.
- Isolate the battery before working near wiring harnesses, sensors, or control modules mounted close to the repair area.
Following the service manual sequence for panel and trim removal protects both the vehicle’s electronics and the technician doing the work.
6. Training, inspection workflow, and documentation
A safe repair leaves a paper trail.
Technicians trained on I-CAR curriculum and current OEM position statements are working from the same playbook referenced throughout this guide, and a documented workflow reduces the odds of a missed step turning into a comeback repair.
| Documentation item | Why it matters |
|---|---|
| VIN/OEM ADAS notes | Confirms repair stays outside restricted radar/camera zones |
| 30X magnifier photos (before/after) | Proves paint integrity was checked, not assumed |
| Signed inspection checklist | Creates accountability for each safety step |
| Corrosion-restoration record | Confirms backside protection was reapplied |
A field technician’s take on what gets overlooked
The most common oversight we see isn’t a bad repair, it’s a skipped check. A technician who’s confident in their hands will sometimes trust their eyes over a magnifier, and that’s exactly when small micro-cracking gets missed. Mobile convenience only means something if the factory finish and the panel’s protection survive the visit. Before you sign off on any on-site repair, ask to see the documentation, not just the dent.
— Brian Blanc
How we build safety into every mobile PDR visit
Whether it’s a large dent from a shopping cart or a minor dent that’s bothered you for months, our mobile dent repair comes to your driveway or lot with the same OEM-aware process.

- OEM and ADAS guidance should be checked before touching a panel.
- Every repair should be documented with before-and-after photos and inspection notes.
- Corrosion protection restoration should be a standard closing step.
Request a free dent quote and we’ll walk you through what your specific repair needs before we schedule the visit.
FAQ
How successful is paintless dent repair?
Paintless dent repair restores most dents without filler or refinishing when the paint hasn’t cracked and the metal hasn’t been overstretched. Success depends heavily on access to the panel’s backside and whether the damage falls inside a restricted ADAS zone, which is why a pre-repair inspection matters so much.
Why is my dent puller not sticking?
A glue puller tab usually fails to stick because the paint surface is dirty, oily, or still cold, all of which weaken the adhesive bond. Cleaning the area with isopropyl alcohol and letting the glue cure at the recommended temperature before pulling solves most of these issues.
What tools are used in PDR?
Technicians rely on specialized rods, tap-down tools with soft protective tips, glue-pulling kits, and bright, angled lighting rigs that reveal a dent’s true shape. Glue pulling is generally preferred over rods or push tools when access behind the panel is limited.
What dents cannot be removed?
Dents with sharp creases, paint that’s already cracked, or damage on panels with limited backside access are often poor candidates for paintless repair. In these cases, sanding and refinishing following OEM procedures is the safer and more lasting fix.
Sources
- GM position: Bumper/fascia systems with ADAS
- Rivian position statement — Paintless Dent Repair
- OSHA publications on auto repair and refinishing safety