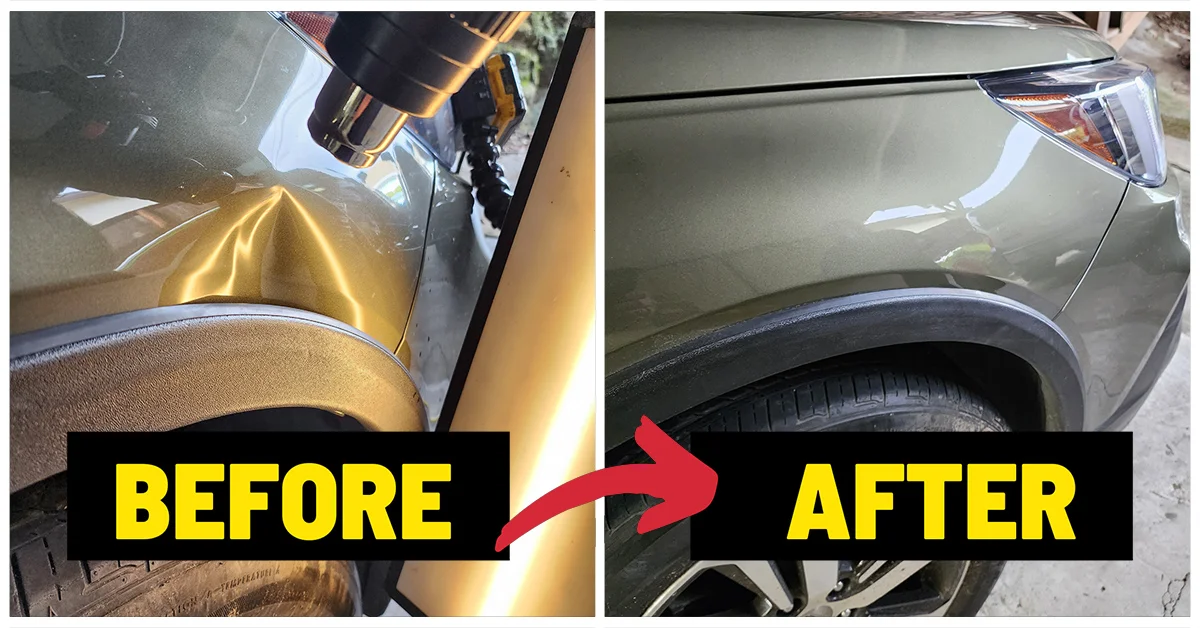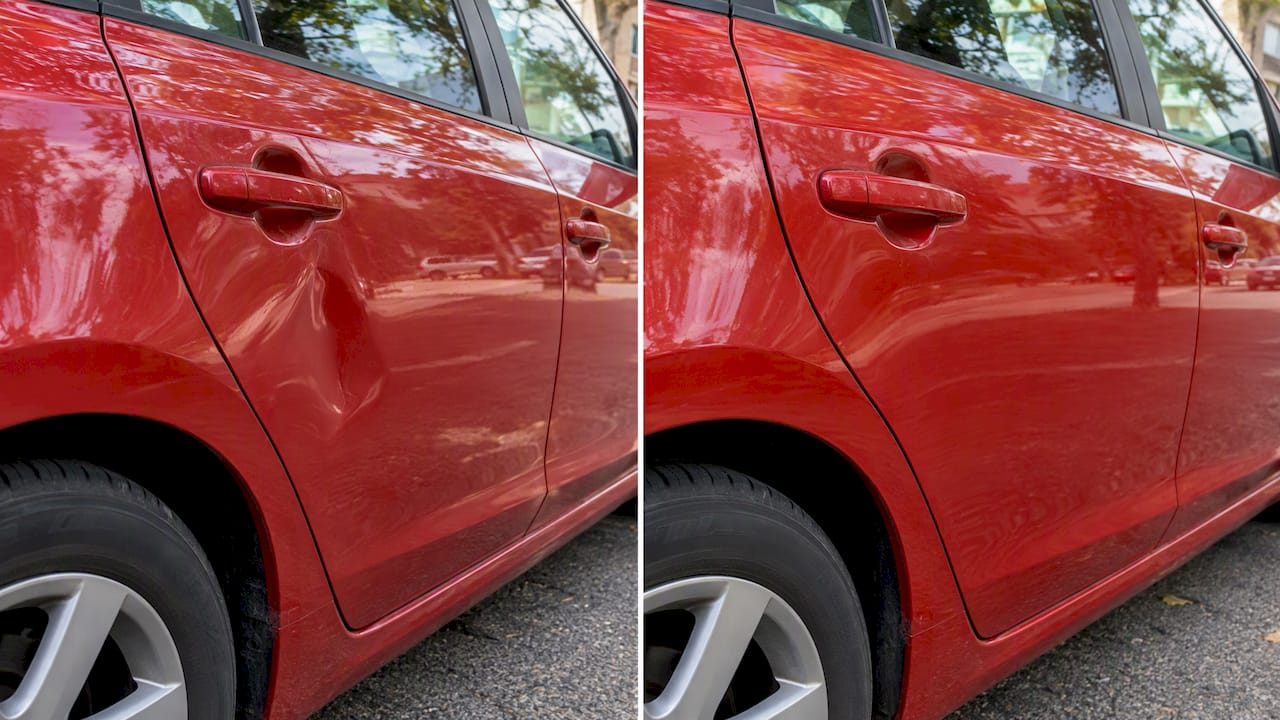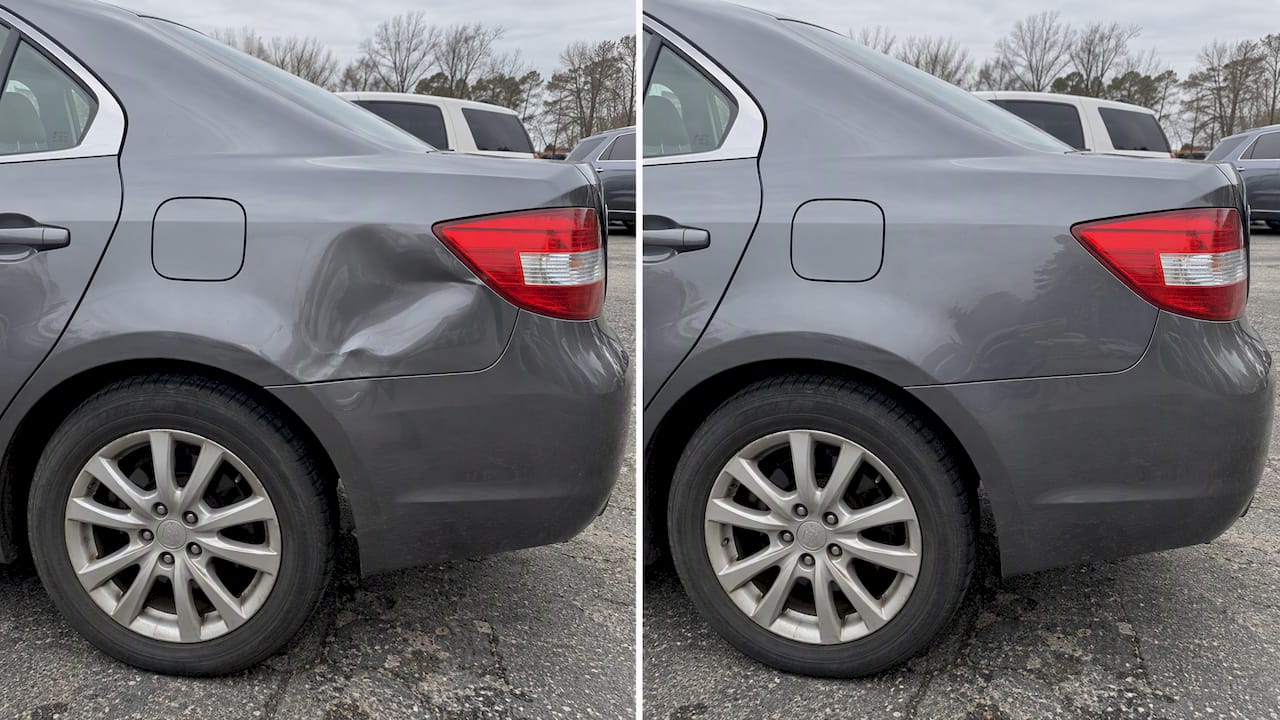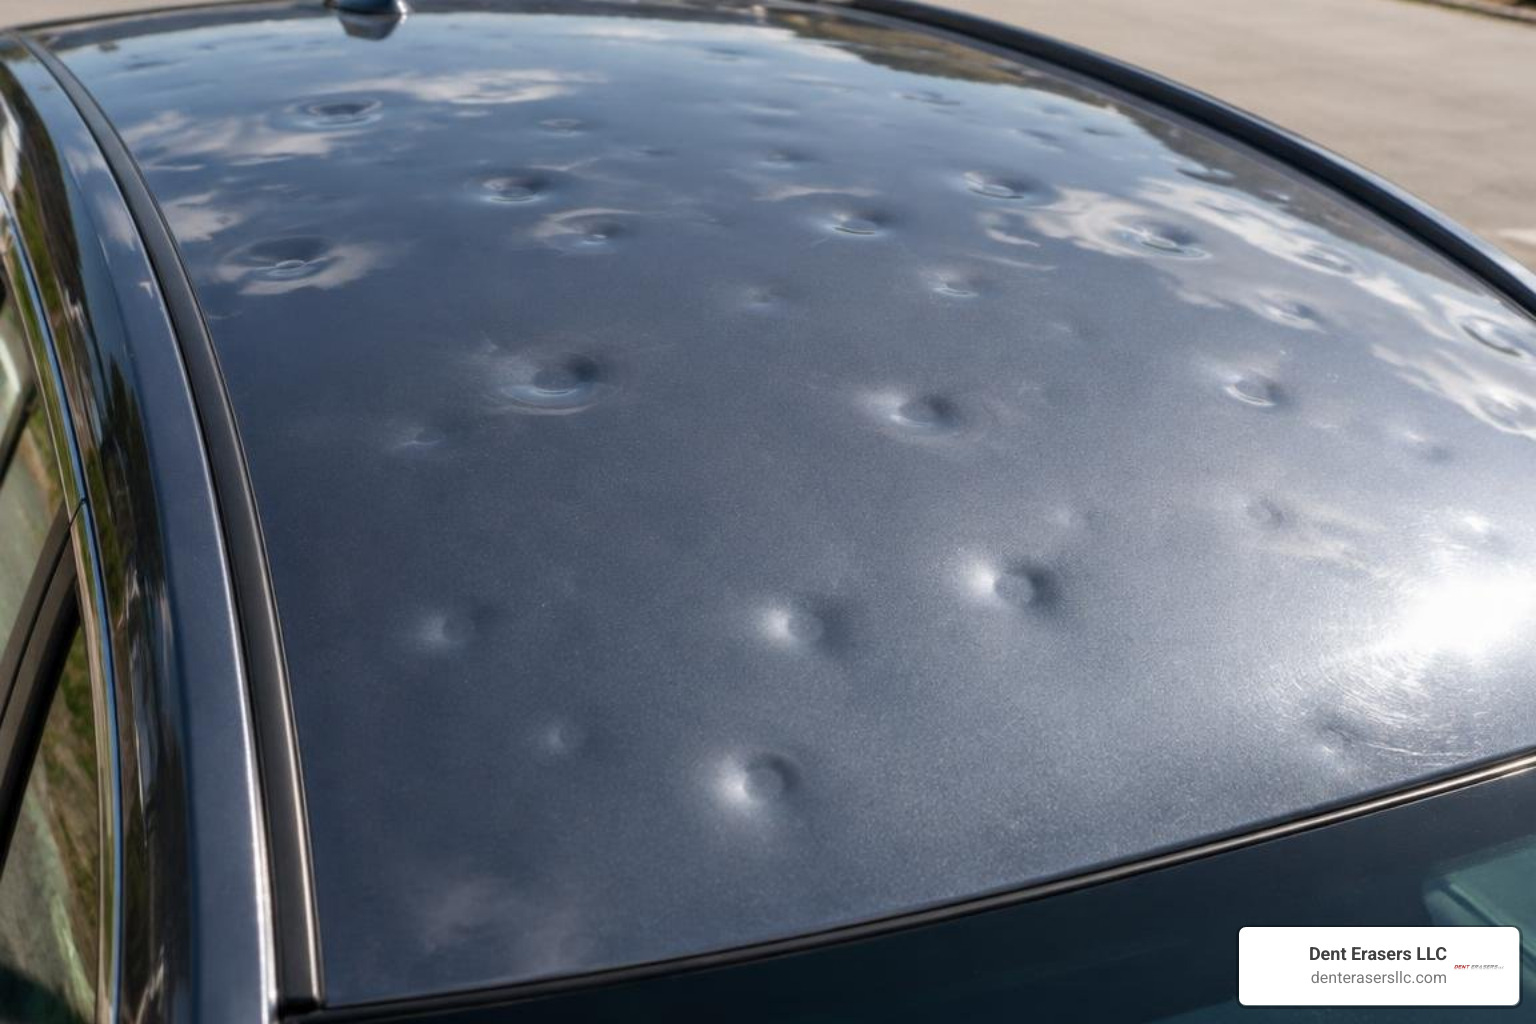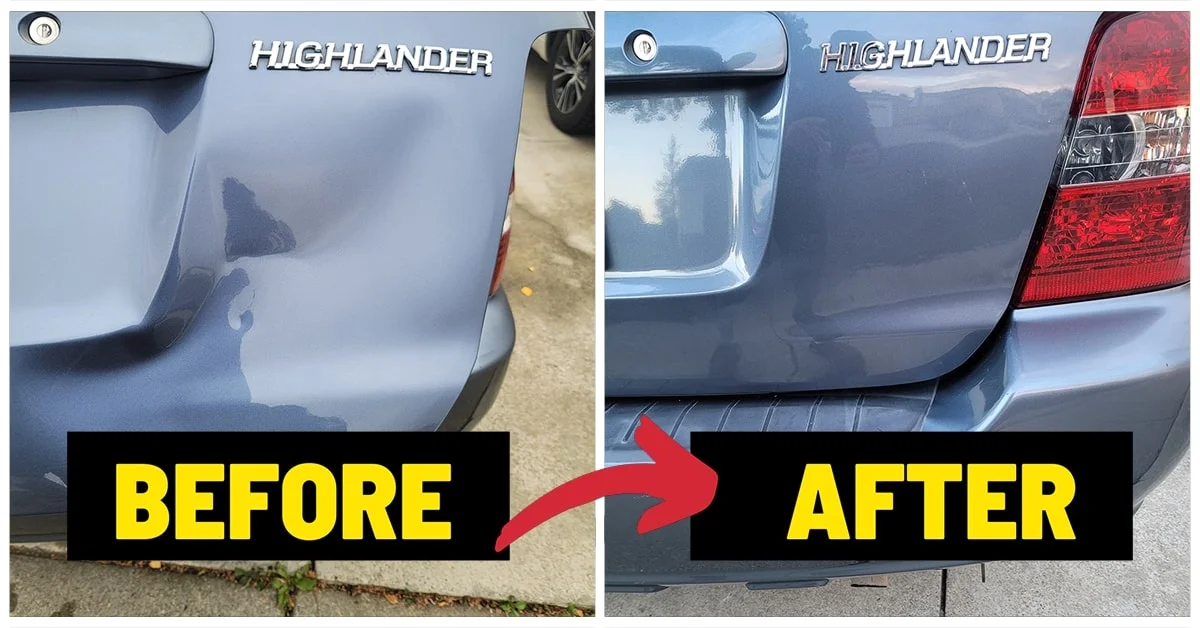
A Simple Hairdryer Method for Plastic Bumper Dent Removal
For a smooth dent with unbroken paint, plastic bumper dent removal can often be done at home with a hairdryer and gentle pressure from behind the bumper. Warm the area evenly, keep the hairdryer moving, then use a blunt plastic or rubber-tipped tool to slowly massage the dent outward. Finish by cooling the reshaped area with cold water or a damp cloth.
This works because many modern bumper covers are flexible thermoplastics, such as polypropylene or TPO. Controlled heat makes the plastic more pliable and helps it return closer to its factory shape. Do not force cold plastic, use sharp tools, or try this method on a cracked bumper, sharp crease, damaged mounting tab, or area near sensors without checking for hidden damage first.
A hairdryer is the gentler starting point for minor dents. It takes more patience than a heat gun, but it gives busy vehicle owners more control and lowers the risk of overheating paint.
I am Brian Blanc, and I have spent nearly three decades working in paintless dent repair through Dent Erasers LLC. My experience with plastic bumper dent removal focuses on restoring everyday and high-end vehicles while protecting the original finish whenever the damage allows it.
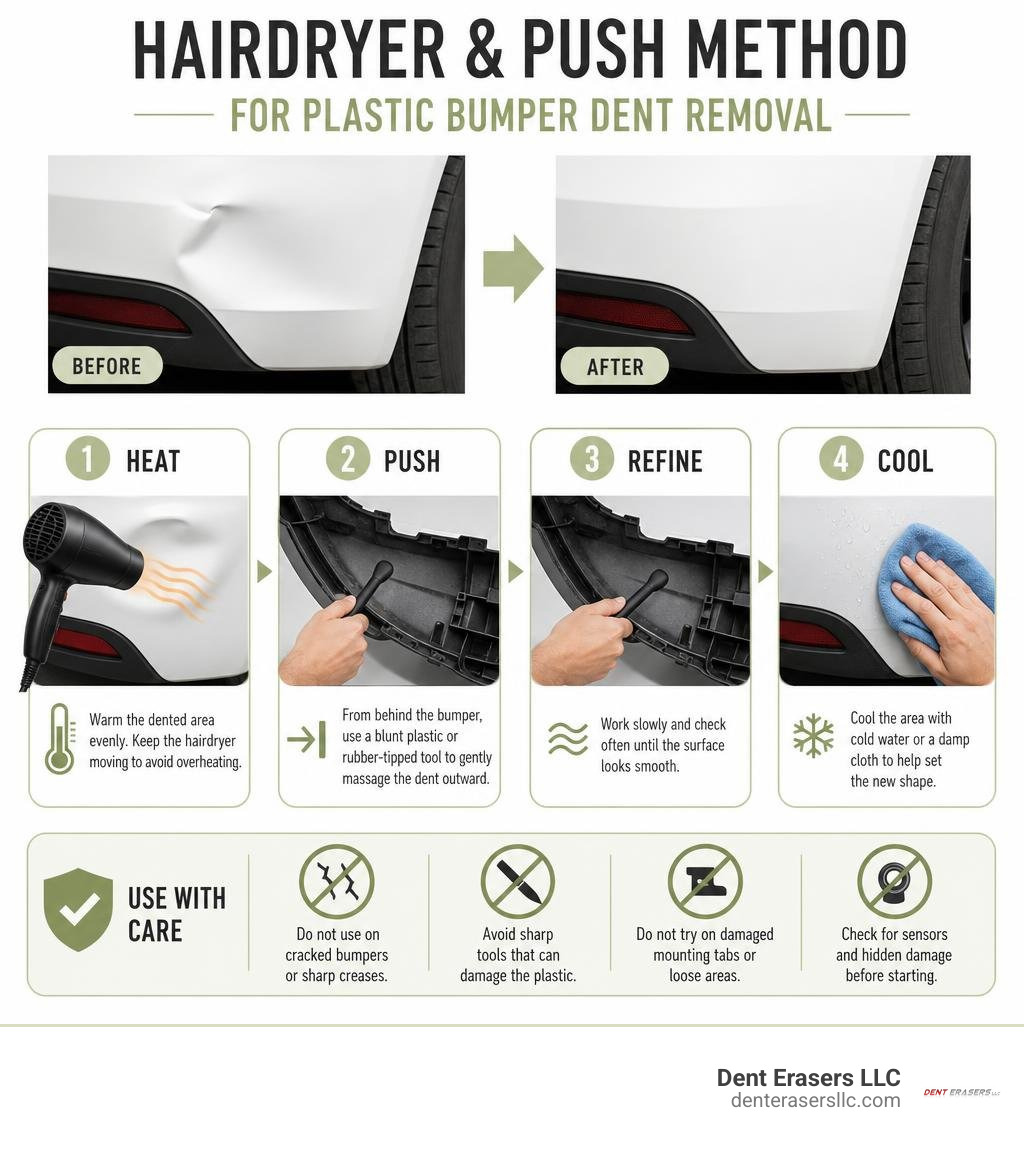
Learn more about plastic bumper dent removal:
Understanding Polymer Thermal Memory in Modern Bumpers
Modern vehicle bumpers are engineering marvels designed to protect pedestrians, improve aerodynamics, and absorb low-speed impact energy. Unlike vintage chrome-plated steel bars, contemporary bumper covers are molded from advanced polymers, primarily Thermoplastic Olefin (TPO) and Polypropylene (PP) blends.
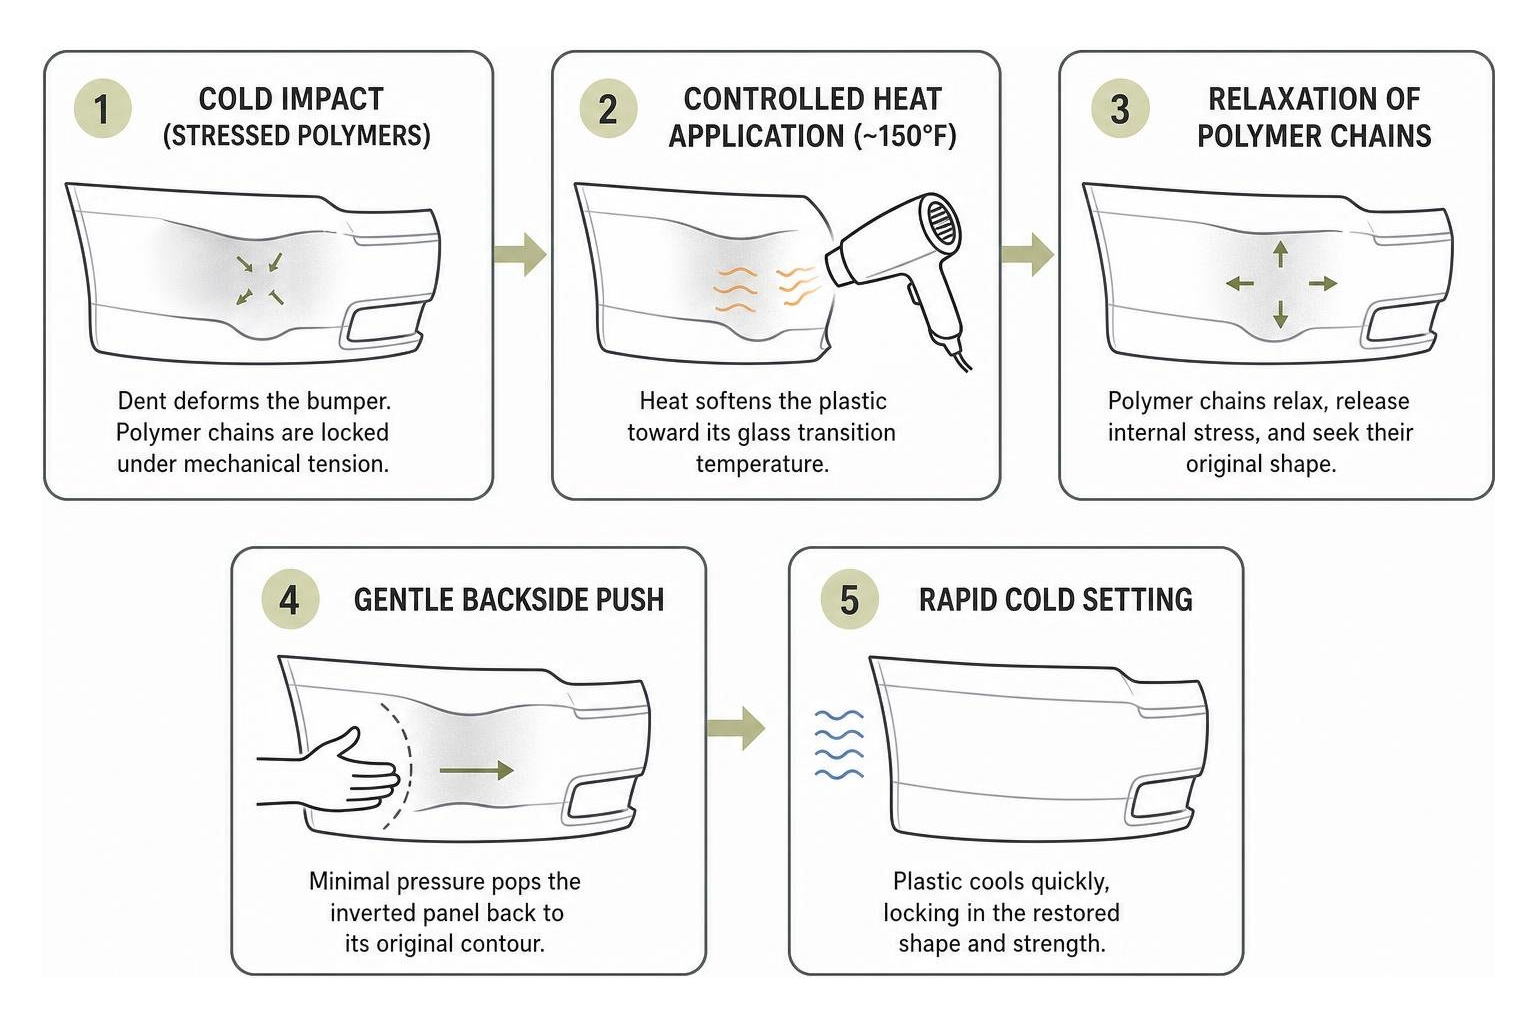
These materials possess a distinct mechanical characteristic known as polymer thermal memory. During the manufacturing process, high-pressure injection molding forces molten plastic into a specific mold. As it cools, the semi-crystalline polymer chains organize into a low-stress matrix that “remembers” that precise factory contour.
When your bumper suffers a low-speed impact—like nudging a parking garage bollard or low wall—the plastic deforms, but the molecular chains often do not break. Instead, they remain locked under mechanical tension.
By applying controlled thermal energy, you raise the material toward its glass transition temperature (around 140°F to 160°F). At this threshold, the polymer chains relax, release internal stress, and naturally seek their original baseline shape. Attempting to force cold plastic back into place without heat leads to “stress whitening”—a permanent micro-fracturing of the polymer matrix that leaves unsightly pale streaks or causes brittle cracking. Exploring a detailed guide on DIY thermal memory hacks reveals how thermal physics allows flexible automotive panels to recover without harsh mechanical stretching.
How Thermal Physics Powers Plastic Bumper Dent Removal
The core principle behind thermal dent repair is the reduction of yield strength under heat. Cold automotive plastics are rigid and resist reshaping. When heated to roughly 150°F, the molecular bonds become pliable enough that minimal manual pressure pops the inverted panel back outward.
Understanding this behavior is central to our daily work at Dent Erasers LLC. Performing a successful plastic bumper repair hinges on softening the thermoplastic without crossing into the danger zone above 200°F, where plastic can permanently stretch, sag, or compromise factory paint coats.
Pre-Repair Assessment: Smooth Dents vs Sharp Creases
Before pulling out extension cords and tools, you must carefully evaluate the damage. Not every dent is an ideal candidate for DIY heat manipulation.
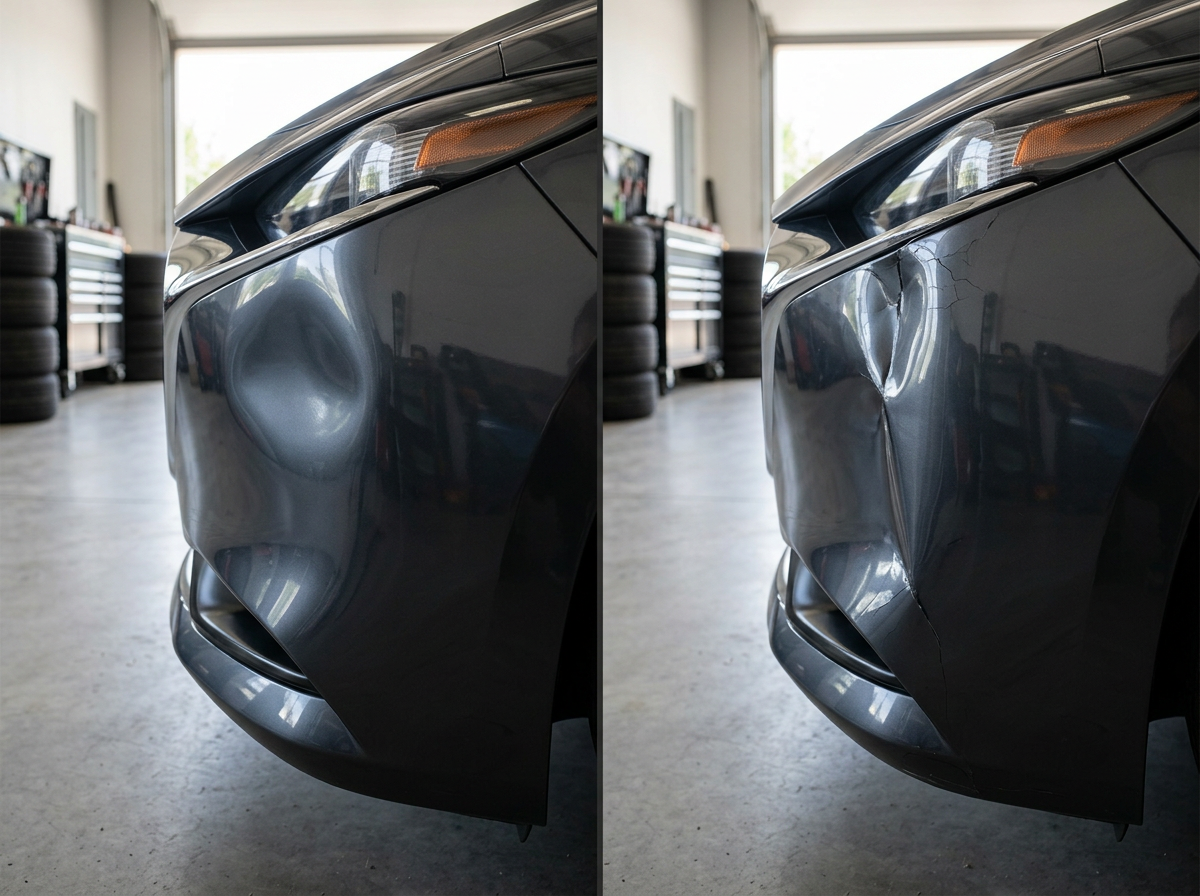
Look for these key indicators during your visual and physical inspection:
- Dent Profile: Wide, smooth, shallow indentations (under 1 to 2 inches deep) on flat or gently curved areas are prime candidates. Sharp, folded creases indicate the plastic has been mechanically stretched or pinched past its yield limit.
- Paint Integrity: Inspect the clear coat and color coat with a flashlight. If the paint is intact and flexible, thermal manipulation will likely succeed. If the paint shows web-like spider cracks, peeling, or deep gouges down to raw plastic, heating may widen those cracks.
- Mounting Tabs and Brackets: Modern bumper covers snap into place with fragile plastic tabs designed to break under specific loads. Check the seams where the bumper meets the fender. If the gap is uneven or clips are sheared, the bumper won’t align properly even if the dent is removed.
- Foam Energy Absorbers: Situated directly behind the plastic shell is an expanded polystyrene (EPS) foam block or honeycomb structure. If this single-use safety component has been crushed flat during impact, popping the plastic out will cosmetically hide the damage, but the vehicle’s low-speed impact protection is compromised.
Step-by-Step Guide to Plastic Bumper Dent Removal with Heat
Approaching this project systematically ensures you don’t trade a cosmetic dent for scorched clear coat or broken clips.
Essential Tools and Materials
- Household Hairdryer: 1500–1800 watts provides adequate heat output without the extreme 1000°F risks of an industrial heat gun.
- Heavy-Duty Heat-Resistant Gloves: Thick work gloves or silicone grill gloves protect your hands when touching heated plastics.
- Blunt Push Tools: A wooden dowel with rounded ends, a rubber-handled mallet, the smooth handle of a screwdriver, or a specialized plastic reshaping wedge. Never use sharp metal rods.
- Automotive Trim Removal Kit: Plastic pry bars to safely unhook splash guards and inner fender clips without gouging vehicle paint.
- Bucket of Ice Water & Microfiber Towels: Used to rapidly cool and set the plastic once reshaped.
- Infrared Thermometer (Optional but recommended): To monitor surface temperatures and avoid exceeding 180°F.
Gaining Access Behind the Bumper Cover
To push a dent out cleanly, you need physical access to the reverse side of the bumper cover. Forcing a dent out from the front using makeshift suction often fails if the dent is firm.
- Park on Level Ground: Engage the parking brake and turn the front wheels inward to create maximum clearance inside the wheel well.
- Locate Retaining Hardware: Inspect the inner fender liner (splash guard) inside the wheel arch and the aerodynamic valance underneath the bumper. Modern vehicles use plastic push-pin clips, Phillips screws, or 8mm/10mm bolts.
- Remove Clips Safely: Slide a plastic pry tool under the center pin of the plastic fasteners to release the expansion lock, then pull the clip free. Remove 3 to 5 clips along the bumper edge.
- Peel Back the Liner: Gently fold back the flexible splash shield to expose the hollow cavity behind the dented bumper corner. Shine a work light inside to check for hidden wiring harnesses, parking sensors, or metal bumper reinforcements.
Mastering the Hairdryer Technique for Plastic Bumper Dent Removal
Applying heat correctly requires patience and continuous movement.
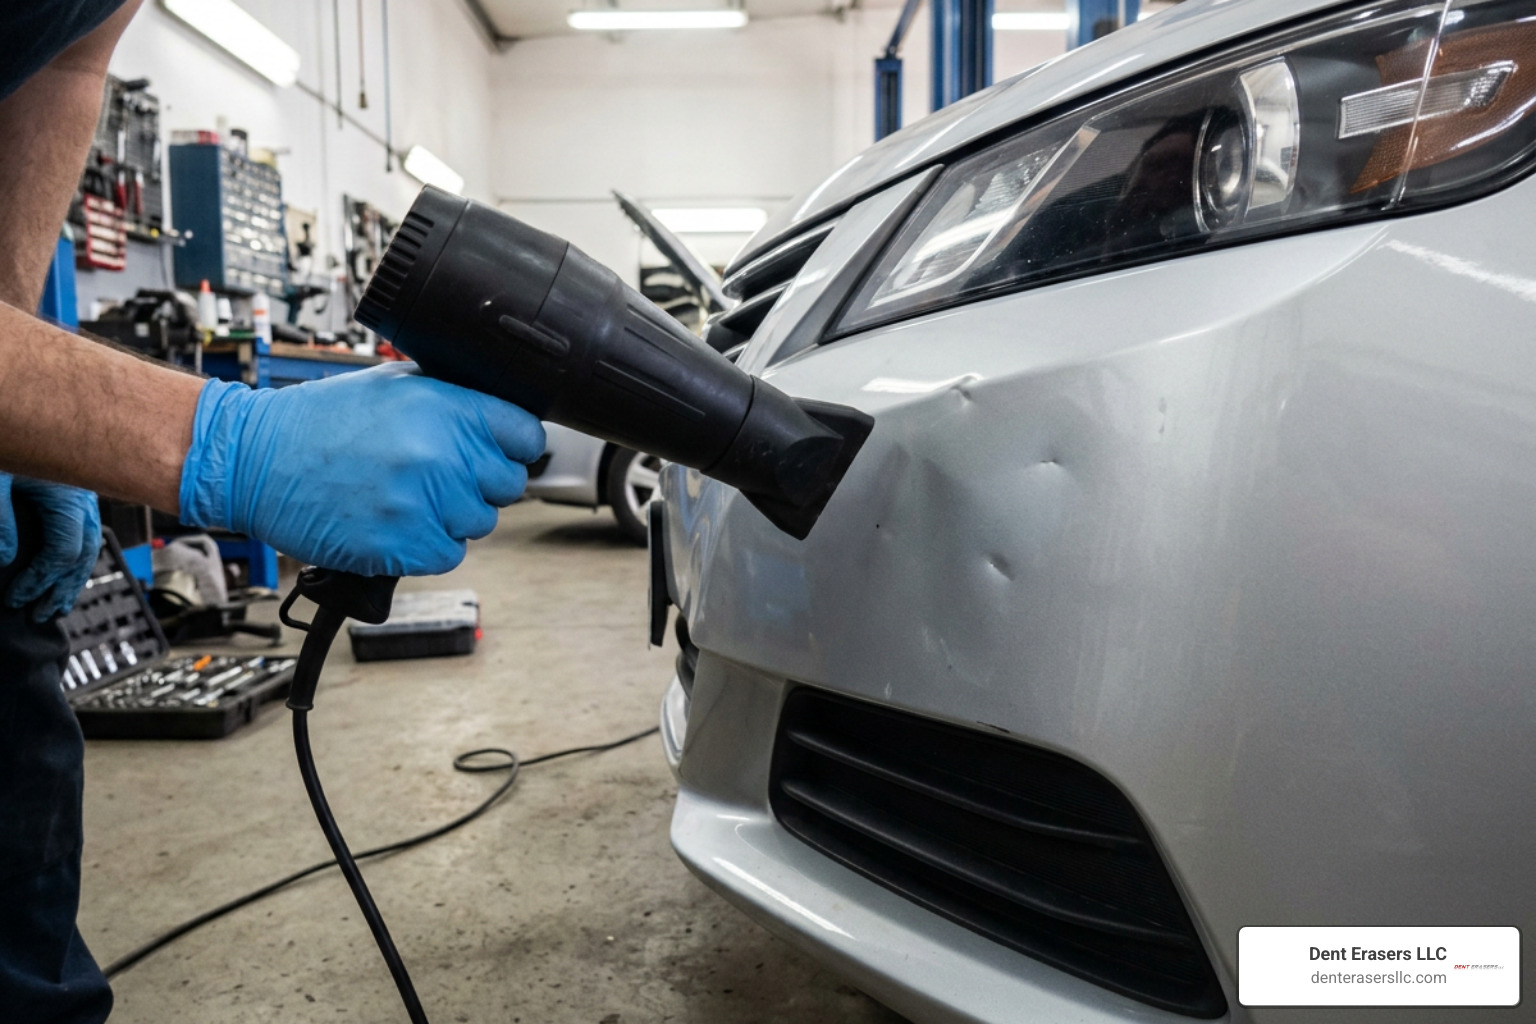
- Clean the Panel: Wash the dented area with automotive soap and dry it thoroughly. Softening dirty paint can grind gritty road dust deep into your clear coat.
- Position the Hairdryer: Hold the nozzle 5 to 7 inches away from the bumper face. Set the hairdryer to its highest heat setting with medium airflow.
- Maintain Continuous Motion: Move the hairdryer in wide, circular, sweeping motions around the perimeter of the dent, gradually spiraling inward toward the center. Never hold the hairdryer stationary in one spot.
- Heat for 2 to 4 Minutes: Automotive bumper plastics are dense. It takes consistent thermal exposure for the heat to penetrate through the full thickness of the panel.
- Check Pliability: With a gloved hand, gently press the outer rim of the dent. When the plastic feels soft, rubbery, and yields easily to thumb pressure, it is ready to be reshaped. For more detailed walk-throughs across different vehicles, refer to these step-by-step DIY bumper repair methods to see varied access configurations.
The Push and Set Method for Seamless Reshaping
Once the plastic reaches optimal malleability (roughly 150°F), work steadily before it cools.
- Apply Backside Pressure: Reach behind the fender liner with your gloved hand or a blunt, rubber-tipped tool. Place the tool against the deepest point of the dent or along its outer hinge lines.
- Massage Outward: Apply firm, uniform pressure outward. Rather than jabbing the center, gently massage the perimeter edges of the dent first to release panel tension, then push the center flush. You will often hear and feel a distinct “pop” as the plastic snaps back to its molded contour.
- Refine the High Spots: If pushing creates small outward bulges, immediately use the flat palm of your gloved hand on the exterior side to press them level with the surrounding body lines.
- Thermal Shock (The Set): While holding the panel in its correct shape, have a helper pour a bowl of ice water over the exterior surface or immediately press a cold, soaking-wet microfiber towel against it. Rapid cooling locks the polymer chains back into their rigid, low-stress factory orientation.
- Reassemble: Once the bumper is cool and firm to the touch, tuck the fender liner back into its channel, secure the plastic push clips, and wipe the area down. Discovering the cheapest ways to fix a car dent at home is rewarding when basic physics and household tools come together cleanly.
Alternative DIY Methods and Repair Cost Comparison
Depending on your tool availability and the nature of the dent, alternative DIY approaches may be suitable. Here is how household and entry-level tools compare against professional repair options:
| Method | Best For | Typical DIY Cost | Time Required | Risk Level |
|---|---|---|---|---|
| Hairdryer & Push | Shallow to medium corner dents | $0 (Household tools) | 20–40 min | Low |
| Boiling Water Trick | Large, broad bumper depressions | $0 (Kettle + Water) | 10–20 min | Very Low (Temp capped at 212°F) |
| Suction Cup / Plunger | Large oil-can dents with no backside access | $5–$15 | 10–15 min | Low |
| Glue-Tab PDR Kit | Small, firm low spots & dings | $20–$50 | 30–60 min | Medium (Glue pull risk on weak paint) |
| Professional Mobile PDR | Complex contours, body lines, luxury finishes | $150–$500 | 1–2 hours | None (Insured & Guaranteed) |
| Body Shop Replacement | Cracked covers, torn tabs, structural damage | $400–$1,500+ | 2–5 days | None |
For vehicle owners weighing their options, understanding how to handle fixing dents without the dents in your wallet provides valuable financial clarity.
Boiling Water Pour-and-Push Alternative
The boiling water technique is one of the safest DIY methods because water naturally caps out at 212°F (100°C) at sea level, eliminating the risk of accidental paint scorching common with high-powered heat guns.
- Boil roughly 1 gallon of fresh water in a kettle or large pot.
- Position a catch basin or towel beneath the bumper to catch runoff.
- Slowly pour the boiling water over the entire dented zone in a wide circle, ensuring even thermal saturation.
- Immediately reach behind the fender liner with heavy waterproof silicone gloves and push the softened plastic outward until it pops flush.
- Pour cold tap water over the exterior to set the shape.
Glue-Tab PDR Kits and Suction Cups
If internal crash structures, windshield washer reservoirs, or exhaust heat shields completely block backside access, external extraction tools can bridge the gap.
- Standard Cup Plungers: Clean the bumper surface thoroughly with automotive soap. Moisten the rubber rim of a standard flat-cup sink plunger (not a flange toilet plunger), press it over the center of the pre-warmed dent to create an airtight vacuum seal, and pull firmly straight back.
- Glue-Tab Paintless Dent Repair (PDR) Kits: For smaller, stubborn low-spots that won’t pop with suction, a $20–$50 PDR kit utilizes hot glue and a bridge puller. Clean the area with isopropyl alcohol, melt specialized automotive glue onto a plastic pulling tab, press it into the center of the dent, and let it cure for 5 minutes. Attach the bridge puller, turn the threaded knob to draw the dent outward until it levels, then spray 91% isopropyl alcohol around the glue tab base to release the bond cleanly. Never use acetone, as it strips automotive clear coats.
When DIY Isn’t Enough: Structural Damage and ADAS Sensors
While heating and popping minor bumper dents is achievable in a home garage, modern automotive engineering introduces variables where DIY methods fall short or create serious safety hazards.
1. ADAS and Parking Sensor Arrays
Today’s vehicles feature Advanced Driver Assistance Systems (ADAS). Embedded directly inside or mounted directly behind front and rear plastic bumper covers are:
- Ultrasonic park-assist sonar sensors
- Blind-spot detection radar modules
- Adaptive cruise control and automatic emergency braking radar units
Heating or mechanically forcing bumper panels directly over these sensitive electronics can distort their mounting brackets. Even a 1-degree misalignment in a radar mounting angle can cause automated safety systems to misjudge distances at highway speeds, requiring dealership-grade digital recalibration.
2. Severe Tears and Plastic Welding Requirements
If an impact leaves a split or puncture rather than a smooth dent, thermal memory cannot bridge the gap. Severed polymer chains require structural plastic welding. This process involves:
- Grinding a 45-degree V-groove channel along the fracture line (penetrating at least 75% of panel thickness).
- Embedding heated stainless steel reinforcement mesh on the backside to act as internal reinforcement.
- Melting matching polymer filler rods (identified by the bumper’s reverse-side ISO stamp, such as
>PP<or>TPO<) into the groove with a temperature-regulated plastic welding iron. - Block sanding the repair with an 80/180/400 grit progression, applying flexible epoxy bumper fillers, and refinishing with plasticizer-rich primers and color-matched paint.
If your bumper has torn tabs, jagged fractures, or compromised sensor mounts, professional intervention is mandatory to ensure roadworthiness.
Frequently Asked Questions About Bumper Dent Repair
Can a hairdryer damage my vehicle's clear coat or paint?
When used correctly, a standard household hairdryer will not damage factory automotive paint. Factory clear coats are baked on at temperatures exceeding 275°F during vehicle assembly. Because hairdryers operate at lower air velocities and temperatures than industrial heat guns, they rarely elevate bumper plastic beyond 160°F–180°F.
However, damage can occur if you hold the hairdryer stationary within an inch of the panel for prolonged periods or if the vehicle has had low-quality aftermarket paint repairs lacking flexible plasticizers. Always maintain a 5 to 7-inch buffer and keep the nozzle in constant circular motion.
What is the difference between fixing a plastic bumper and a metal panel?
The fundamental difference lies in material memory and heat response. Plastic bumper covers are semi-crystalline thermoplastics that soften under moderate heat (140°F–160°F) and naturally want to relax back to their injection-molded shape.
Steel and aluminum panels, by contrast, undergo permanent crystalline deformation when dented. Metal does not soften at safe paint temperatures and possesses no thermal memory. Removing dents from sheet metal requires specialized metal-shaping tools, reflection boards, and precise micro-massaging from trained technicians. You can review our detailed walkthrough on small dent removal from car panels to see how metal dent dynamics differ from plastic bumpers.
What should I do if the bumper plastic has a structural crack?
If the dent is accompanied by a crack or split, applying heat will cause the crack to propagate further along stress lines. Do not attempt standard push methods.
Minor cracks must either be chemically fused using a flexible two-part structural urethane adhesive or thermally joined using an automotive plastic welding iron and matching filler rods. If the fracture intersects an energy-absorbing mounting point or headlight alignment tab, full bumper cover replacement is recommended for structural safety.
Conclusion
Popping a shallow, smooth dent out of a plastic bumper using a standard household hairdryer is a practical, cost-effective DIY project that preserves your factory paint finish. By understanding polymer thermal memory, keeping your heat source moving, and applying steady outward pressure from behind the liner, you can restore your vehicle's clean lines in under an hour.
However, when bumper damage involves sharp creases, torn mounting brackets, cracked paint finishes, or complex ADAS safety sensors, DIY shortcuts can lead to costly mistakes.
If you are located across Contra Costa County—including Concord, Walnut Creek, Brentwood, Danville, San Ramon, Antioch, Pittsburg, Richmond, Martinez, or Pleasant Hill—our team at Dent Erasers LLC is ready to help. We provide expert mobile paintless dent repair and bumper reshaping that comes straight to your driveway, protecting your factory paint with zero body shop hassle.
Ready to restore your car's appearance? Explore our dedicated professional plastic bumper repair solutions or reach out today to schedule a fast, transparent quote.