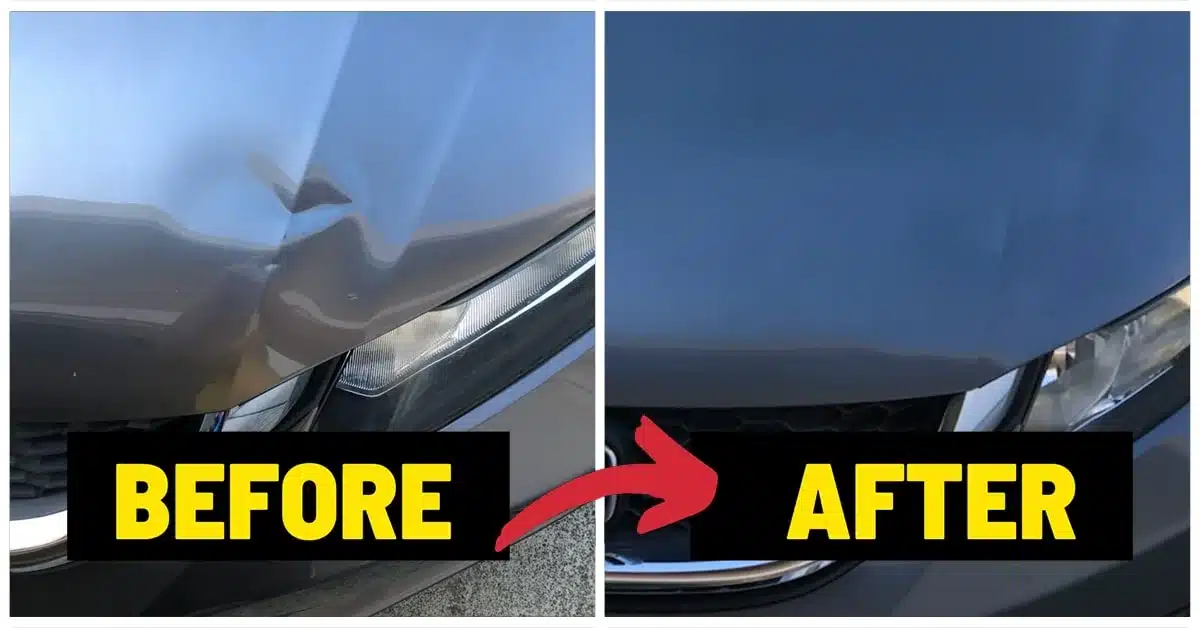
Fix a Dent on a Car Hood Without Making It Worse
To fix a dent on a car hood, first check that it is shallow, rounded, on a flat area, and has no cracked paint. Clean the panel, inspect it under angled light, then use a gentle method such as an automotive glue-puller kit for a small steel-hood dent. Stop and call a paintless dent repair professional if the dent is on a body line, near an edge, behind hood bracing, or in an aluminum panel.
A small parking-lot ding may be a manageable DIY project. But pulling too hard, overheating the paint, or hammering from underneath can stretch the metal and turn a simple repair into a repaint. The goal is not just to make the dent less visible – it is to preserve the factory finish and the vehicle’s value.
I am Brian Blanc, and I have spent nearly three decades repairing dents through paintless dent repair and operating Dent Erasers LLC in the East Bay. I help drivers decide when they can safely fix dent on car hood damage themselves and when precise mobile PDR is the smarter option.
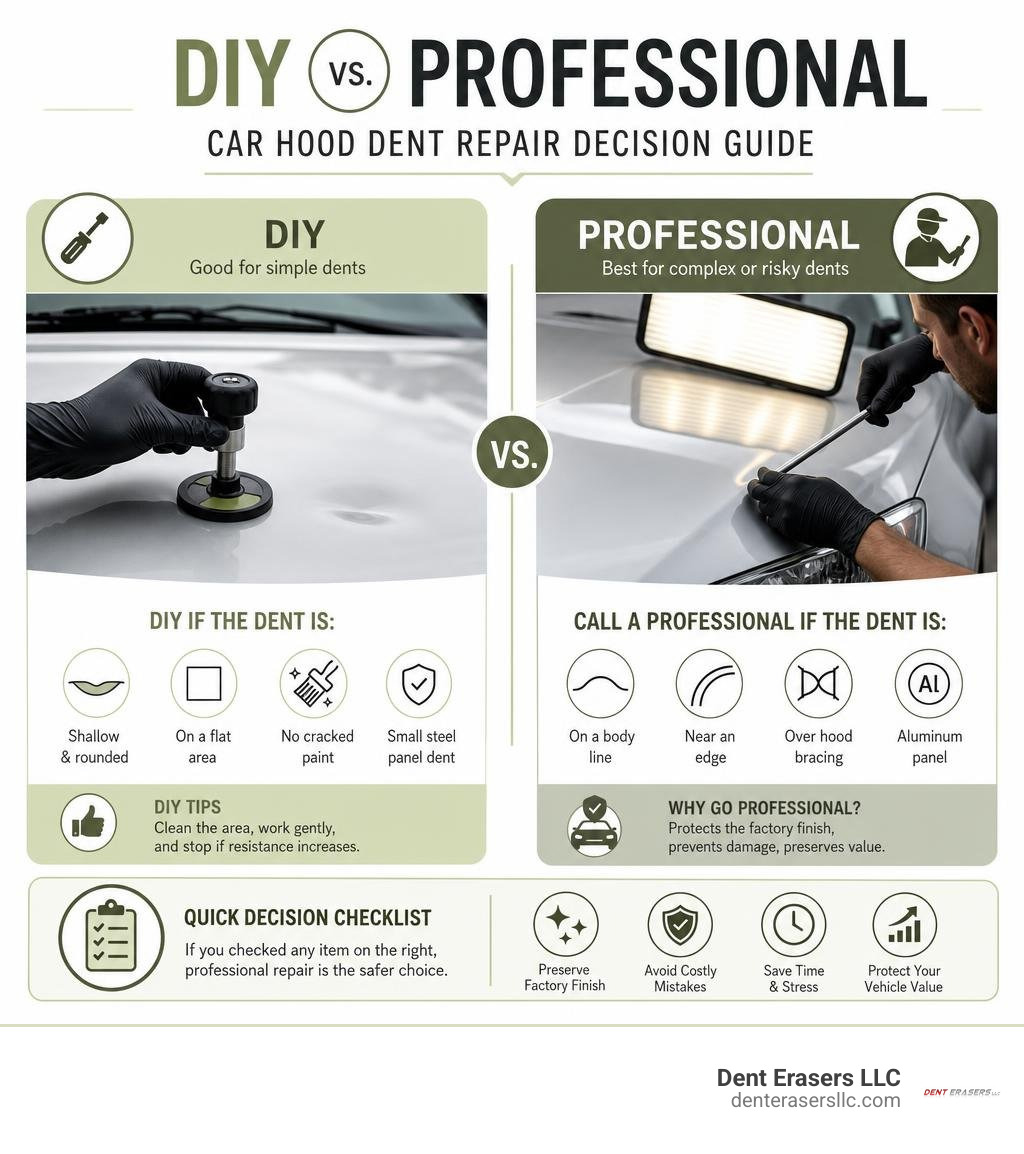
Simple guide to fix dent on car hood terms:
Assessing Hood Damage: Can You DIY the Repair?
Every day we encounter vehicle owners in Walnut Creek and Concord who walk out to their car only to spot an unsightly depression right across their hood. Over 40% of vehicle dings and dents occur in parking lots from errant shopping carts and swinging doors, while others drop from trees or fall from the sky during violent hail storms. When assessing hood damage, dont let hood dents ruin your view without first understanding whether the metal can be safely manipulated at home.
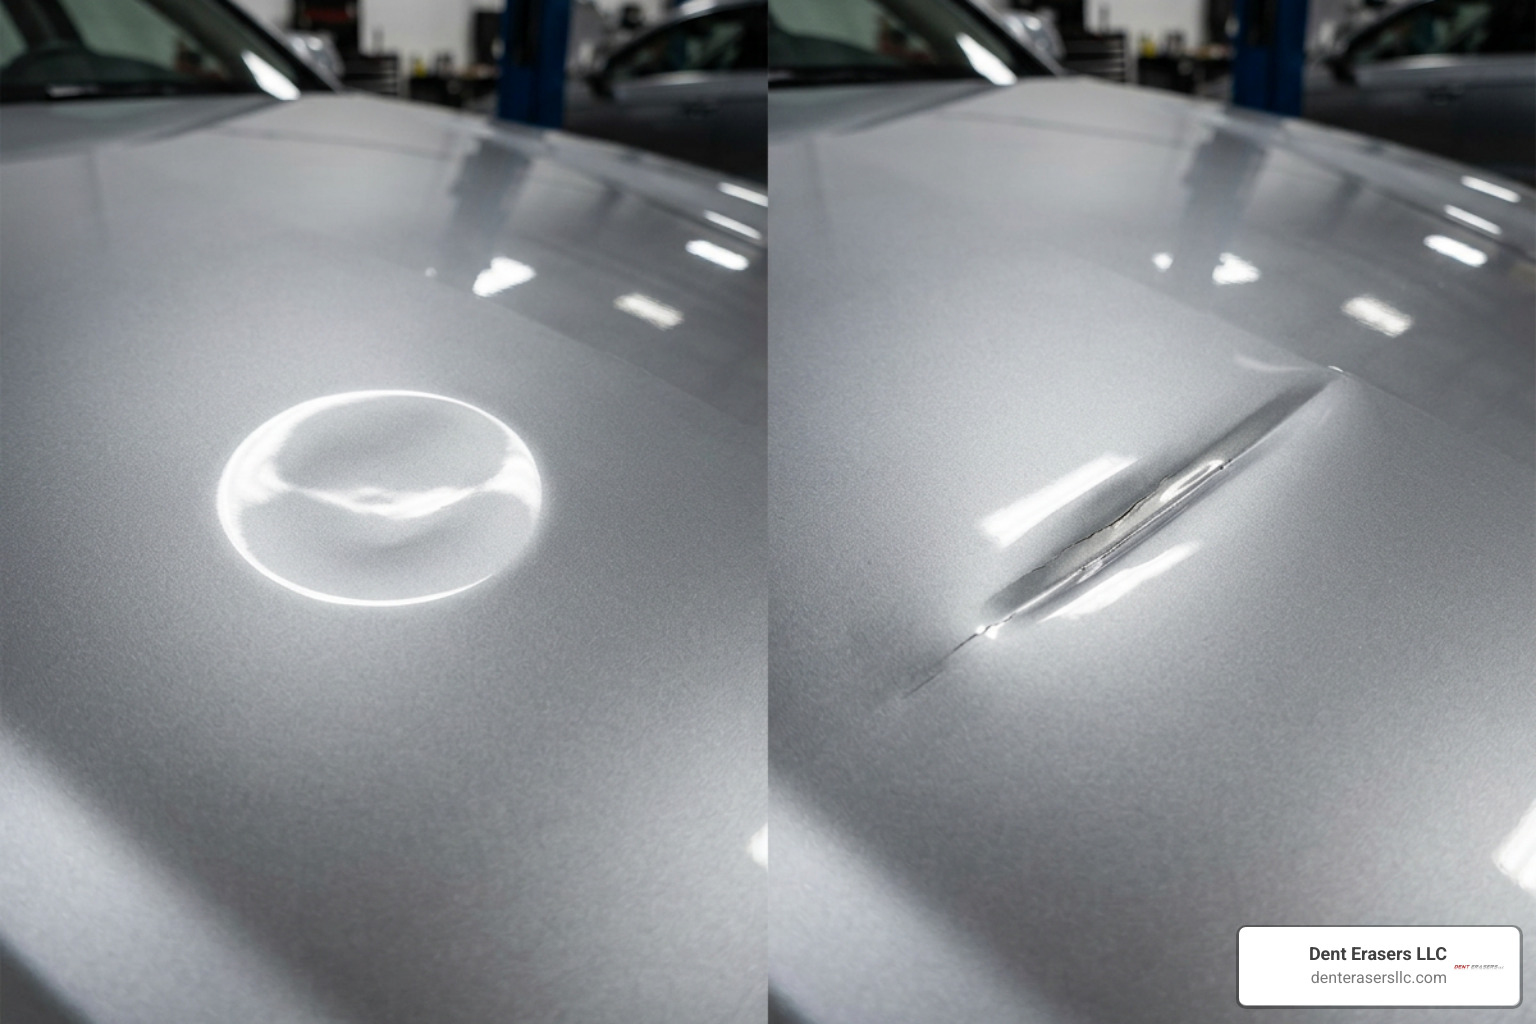
A successful home repair depends on three critical factors: size, depth, and location. Shallow, rounded impressions smaller than a tennis ball (under 3 inches in diameter) that sit on wide, flat sections of the panel are the most forgiving candidates.
Before attempting any repair, inspect the paint under angled directional lighting. If the clear coat is fractured, chipped, or showing bare metal, DIY suction or glue pulling will only delaminate the finish further. In those situations, metal reshaping must be followed by sanding, filler, and primer application to prevent rust, which begins oxidizing exposed steel within hours in humid environments.
Steel vs. Aluminum Hood Repair Considerations
Modern car hoods are no longer built solely from malleable mild steel. Many modern vehicles feature aluminum alloy hoods to shed curb weight and improve fuel efficiency.
You can determine your hood material with a simple refrigerator magnet. If the magnet snaps firmly to the hood, you are working with steel; if it slides right off, the panel is aluminum or a composite blend.
Aluminum behaves fundamentally differently than steel under stress:
- Lack of Metal Memory: Steel has natural elasticity and “memory,” allowing it to spring back when coaxed with heat or suction. Aluminum lacks this elasticity.
- Work-Hardening Risks: Manipulating aluminum rapidly causes the alloy to stiffen and lock into shape. Forcing it with standard home pulling kits can stretch the metal permanently or shear the paint clear coat.
- Specialized Tool Demands: Aluminum hoods require significantly more controlled heat, higher-tonnage pulling force, and ultra-fine PDR rods, which is why a comprehensive guide to hood dent removal always highlights material type before any mechanical work begins.
Evaluating Creases, Edges, and Under-Hood Bracing
The structure underneath your car’s hood is just as important as the metal skin on top. When you open the hood, you will see an intricate framework of structural support webbing, crumple zones, and sound-dampening insulation blankets.
As detailed in under the hood a guide to fixing bonnet dents, accessing the backside of a dent often requires removing plastic push-pins to drop the heat liner. If the dent sits directly over a bonded reinforcement rib or along the sharp front leading edge of the hood, backside access will be obstructed.
Furthermore, dents situated directly on a body line or sharp contour crease hold immense mechanical tension. The metal along a body line has already been stamped and stretched at the factory; trying to pop a crease with generic suction tools is ineffective and often leaves severe distortion in the surrounding metal.
Step-by-Step Methods to Fix Dent on Car Hood
If your hood is steel, the paint is completely intact, and the dent is a smooth, shallow dish on a flat section of the panel, you can explore the cheapest ways to fix a car dent right in your garage.

Essential Equipment to Fix Dent on Car Hood at Home
To perform a safe, controlled repair, assemble the right tools rather than grabbing random items from the utility closet:
- Surface Cleaners: Isopropyl alcohol (91%) and premium microfiber towels to strip road film and wax.
- Controlled Heat Source: A standard household hair dryer or an adjustable heat gun.
- Cooling Medium: Canned compressed air duster (used inverted) or dry ice with insulated thermal gloves.
- Mechanical Pulling Tools: A bridge-style PDR glue-puller kit equipped with various round tabs and specialized high-tack hot glue sticks.
- Finishing Accessories: A high-density plastic knock-down punch, rubber mallet, and a directional LED line board or portable work light.
Thermal Shock Technique Using Heat and Compressed Air
The thermal shock method utilizes basic physics: heat expands the metal molecules slightly, and immediate extreme cold causes rapid contraction, coaxing mild steel back to its original factory stamp.
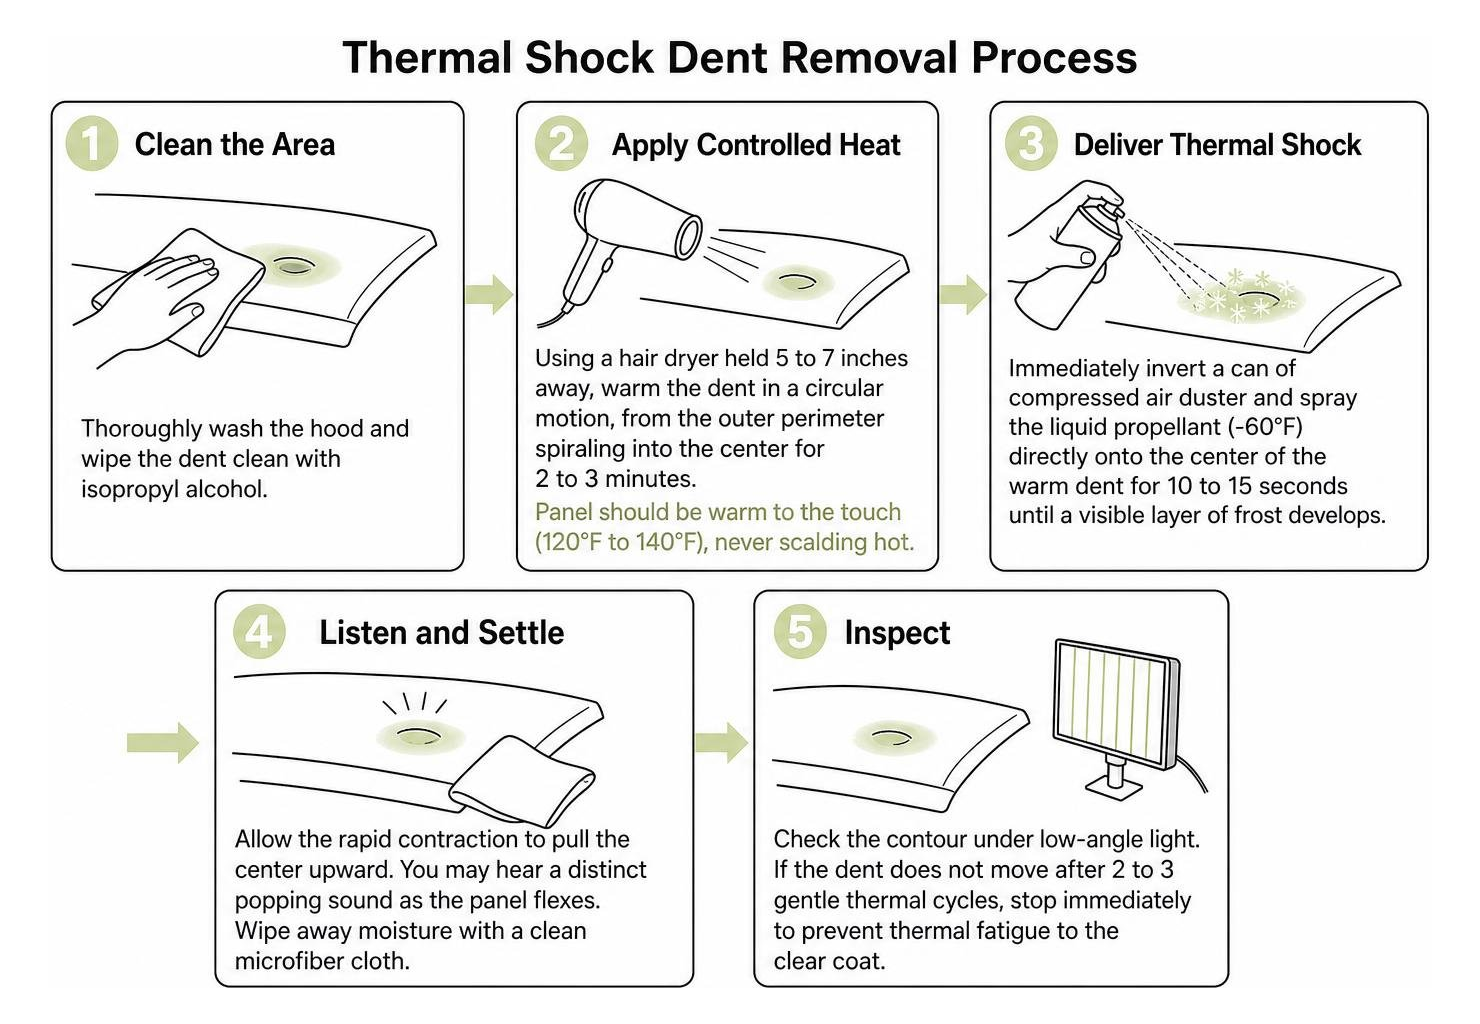
- Clean the Area: Thoroughly wash the hood and wipe the dent clean with isopropyl alcohol.
- Apply Controlled Heat: Using a hair dryer held 5 to 7 inches away, warm the dent in a circular motion, moving from the outer perimeter spiraling into the center for 2 to 3 minutes. The panel should be warm to the touch (around 120°F to 140°F), never scalding hot.
- Deliver Thermal Shock: Immediately invert a can of compressed air duster and spray the liquid propellant (-60°F) directly onto the center of the warm dent for 10 to 15 seconds until a visible layer of frost develops.
- Listen and Settle: Allow the rapid contraction to pull the center upward. You may hear a distinct popping sound as the panel flexes. Wipe away moisture with a clean microfiber cloth.
- Inspect: Check the contour under low-angle light. As outlined in standard DIY car hood dent repair guides, if the dent does not move after 2 to 3 gentle thermal cycles, stop immediately to prevent thermal fatigue to the clear coat.
PDR Glue-Pulling and Bridge Lifters
When thermal shock is not quite enough to overcome the surface tension of a shallow depression, mechanical glue pulling provides focused, incremental outward leverage. Many vehicle owners learn how to pop out large dents without a body shop using an entry-level bridge lifter:
- Prep the Pulling Tab: Degrease the dent and the plastic puller tab with isopropyl alcohol.
- Apply Hot Glue: Apply a dime-sized amount of PDR hot glue to the center of the tab and press it firmly into the lowest center point of the dent.
- Allow Setting Time: Let the glue cool and cure for 60 to 90 seconds. It should be firm and tacky, not rock hard or molten.
- Mount the Bridge Lifter: Place the bridge frame evenly across the surrounding flat panel, thread the center knob onto the tab adapter, and turn the tension knob slowly.
- Apply Gradual Tension: Turn the knob with smooth, steady turns until the dent releases with a soft pop. Never jerk or aggressively rip the tool upward.
- Release the Glue: Spray 91% isopropyl alcohol around the edge of the glue base, wait 30 seconds for the bond to break down, and peel the tab away using a plastic scraper.
Common Mistakes to Avoid During DIY Metal Work
Automotive sheet metal is remarkably sensitive. Minor errors during home dent repair can transform a simple $150 cosmetic fix into an expensive $1,200 body shop visit.
- Using Household Toilet Plungers: Plungers designed for plumbing lack the rigid vacuum seals needed for metal panels. Worse, the rough rubber lip or flange can grind dirt into the clear coat, leaving severe swirl marks and micro-scratches.
- Overheating Clear Coat: Holding a high-output heat gun stationary in one spot for more than a few seconds will scorch, bubble, or yellow the automotive clear coat, causing permanent paint peeling.
- Yanking with Slide Hammers: Aggressive, sudden yanking with a slide hammer over-pulls the sheet metal past its original factory plane, creating an unsightly raised bump known as a “high spot” or “volcano.”
- Blind Hammering from the Underside: Shoving screwdrivers, pry bars, or metal rods into inner hood access holes without proper PDR lighting creates sharp “pimples” on the outer surface that crack the paint from the inside out.
- Ignoring High-Spot Crowning: When a dent forms, the displaced metal is forced outward around the rim, creating a stress ring (crown). If you do not relieve this crown using a plastic knock-down punch and gentle tapping, the center cannot pop back out cleanly.
DIY vs. Professional Costs and Resale Value Impact
Before picking up a tool, it helps to weigh the real financial comparison between DIY kits, professional mobile PDR, and traditional collision centers.
Appraisers and trade-in inspectors look directly down the sightlines of a hood under fluorescent showroom lighting. Even small ripples or DIY imperfections can lead an appraiser to deduct the full cost of a professional panel repair from your vehicle’s trade-in value.
| Repair Option | Typical Cost Range | Repair Time | Paint Preservation | Best Suited For |
|---|---|---|---|---|
| DIY Thermal / Glue Kit | $20 – $150 | 1 – 3 Hours | Variable (Risk of Pulling Paint) | Shallow, round dings on flat steel hoods |
| Mobile Paintless Dent Repair (PDR) | $150 – $500 | 45 – 90 Minutes | 100% Factory Finish Preserved | Complex dents, aluminum hoods, body lines, hail dings |
| Traditional Body Shop (Fill & Paint) | $750 – $1,500+ | 3 – 5 Business Days | Factory Paint Stripped & Blended | Severe collision damage, deep creases, cracked paint |
As explored in the price of a panel and what fixing your hood really costs, a full-panel traditional repair involves extensive labor: removing the hood, grinding down to bare steel, applying polyester body filler, spraying primer, basecoat, and blending the clear coat into adjacent front fenders. On an older vehicle, replacing the panel with a pre-painted aftermarket hood ($500) can sometimes cost less than traditional body shop repairs, but it often lacks OEM fit and corrosion protection.
When Not to Fix Dent on Car Hood with DIY Methods
Certain types of damage simply cannot be resolved safely in a home driveway. You should bypass DIY techniques and consult a certified PDR specialist or collision center if you observe:
- Sharp Creases or Folded Metal: When metal folds into a sharp “V” shape, the material stretches beyond its elastic limit. Popping it without professional micro-tapping will only distort the panel.
- Dents on Hood Seams or Perimeter Edges: The outer 1 inch around the edge of a hood is hemmed and crimped over an inner shell, offering zero mechanical flexibility for DIY pullers.
- Aluminum Panel Damage: Because aluminum work-hardens rapidly and has minimal elasticity, standard suction or glue-pulling risks tearing the metal or fracturing paint bonds.
- Extensive Hail Damage: While a few scattered dings might be tempting to tackle, a hood peppered with 30 to 80 hail impacts requires specialized line boards and multi-angle PDR rods. Full hail repair averages $2,500 to $10,000 across a whole vehicle, which is typically covered under comprehensive auto insurance.
- Cracked, Scratched, or Flaking Paint: Applying glue or suction to compromised clear coat will strip the paint straight off the primer.
Frequently Asked Questions About Hood Dent Repairs
How much does it cost to repair a car hood dent?
DIY tool kits cost between $20 and $150. Professional mobile Paintless Dent Repair typically ranges from $150 to $500 depending on the dent’s diameter, depth, panel material (aluminum often carries a modest surcharge due to metal stiffness), and location. Traditional body shop repairs involving body filler and multi-stage panel repainting start at $750 and can exceed $1,200.
Will fixing a hood dent at home void my vehicle warranty?
No, performing a cosmetic DIY dent repair will not void your overall factory bumper-to-bumper or powertrain warranty. However, any collateral damage you cause during the attempt—such as burning the clear coat with a heat gun, delaminating paint with hot glue, or damaging under-hood wiring harnesses and active pedestrian-safety hood sensors—will not be covered under your manufacturer warranty.
Does a household plunger work on car hood dents?
Household plungers are largely ineffective for automotive hoods. Toilet plungers feature flexible rubber flanges designed for curved plumbing drains, which fail to create an airtight vacuum on flat sheet metal and can grind trapped dirt into your paint. While a clean, flat-cup sink plunger can occasionally pull a large, oil-canned depression on a thin door panel, rigid automotive suction pullers or PDR glue lifters are far safer and more effective.
Conclusion
Fixing a minor ding on your car hood can be a rewarding weekend project if the dent is small, shallow, situated on flat steel, and the factory paint is entirely intact. By utilizing gentle thermal techniques or dedicated PDR glue lifters, you can often improve the cosmetic appearance of your hood without spending hundreds of dollars.
However, modern vehicles require precision. If your hood is made of aluminum, sits along a sharp structural body line, or is blocked by under-hood bracing, aggressive DIY attempts often create high spots, stretched metal, or ruined paint that permanently damages your car’s market value.
When you want the blemish erased perfectly without compromising your vehicle’s original factory finish, turning to professional paintless dent repair is the most reliable, convenient choice. At Dent Erasers LLC, our fully equipped mobile PDR units bring nearly thirty years of master craftsmanship straight to your home or office throughout Concord, Antioch, Richmond, Walnut Creek, Brentwood, San Ramon, and across Contra Costa County. We restore your vehicle’s sleek body lines in under two hours—keeping your original paint 100% intact and your vehicle looking showroom-ready.